The Best Way to Screen Record on Windows 11

Record your Skype voice or video calls within the app. We'll also introduce a method to call recording without notification using a third-party app.

Skype, as a must-have calling tool installed on most PC devices, is widely used in the modern business world and the personal lives of many around the globe.
Although the communication market is highly competitive, Skype remains one of the most dominant and streamlined telecommunications applications thanks to its built-in call recording feature, which enables PC users to easily record Skype voice and video calls.

Skype's call recording deeply impresses our personal life. As it's completely cloud-based, you'll be accessible to capture, save, and share skype voice or video call recordings on your PC without relying on other third-party apps. You might use Skype to record special moments calling family members on Skype, or video chats with friends you haven't seen in a while on PC devices. Even important meetings and B2B conversations should be recorded for being crucial to the businesses involved.
In this how-to article, we will introduce you to how to record Skype calls on Windows PC with audio and video call recording feature Skype possesses, and the other method to do it with a terrific Skype Screen Recorder for higher quality recordings and editing options.
Microsoft added call recording to Skype to meet Skype users' imperious demands in 2018. The addition of new Skype call recording is especially important regarding business calls or anything else that is used to relay key information that might be complicated.
One thing you should keep in mind is that when you start recording Skype calls on a PC, every participant in the chat will be notified. This is to keep the feature from being used maliciously or in situations where it's inappropriate.
1. Make a Skype call on your own PC as usual. It doesn't matter if you're on a voice or video call with your friends or colleagues.
2. Click the More Options button in the Skype call window. And then click the option Start Recording to begin your free Skype call recording.

As we mentioned earlier, everyone in the chat will receive a banner notification informing them that you're recording this audio or video call session.
3. Select the Stop Recording button on the top left of the screen. Click it when the Skype call is about to finish or just the moment you want to put it to an end.
![]()
Recorded audio or video calls will cut off from the exact moment you click Stop Recording on Skype. So, please make sure that you leave a couple of seconds for trimming if you're looking for a natural recording.
Saving your Skype call recordings onto your PC is extremely easy. To be honest, it's mostly done automatically for you. Once you hit Stop Recording, the audio or video will be saved and shown on the chat for all participants to view.
This feature really comes in handy if you're recording for a collaboration project through Skype on your Windows PC, then every member involved in the call will be able to have a reference copy of the conversation.
The automatically saved recording calls are available on Skype server only for 30 days. If you'd like to put those recorded Skype call files on PC for offline viewing or long-term saving, the best way is to save them locally.
Skype saves recorded video calls as MP4 files to your PC by default. Of course, you'll have the option to select the format you desire before downloading a Skype recording video call.
Note:
Sometimes, you might want to share your call recording with someone who wasn't present for the Skype call. Maybe forward it to co-workers who couldn't get on Skype, or anyone else, which can be done easily.
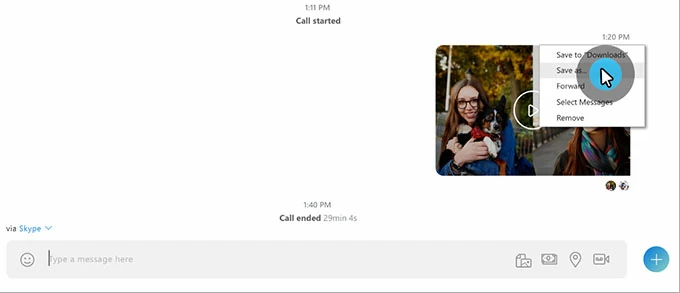
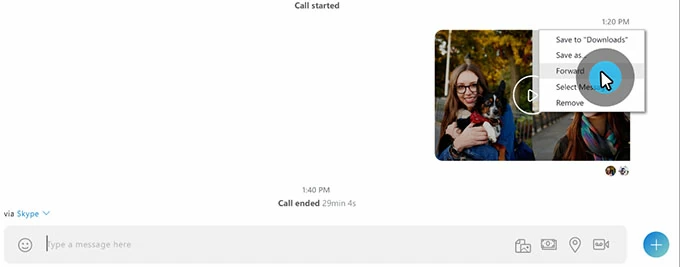
Step 1: Click the three-dot tab next to the video thumbnail from the chat, and then tap Forward.
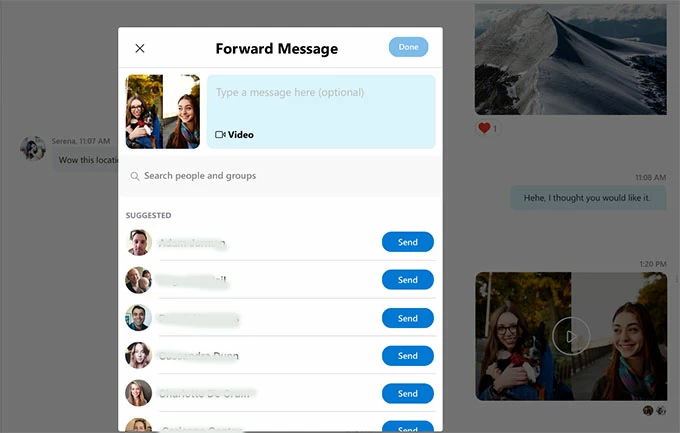
Step 2: Choose recipients from the Forward Message box. Then the Skype copy of the recording will be sent over to them. They'll have 30 days to download it just like everyone else.
1. Go to Recent Chats and click on the specific chat feature. You can find your recorded Skype call in the chat window.
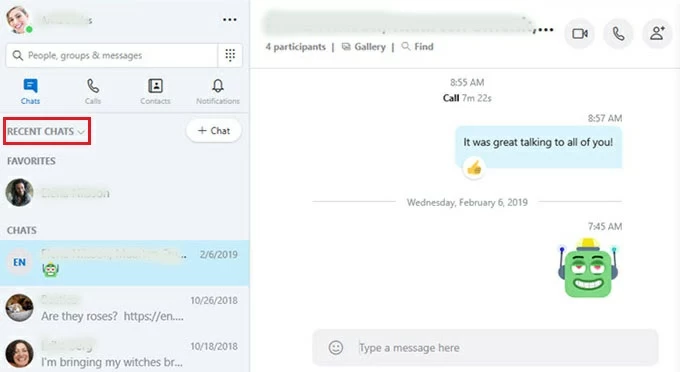
2. Move your cursor to the call recording and click on the More Options button.
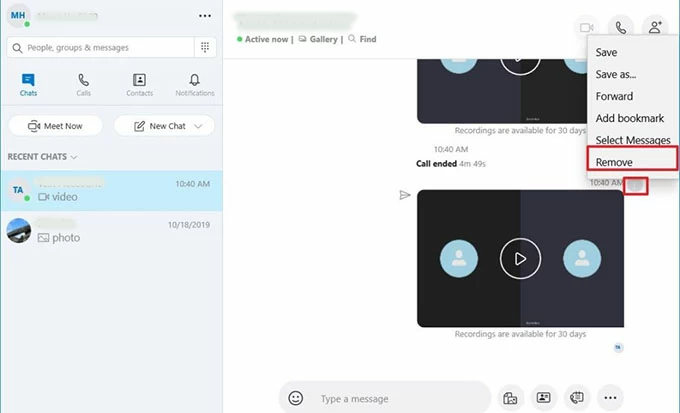
3. Hit Remove. Then the Skype call recorded will be deleted. Keep in mind that this does not delete personal copies other participants might have already downloaded.
If you tend to delete more than just one Skype call recording from the chat, instead of deleting them one by one, there's a faster way to do it. Choose Select Messages option from the three-dotted menu on the upper right of the video. Then you can tick every recorded Skype call that needs to be deleted, no matter if it's for audio or video purposes. At last, click Delete to remove what has been chosen.
There are circumstances when you would like to hide that you're recording a Skype video call. AppGeeker Screen Recorder is very popular as a video recorder for Skype because it can not only record Skype video calls in high resolution, but also offers annotation and editing features, which makes it the best way to record Skype video calls secretly on PC desktop. However, you should not use it to record people in sensitive positions against their will or any other illegal activity.
Step 1. Launch the app from the destination you installed it.
Step 2. Click Video Recorder on the left of the software page.

Step 3. Click Full button to record the full PC desktop screen. Or click on Custom button, and choose Select region/window to capture your wanted area. For Skype recording video calls, simply selecting the Skype display window would be fine

Step 4. Tap the REC button on the right side of the bar to begin your recording. This will not notify other Skype users that they are being recorded.
Step 5. Stop the recording when you're ready by clicking the Stop button (the red square).
![]()
If you plan to edit the video, it's best to leave it running slightly past the point you intend to stop the video at.