
Screen Record on Windows 10 desktop

Having trouble recording an ongoing Zoom meeting secretly on your PC? Here are some of your best solutions.

Zoom has become a popular videoconferencing application for Windows 10 for its fantastic recording feature providing to users. With the Zoom Meetings app running on your PC, you'll get access to record online audio and video conferencing, telephony calls, and chats. Participants can even record on Zoom and share recorded meetings with team members later on their Windows 10 computers.
As is known to hosts who once held meetings on Windows 10 PC, they're accessible to the in-built feature of recording Zoom meetings without asking for permission. However, as a participant, you can't record Zoom meetings without permission on Windows 10. So, in order to record a meeting within Zoom app on your Windows 10 devices, you'll need recording permission from your host first.

Zoom screen recording tools can make it easy to record your meeting without the host's consent on Windows 10.
While in some cases, asking the host for a permit to record a Zoom session on your Windows 10 desktop might be the last thing you want to do. In this article, we'll further discuss how to use the best Screen Recorder to record a Zoom meeting without needing host permission on Windows 10, and what you should consider before attempting such a thing.
Disclaimer: You may record Zoom for private use only or in case you get the consent of other participants in the session for whatever you recorded on Zoom.
Table of Contents
While attending the Zoom meeting on Windows 10, you should remember that only the host can start a Zoom session recording without permission from anyone by default. But after requesting and receiving your host's authorization, you'll have the recording privilege to record a meeting in Zoom as well.
Therefore, if the host has given you the approval to record Zoom meetings, or set you up as an alternative host, you can begin your recording exploration with no restrictions. Here are steps for you to follow then.
1. Join the meeting, and then click Record button.

2. There'll be a Recording hint with the red light next to it that appears at the top-left corner of the Zoom screen showing the recording process.

3. Click on the Pause button to pause or continue the ongoing meeting recording.
4. The way to stop your recording is to click on the Stop Recording icon once you're ready. Recorded Zoom meeting files will be automatically saved to your Windows PC.

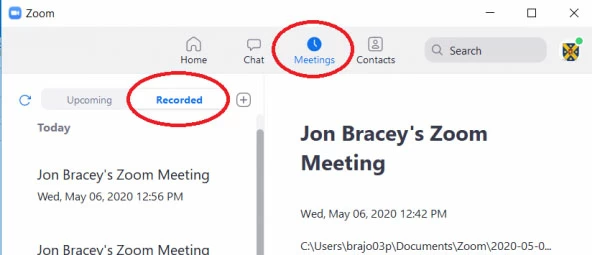
5. By default, your recordings are stored in the Zoom folder in a sub-folder named Document. The other way to access your recorded file is to Meetings > Recorded tab, and then select the Zoom meeting with your recordings.
Tip - How to assign recording permission to other participants?
In case you'll be appointed as the meeting host on Zoom someday, you need to know how to grant other participants recording privileges.
What we must admit is that seeking the host's permission to record Zoom sessions on Windows 10 PC is not always the easy and pleasant choice to make, especially when the recordings are for private purposes. Luckily for Windows 10 users, there's already a screen recording software built into Windows 10 OS for you to record Zoom meetings with ease - Xbox Game Bar.
The best thing about Xbox Game Bar is that you don't have to go through the hassle of downloading and installing it. As a Windows 10 built-in screen recorder, it's already preinstalled on your Windows device.
Here's how you can use it to record a presentation or meeting within Zoom without permission from your host on Windows 10.
1. Press the Windows logo + G key to open the app when you're in a Zoom meeting.
2. Move your cursor to the bar at the top, and click on the camera icon on the left half of the bar.

3. On the top left corner, a window labeled Capture will pop up. Click on the Start Recording icon.
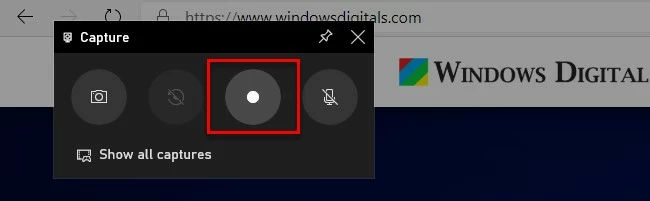
Your screen will now start recording. You'll also see a pop-up widget showing the recording process on the top right.
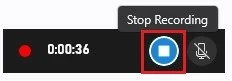
4. Once the Zoom meeting is done, click the Stop Recording button to finish your recording.
To locate where recorded Zoom meeting video files are saved, click on See My Captures at the bottom of the Capture window to bring out the Show All Captures bar. Then click on the small file icon above the recordings list.
AppGeeker Screen Recorder is one of the best applications for screen recording a Zoom meeting without host permission, whether you are on Windows 7, Windows 8, Windows 10, Windows 11, or Mac OS.
It comes with a ton of useful features that are worth further exploring. Let's take a look at what those features are that make it the best Zoom meeting recording tool to record on Windows 10 without seeking the host's permission.
High-Quality Video Output
Video quality is available with fully customizable choices, providing a frame rate from 5 – 60 fps. While video recording, the app will offer matched preset sizes according to different recording situations you're facing.
Automatic Sound Optimization
Background noise, and excessive microphone sensitivity of the host or any other participants, can really distort the audio. The app automatically looks out for these audio issues and uses advanced audio algorithms to fix them.
Running AppGeeker Screen Recorder on Windows 10 to record a Zoom meeting without the host's approval is super easy and intuitive, here's a simple guide to help you get started.
Step 1. Download and launch the app on your PC.
Step 2. On the far left, click on Video Recorder.

Step 3. Then select the area of your Zoom session screen by clicking Custom > Select region/window. Don't forget to enable the System Sound and Microphone option.

Step 4. Click the Rec button on the right, then a toolbar will pop up at the bottom of your screen and you can see that the recording has begun.
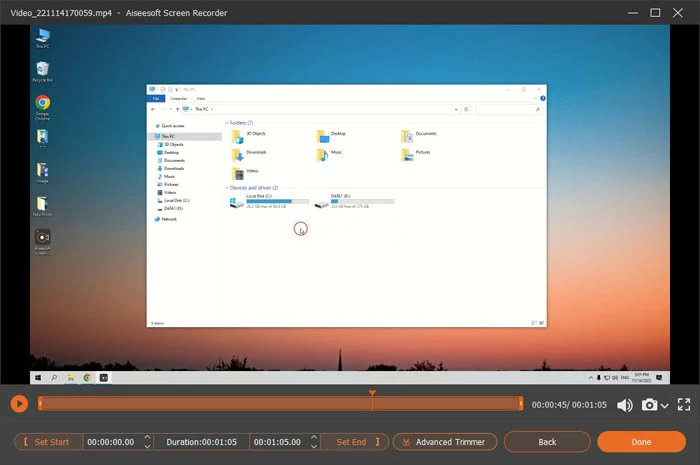
Step 5. Click on the square red Stop button to end the recording.
![]()
Step 6. You will then be presented with a video editor with your recording in it. Make any edits you deem necessary then click Done.
If you want to access the recordings then hover over a specific video on the recordings list and click on the file icon. The list can be found in Recording history, which locates in the lower left corner of the app's interface.
Recording Zoom meetings without permission is always a controversial topic. The hosts of a Zoom meeting might have the right to their privacy. However, you have the right to information as well. When you're not assigned privileges to record Zoom meetings that could contain vital information about your studies, work, and projects on your Windows 10 computer, using a screen recorder for them is beyond reproach, as long as you're not linked to the illicit use of it.
1. Will the host know if I screen record a Zoom meeting?
The answer is yes if you're recording the meeting within Zoom. The host can check participants' recording situations by clicking Participants. But if you're using third-party apps to record your meeting, Zoom won't be able to detect your recording behavior.
2. How to deny recording privileges to participants as a host?
First, you should be aware that participants in the Zoom meeting are disabled to record unless you give them permission.
To rescind that authority you've given, navigate to Participants, click More next to the target participant's name, then click on Forbid Record.


