
How to Record Audio from YouTube Video

Looking to record a video of yourself on your Mac? This post provides the most convenient options to record yourself on a Mac or MacBook with easiest steps.

Quick answer: To record a video of yourself on Mac, the efficient tool Screen Recorder provides advanced recording and editing features to record yourself and your Mac screen simultaneously or separately, and enhances your videos according to your needs.
There are several different video recorders available for self-recording on a Mac or MacBook.
Recording yourself on a Mac is not as straightforward as recording video on your iPhone. Luckily, with a few Mac video recorders given below, you'll know how to record yourself on a Mac easily.
Whether you like to make video reactions or share video tutorials, your Mac can do a decent job. Use QuickTime Player to record yourself on Mac using a compatible camera and microphone. If you want to make the recordings more creative, Photo Booth offers stylized video effects. Plus, you can further edit and polish your videos in iMovie after you record yourself with your Mac.
Additionally, some third-party tools can also record a video on Mac or MacBook in high resolution seamlessly. This post will explain how to record yourself with your Mac, and share everything about how you can use a built-in or external camera on Mac to record yourself quickly.
Before diving into the details, here are a few tips you'll need for preparations to record yourself on your Mac in better quality:
For Mac users who are wondering "how to record myself on Mac," sit back and now explore the proven methods below to record a video on Mac, MacBook, MacBook Pro with ease:
If you want to take a video of yourself on Mac without additional download, you have a built-in app called QuickTime Player. It's a default media player on macOS computers, including MacBook, MacBook Pro & Air, but you can also use it to record yourself, or record screen and audio with QuickTime Player.
Although it only offers basic video recording and editing features, many users are willing to use this default Mac video recording software to record a video for free. If desired, you may purchase a high-end camera separately to achieve better video quality.
Follows the steps on how to record yourself on a Mac using QuickTime:
1. Locate QuickTime Player in Applications folder and open it up.
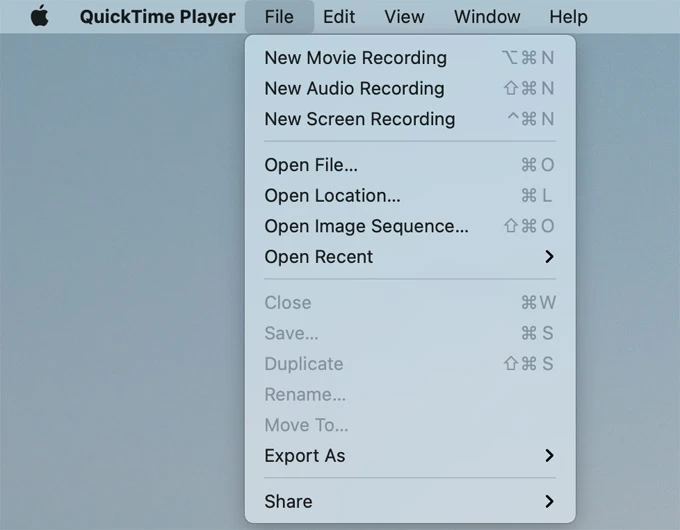
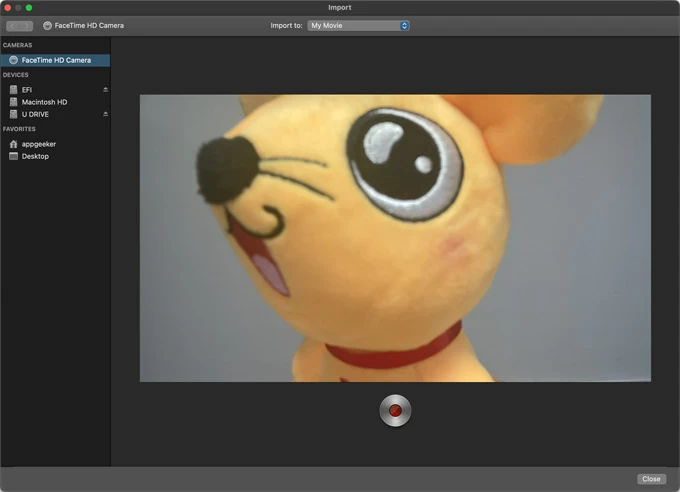
2. Choose File > New Movie Recording from the top menu. Or press the keyboard shortcut CMD + Option + N to bring up the video recording controller.
Create a new movie recording of yourself in QuickTime Player.
3. Click the drop-down arrow to open the Options menu.
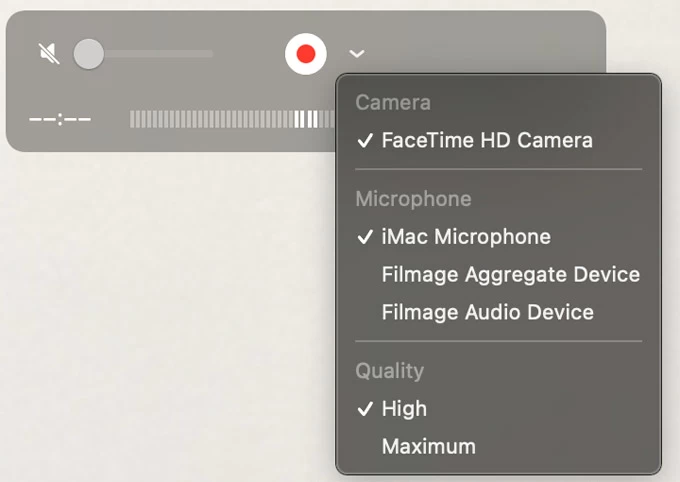
4. Choose a camera and microphone you want to use.
Tip: You may also choose to record yourself in High or Maximum quality. Maximum-quality recording will create uncompressed video file and use much more Mac storage.
5. Drag the volume slider to adjust the volume you're recording.
6. When you're ready to start, click the Record button to record your own video.
7. Hit the Stop button to stop recording. Or use the Touch Bar if you're recording yourself on a MacBook.
After that, click File > Save at the top to rename and save the new self-recording on your Mac. The QuickTime recordings will be exported as MOV files for future playback or sharing.
Using your Mac's own camera or an external video camera connected, Photo Booth is another video recorder on Mac to record yourself and apply diversity of video effects. Not limited to video shooting on Mac, it also lets you take a photo or a group of four photos with your camera.
When you record yourself with Photo Booth on Mac, there's a quick shortcut to share your videos and photos with your friends or other Apple devices by messages, email or AirDrop. Here's how to record yourself on MacBook or Mac using Photo Booth:
1. Launch Photo Booth on your Mac or MacBook. A recording window will appear on the desktop, showing what your camera is capturing.
2. Click the video camera icon at the lower-left corner. Note: If the Record Video button doesn't appear, click on Record a movie clip instead.
3. If you like, check the Effects button to add a fancy effect to your video.
4. Now click the red Record button to self-record on Mac.
5. When you're finished, click the Stop in the same position.
That's how you can record with webcam on Mac. The newly recorded video will show up as a thumbnail at the bottom left, allowing for easy playback and sharing in single click.
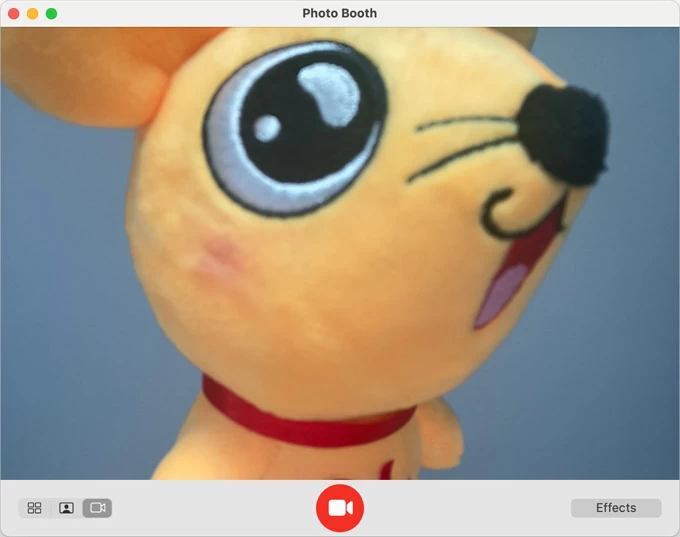
Take a video of yourself on a Mac using Photo Booth.
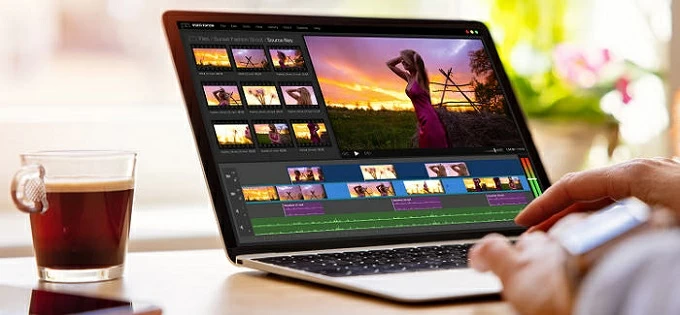
Recording yourself with your Mac is easy. But if you want to create videos that record your face and your screen at the same time, the AppGeeker Screen Recorder is the perfect solution to record yourself on your Mac or MacBook with simultaneous screen activities.
This Mac Screen Recorder offers abundant recording features and wide flexibility, letting you record yourself and your Mac screen easily. Whether it's online meetings, video calls, or streaming platforms, this tool covers it all. What's even better is that you can customize video formats and quality according to your preferences, and conveniently perform instant edits once you're done video recording with your Mac camera or a connected one.
Easy steps for how to record a video of yourself on Mac:
1. Install and open Screen Recorder for Mac on your computer.

2. Choose Webcam Recorder from the main screen. If you prefer to record you and your screen together, select the Video Recorder to go on.
3. From the left bottom, click the selector to choose a camera you want to record.

Take a video of yourself with Mac camera in the live video screen.
4. Enable the Microphone option and click the REC button to start filming. If you want to take a selfie while recording, click the camera icon next to record button.
5. Hit the same button to stop self-recording.
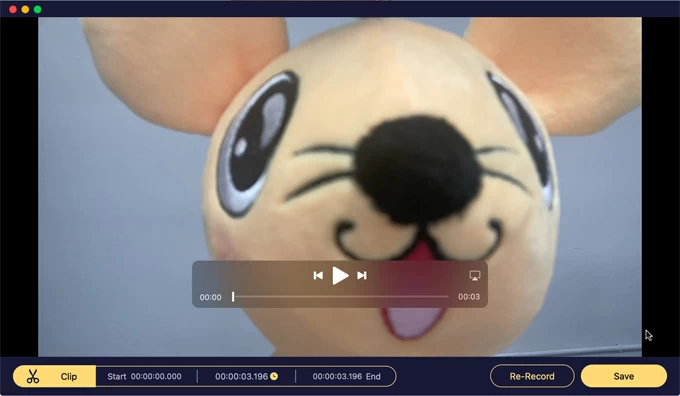
Preview, edit and save video recording to Mac or MacBook.
6. On the next preview window, hit Save button to keep your video recording. You may clip or re-record if you're not satisfied with the recording result.
There's another pre-installed video creator to record yourself on MacBook or Mac with ease — iMovie. It's an efficient video editing application on macOS, but it can also record videos on Mac to capture your camera footage. The built-in editor tools in iMovie allow you to cut, merge, and add effects and background music after you video film yourself.
Explore how to take a video of yourself on your Mac with iMovie:
You can record a video of yourself into iMovie directly. Once done, go back to File menu and choose Share to select where you want to save your self-recording on your Mac or to social media.
There are quite a few video recorder options available to record yourself on your Mac, MacBook, MacBook Pro or Air.
The built-in video recording apps on macOS, like QuickTime or Photo Booth, don't have the ability for simultaneous camera and screen recording. But you can use QuickTime to record yourself and your screen separately, and then use iMovie's editing features to display your webcam video over the screen recording.
Alternatively, to make things easier, try to use a more advanced recording option like AppGeeker Screen Recorder that can video capture yourself and your screen simultaneously, without needing extra add-ons.


