Record a Video of Yourself on Mac

Here're steps to record webcam videos using Windows 11's built-in software, and to record both screen and webcam with an advanced screen recorder.

Webcam video recordings have become an important medium for information communications in modern society, with their widespread implications on many streaming media platforms. Since webcam video recording is so popular, as a Windows 11 user, you'll want to know how to record webcam video on Windows 11 PC for later previewing and sharing.
With the improved webcam on Windows 11, it's easier than ever to record high-quality video.
The improved webcam on Windows 11 makes it even easier for you to take advantage of video recording. With just a few clicks, you can start recording videos using the webcam on your Windows 11 computer. And with the help of a Screen Recorder for Windows 11, you can even record your webcam and computer screen at the same time. In this article, we will introduce you to the various ways to record video on Windows 11 PC using webcam in detail.
Table of Contents
Windows 11 was officially released as the successor to Windows 10 in October 2021. The new operating system introduces a variety of new-updated features, including a fluent design system, redesigned Start menu, and virtual desktops. The most notable update in Windows 11 is the improved webcam recording functionality.
Windows 11 webcam offers higher resolution and better low-light performance compared to the webcam in Windows 10, which makes it the best webcam recording software. Additionally, the webcam supports facial recognition for secure logins, making it easier and more convenient for Windows 11 users to access their devices. The webcam in Windows 11 is a significant improvement over its predecessor and offers a range of useful features for both personal and professional use.
Built into Windows 11, the Camera app has a number of features, including capturing and recording your webcam video. In recent updates, the Windows 11 Camera app, as a webcam recording software, has received a new look, making it even easier to use.
The Camera app now features a streamlined design, with all of the controls and settings easily accessible from a single screen. This allows you to quickly switch between different modes and settings, so you can get the perfect picture or video every time. Here's a quick guide on how to record webcam video on Windows 11:
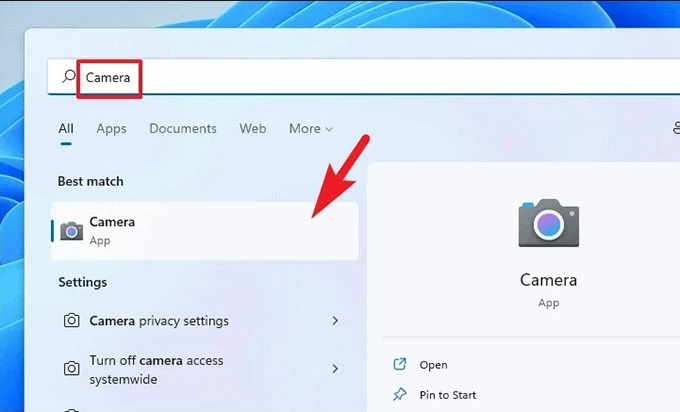
1. Press Windows + S keys to bring up the search box on Windows 11 desktop.
2. Type Camera and then click open it.
3. Click on the Video icon to switch to video mode.
4. Click on the Video icon again to start recording webcam video.

5. Click the red Stop button to end the webcam recording.
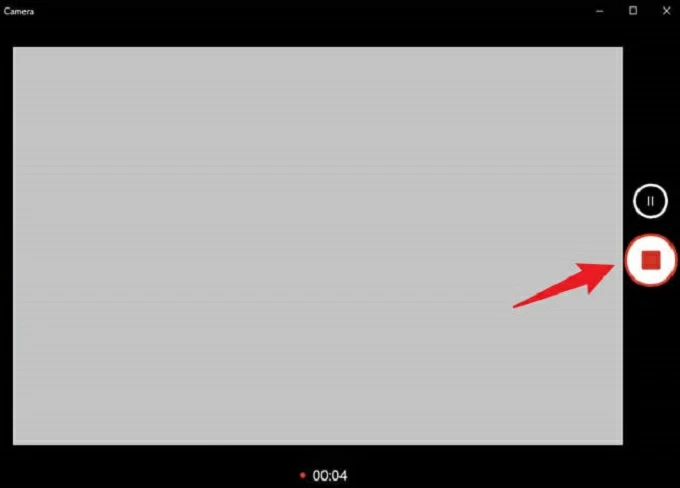
Recorded webcam photos and videos will be saved to This PC > Pictures > Camera Roll.
Tips for better video recording with Windows 11 webcam:
1. How to adjust webcam video quality on Windows 11?
To adjust the video quality of your webcam recording in Windows 11, you'll need to access the video settings of your Camera app. To do so, click on Settings on the top left of the camera panel. Scroll downs to find the Videos option.
Under the Video quality feature, you will find a menu with a list of video resolutions, frame per rate (fps), and aspect ratios, that's where you can choose your preferable video quality from.
AppGeeker Screen Recorder is an excellent webcam recorder for Windows 11 designed to help users record high-quality video from their computer screen, webcam, or both. The application offers a range of advanced features and tools for fine-tuning your webcam recordings, such as the ability to adjust the video quality, frame rate, and audio input on Windows 11 PC.
Unlike the Windows 11 Camera app, which requires you to stop recording and save the video before you can view it, AppGeeker Screen Recorder allows you to preview and make any necessary adjustments to your captured webcam videos as you go without the need of switching between multiple programs.
To record video using webcam in Windows 11 through AppGeeker Screen Recorder, please follow the below steps:
Step 1. Download and install the app on your Windows 11 desktop.
Step 2. Double-click to open the app, and select the Webcam option on the right side of the menu.

Step 3. Check the square box next to System Sound and Microphone to enable different soundtracks for your webcam video.

Step 4. Click the orange Record button on the left to start recording.
Step 5. Hit the red square Stop button on the floating bar to stop recording.

Picture-in-picture videos, which show a small webcam video overlaid on top of a screen recording, are becoming increasingly popular with Windows 11 users. They are a useful way to add a personal touch to a video presentation or to demonstrate something on your Windows 11 computer while also showing your recorded facial expression with the built-in webcam on Windows 11.
To fulfill your needs of recording webcam and Windows 11 computer screen simultaneously, AppGeeker Screen Recorder is the best go-to option.
This software is not only capable of recording high-quality screen videos, but it also allows you to easily capture webcam footage and combine the two into a single picture-in-picture video on your Windows 11 computer.
1. Download and install AppGeeker software.
2. Open the app and select "Video Recorder."
3. Click on "Full" option for recording your fullscreen. Or choose Custom > Select region/window and drag the crosshair to record your wanted area.

4. Toggle" On" the "Webcam" option. For the audio adjustment, enable soundtracks for both "System Sound" and "Microphone".
5. Click the "REC" button to start recording.
6. Click the red square "Stop" button to stop recording.
![]()
With these simple steps, you can easily create a PIP screen recording video using webcam of your Windows 11 PC with AppGeeker screen recorder.
1. How long can a webcam record on Windows 11?
The webcam on your Windows 11 PC won't stop recording until the file size of webcam video recordings has reached more than 2GB, and that usually takes 3 hours.
2. How do I record my webcam on Windows 11?
3. How to enable adjustment for exposure in Windows 11's built-in Camera app?
To enable adjustment for exposure with your webcam in Windows 11, you'll need to enable "Pro Mode." To do this, go to "Settings" menu at the top left of the Camera app. Then toggle to turn on the "Pro mode."
After turning on the "Pro mode", the exposure option will be available at the left center front panel of the Camera app. Click on the exposure option and move the slider vertically to adjust the exposure of the webcam video. This will allow you to adjust the exposure of your webcam manually, giving you more control over the lighting in your videos.