
How to Transfer Videos from iPhone to Laptop

The task of screen recording with audio on a Mac is easy if you know the right process to enable the built-in recording tools. To record system sound, you need a third-party app.

For anyone who just needs to record screen with audio from microphone, Apple's built-in tools should suffice. Without option for screen recording with system audio on Mac, you'll want a third-party utility like Appgeeker Screen Recorder, which can capture everything on your desktop.

Mac has pre-installed feature to record screen with inbuilt mic audio and external microphone taking voice.
Screen recording with audio on your Mac is not that difficult. No matter you want to record what was on your iMac's or MacBook's screen, or save an online Zoom meeting with other participant's voice for later viewing, a create a software demo for your YouTube fans, there are a lot of screen and audio recorder mac available to complete the task.
In this article, we'll tell you how to screen record with audio on a Mac using the Mac's built-in recording tools, and third-party apps, so that you can edit & share the screen recordings with audio once they are saved.
If all you need is a screen recorder app for recording the Mac's screen with audio from your voice that is coming out of microphone, you don't need to look anywhere else but the built-in macOS screen recorder - Screenshot Toolbar and QuickTime Player. Aside from screen recording on Mac with mic audio, it also can take snapshots of an entire screen or a portion of the window.
However, Apple doesn't let you screen record with system sound in Mac, such as the audio from a streaming video, a sound coming from a browser window or app, presenter's and attendees' voice in Zoom Webinar. You will need to use a third-party Mac screen recorder with audio, something like Appgeeker Screen Recorder, that has capability of recording screen with internal audio on MacBook, iMac or Mac Mini to grab your computer sound.
To enable the pre-installed screen recording feature on your Mac, in the past, you had to open QuickTime Player to find "New Screen Recording" option. But since macOS Mojave or later version, you can use hotkey to bring up Screenshot Toolbar to record screen with audio Mac.
For screen recording with audio on your Mac computer, press Shift + Command + 5 to quickly open the Screenshot, click Options in the toolbar to select the audio source you want to record sound from, choose to record the whole screen or a portion of the screen and click the Record button. Finally, press Command + Control + Escape to stop recording.
Here're the detailed steps with image on how to record screen audio on Mac.
1. Press the Command + Shift + 5 hotkeys on your keyboard. Screenshot opens on your Mac screen. You will see a list tools in the Toolbar.
2. To screen record with your audio from microphone on Mac, click Options.
3. In the dropdown menu, select from Mac's built-in microphone, or use an external mic you plug into the computer.
4. Select Record Entire Screen tool to record the whole computer screen with mic audio, and then click Record button.

5. If you're recording a portion of the screen, click Record selected Portion tool on the Screenshot, then drag your cursor to select the area you want to capture. Then, click Record.
Quick Tip: After you click the button, a small circle with square icon will appear on your menu bar (see below), and your Mac will start recording your screen with audio.

6. To stop recording the screen, press the Command + Control + Esc keys. Alternatively, you may also click on the Stop icon on the menu bar to stop screen recording with audio on your Mac device.
Note:
While the hotkeys doesn't work for screen recording your Mac's internal audio, you can use the pre-installed QuickTime Player application to fulfill it — you need another tool named Soundflower to work together, though. Using the recording feature with this Mac's primary media player is similar to Screenshot Toolbar, but it has additional option to adjust your volume.
Let's see how QuickTime Player screen records with internal audio, microphone sound, or both on your Mac. Make sure you have enough free space to save your recording.
How to screen record with internal and external audio with Mac's QuickTime Player.
1. Download Soundflower and install on your iMac or MacBook. It's an open source and free kernel extension for macOS that can be used as a virtual audio output device.
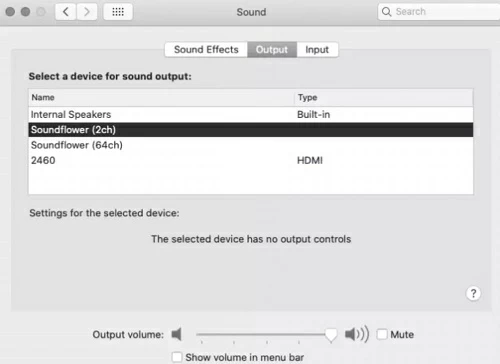
2. Set Soundflower as audio output device. To do so, go to System Preferences > Sound > Output. Both Soundflower (2ch) and Soundflower (64ch) appear in the list of available devices for sound output. For average users, choosing Soundflower (2ch) is quite good.
3. Open QuickTime Player from your Mac's Application folder.
4. In the opening QT window, select File > New Screen Recording.
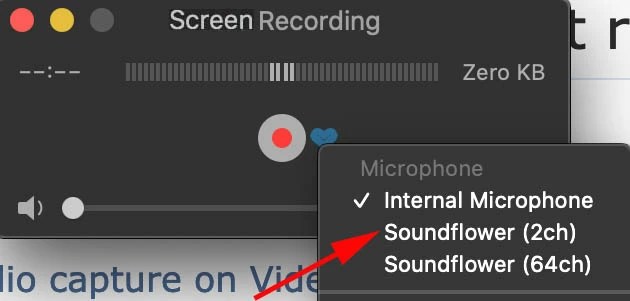
5. Click Options button next to red Record button and check Soundflower (2ch) from the Microphone field as audio output. You then can drag the Volume bar's slider for Soundflower to the left and right to adjust volume.
Soundflower works by rerouting your system audio output to the microphone input. It creates a virtual audio device on your machine that your Mac audio system can see. It could be a great solution to "Mac cannot record system sound" problem.
6. Select either Record Entire Screen or Record Selected Portion, and then click Record button. Let QuickTime record screen with audio. Both your screen and internal & external audio will be recorded.
7. Finally, click the Stop icon in the menu bar to stop, or simply press Command + Control + Esc.
8. QuickTime Player will open a preview window of your recorded video with audio automatically. Check everything that's captured is good enough.
Don't forget to go back to System Preferences again and set the sound output device back to the default value.
Done! You have successfully recorded screen audio on your Mac.
Every time you finish recording your Mac screen with audio using the combination of QuickTime and Soundflower, you will have to switch settings back to default value to be able to hear voice from your Mac again. This can be time consuming and not that convenient.
Thankfully, Soundflower is not your only option. There are many of screen recorders for Mac with audio available on the market. Here we pick Appgeeker Screen Recorder, which offers extensive recording features to take your screen recordings to the next level for creative and professional videos. The program simplifies the whole recording process without configuring anything, and adds a lot of advanced features like annotating in real time, scheduling screen recording, trimming the recorded video clips, capturing background computer audio, adding webcam overlay, and more.
The program works on iMac, MacBook, Mac Mini and other Mac devices. Download it now!
Let's have a look at how to capture internal sound and microphone audio simultaneously or separately while recording your screen in Mac.
1. Once downloaded and installed, open Appgeeker Screen Recorder for Mac recording screen and audio.
2. Click "Video Recorder" in the interface to proceed.

3. Select what area of the screen you want to capture through "Full" or "Custom."
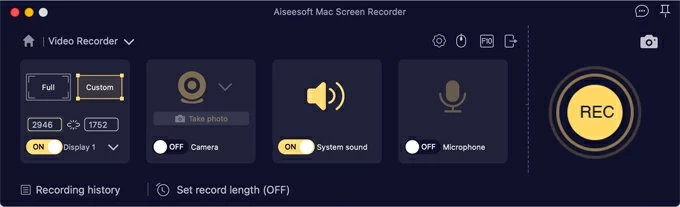
When you choose the latter, an orange border appears around the screen, simply drag to select a portion you need to record.
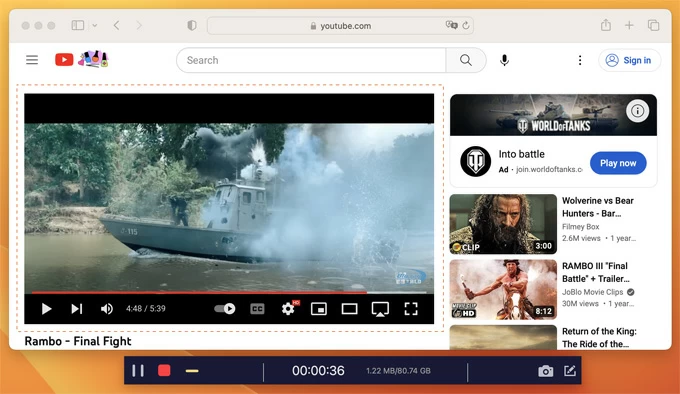
4. Turn the "System sound" switch to the right position on the program interface so that you enable internal audio recording on Mac. You may also turn on "Microphone" switch if you need your voice from a mic.
5. When you're satisfied with your settings for recording screen with external audio and system sound on Mac, click the "Rec" button on the far right of the interface to begin recording.
A floating recording bar will appear automatically under the selected window.
6. When you're ready to stop, hit the "Stop" button (red square) on the floating bar. You can preview and trim the screen recording in the auto-open new window before saving it on your Mac. The video file can be exported in various formats like MP4, MOV, and more.
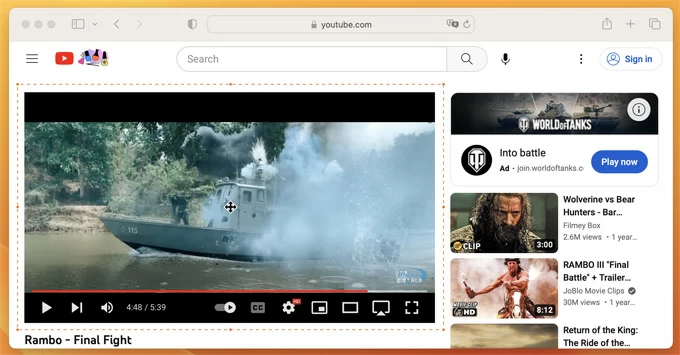
You can use this program to record YouTube videos on Mac.
If you want to look for a screen recorder with audio for Mac with more controls and can record the screen with system audio and mic sound in rich quality, Appgeeker Screen Recorder should be a nice pick.
You can make use of native editing tools in QuickTime Player to edit your screen recordings. Once you're done with your editing, go to File > Save to save your changes.
Launch QuickTime Player and import the recorded screen video with audio you want to edit.
Next, click on the Edit button from the menu bar at the top of the screen, and you will see a few different editing tools.
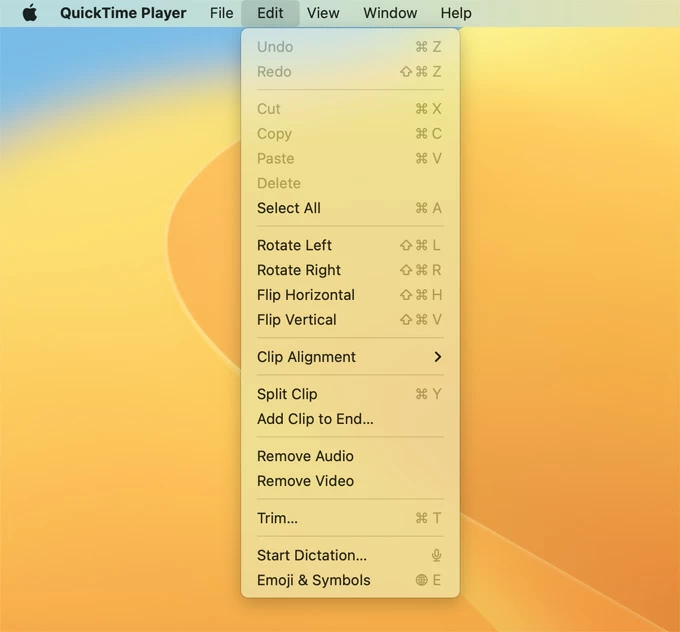
To rotate a screen recording, click the Rotate/Flip buttons. From there, you can rotate the recording left or right, or flip it vertically or horizontally.
To trim your recording, click the Trim button. You can then drag either the beginning or end of the yellow box in the trimming bar to trim the beginning or end of the video.
You can also split a recording into as many clips as you want. To do so, choose View > move the playhead to the point where you want to split the clip, click Split Clip button. Repeat the same steps if necessary.
Once you have edited the video, click File > Save at the top menu bar to confirm the change.
Once you've edited your recording, click File, and then Share at the top menu bar, choose the desired app through which you want to share the recorded video, sign in with your credentials if required, and you're good to go.


