How to Transfer Music from iTunes to iPhone without Syncing

If you can't remember the passcode of your iPhone X, you can erase all the settings to unlock it. Here's how to do it in with a few clicks.

We have to admit that the emergence of Face Id, born together with iPhone X in 2019, has brought us convenience. Most people choose to create a Face ID while setting a passcode on their iPhone X. Of course, Face ID is not a panacea. For some reasons, it occasionally fails to work.
Hopefully, the passcode can also be used to unlock your iPhone X. However, it never rains but it pours! You realize that you have forgotten what the password is because you have relied on Face ID for so long. A message stating that it is disabled appears on your lock screen after several failed passcode attempts. Clearly, your iPhone X is locked. Don't worry, you will find the best solution to unlock it here.

If your iPhone X is locked, the only solution is to remove the passcode by wiping all the data on your device.
Back it up termly!
Even if you have forgotten your password, there are some methods to regain access to your locked iPhone X. Unfortunately, no matter which method you use, all the data will be erased along with the passcode. The good news is that if you have backed up your iPhone recently, all the data will not be lost. If not, making regular backups will be a compulsory course for you. Start doing backups regularly!
For your convenience, we have divided this post into three sections:
Tip: An internet connection is required to download any required software updates and to reactivate the phone.
The method Apple's official recommends is to use iTunes or Finder to unlock a locked iPhone X. Choosing which software to use hinges on the version of your computer. If you're using a PC or a macOS 10.14 or earlier, you'll launch iTunes. Instead, open the Finder. Follow these steps to regain control of the device:
Getting iTunes or Finder to work on the computer. Then force the iPhone into the Recovery Mode. Unplug it into the computer at first. Press and hold the Side button and one of the Volume buttons to turn off the device as usual. Press the Side button and connect the locked iPhone to the computer. Continue holding the Side button. This will bring you to a screen like this:
![]()
Don't let go of the Side button until you see the Recovery Mode screen.
Navigate to the computer, iTunes or Finder has detected your device and pops up a window giving you a choice to restore or update. Opt for the ''Restore'' button.
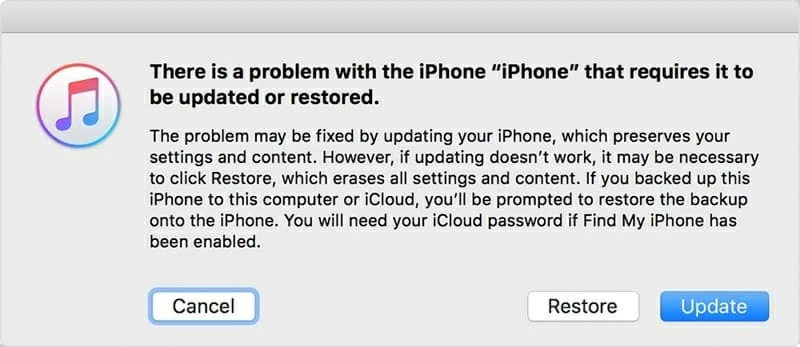
Choose ''Restore'' to begin downloading the iOS software for your locked iPhone X.
iTunes will start to download the latest version of software to your device. After downloading, you'll be promoted to set up your device by following the on-screen guides.
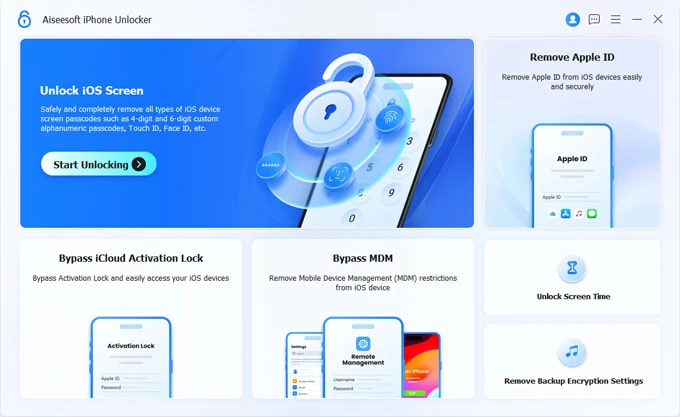
If iTunes or Finder is not working for your iPhone, you can try Appgeeker iPhone Unlocker. It is an advanced password erasure tool specially designed for iOS devices. Using this tool, one can remove screen passcode, bypass iCloud activation lock on iPhone, as well as remove Screen Time passcode on iPhone, iPad or iPod. Here are the steps to unlock a locked iPhone X with iPhone Unlocker.
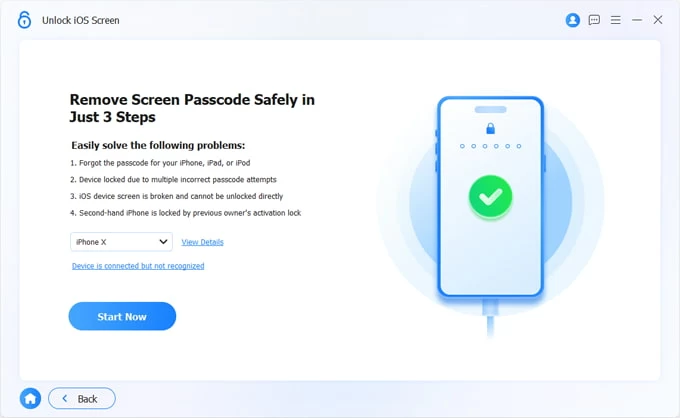
Click the link above to free download and install iPhone Unlocker. Then click the icon on the desktop to open the program. A window containing three parts appears. Select ''Start Unlocking'' to continue.
You'll be promoted to connect iPhone X to the computer, and the software requires you to enter Recovery Mode on your iPhone before it can be detected.
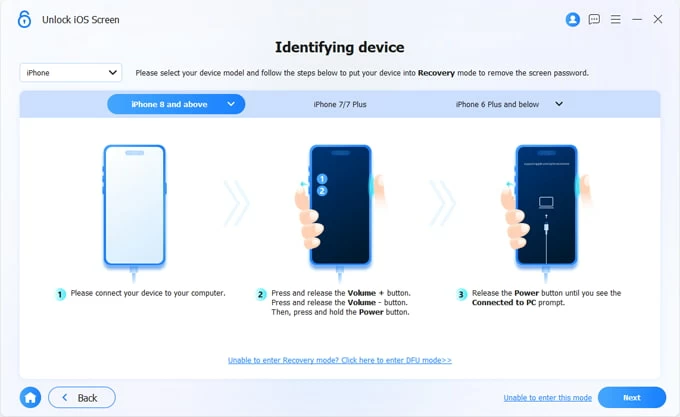
Press and hold the Volume Up key followed by the Volume Down key. Then keep holding the Side button. You will see an Apple logo on the screen and the Recovery Mode screen will appear later.
With iPhone X entering the Recovery Mode, the information of the device will show up.
The correctness of the information has a bearing on the smoothness of the unlocking process.
Make sure the info is incorrect and tap on ''Start Now" button to begin downloading the iOS firmware package for your device.
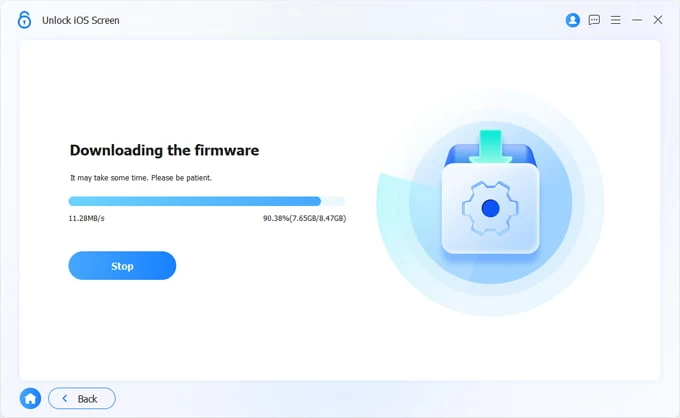
The firmware package is being downloaded for your device.
When the downloading process finishes, a warning dialog box appears in front of you. Read these precautions carefully and clcik "OK" to unlock.
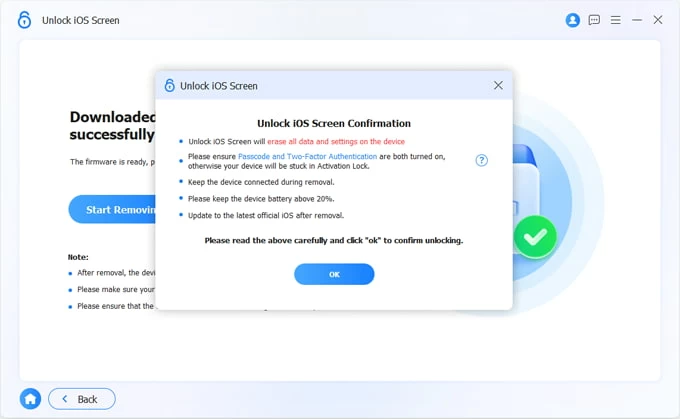
At the time you press the ''Confirm Again'' button, iPhone Unlocker will let you download the iOS software to begin wiping the passcode.
Wait for a while and you can get a screen looks like the screenshot below which means that your device is unlocked. Next you will be invited to set up your device.
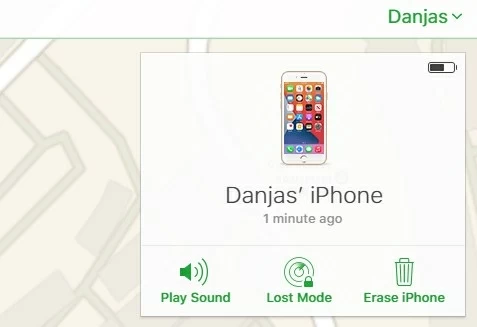
Can't enter the Recovery Mode successfully? Maybe Apple's Find My can help you to perform an unlock. Ensure that you remember the Apple ID and password. It may seem obvious, but a common mistake that's often made when using Find My is not making sure the Apple ID.
To unlock iPhone X step by step:
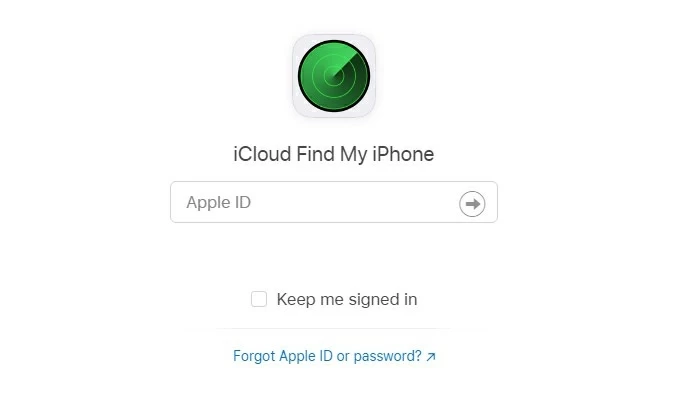
Visit Find My in your browser. You are asked to log in with your Apple ID and passcode. To do that, type in your Apple ID and passcode.
Find My will locate all your online devices on the map. Select the device you want to unlock in the summary list at the top of the interface.

On the top left of the screen select ''Erase iPhone''. A confirmation box appears. Tap on ''Erase'' to confirm. After a few minutes, you can gain the access to your iPhone X back.