
How to Convert YouTube Video to MP3 Audio in Mac


M4A is audio-only MPEG-4 file developed by Apple Inc, and therefore, it is mainly applied to a full series of Apple products including iPhone, iPad, iTunes, QuickTime, etc and some other limited M4A players likes Windows Media Player and VLC.
Even though M4A is the common audio file type for Apple fans, for those who want to play their favorite M4A songs on Android LG, Samsung, HTC, etc, it has a need sometimes to convert the M4A to a more accessible audio format like MP3, which has strong compatibility on a plethora of handy devices. Here, just by performing a quick conversion using Video Converter for Mac (for Windows), with which you can convert those M4A files over to MP3 with high possible quality and be on your way.
This cross-platform tool is definitely a rather flexible and feature-rich converting tool that supports a wide variety of formatted audio and video files, allowing change from one format to another with best possible quality for better playing on your media player or iOS/Android device. It has the capability to convert audio to any frequently-used regular and lossless audio format, such as convert APE to ALAC, MP3, AAC, and more. It also supports batch conversion and merging into several files into one within an intuitive interface.
Plus, it also acts as a handy editor which is ease of use to do editing on video: clipping any portion of the file, adding effects, cropping out portions of video you don't want, putting watermark, etc.
Step 1: Load M4A Source File
Navigate to the main interface of Video Converter for Mac and click on Add File button on the top toolbar to import .m4a music file(s) you want to convert from your computer. Or directly drag and drop the file(s) into center panel of the program.
Note: We suggest that choosing a folder with multiple files rather than just a lone audio since batch processing is supported, and this saves your time on file conversion and gets your audio ready for editing or any purpose.

If you are working on multiple audio files at once, you can check Merge into one file option located in the bottom right corner of the window to combine them into one. Also, you can spilt your original audio files into several segments through Clip tab on the toolbar and choose any part of them to join them together seamlessly for creating your own songs.
Our most popular music tutorials: How to Copy Songs from Your iPhone and Transfer to a Mac
Step 2:Set MP3 as Output Soundtrack Format from "Profile"
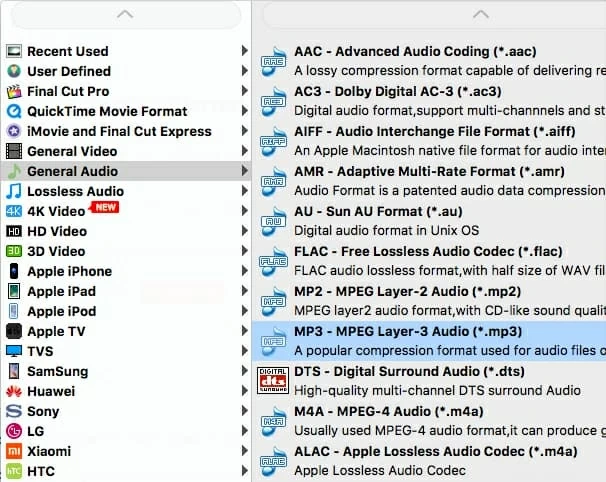
In this step, simply hit Profile drop-down arrow in the lower right corner to call up the format selection list. Then you can choose MP3 – MPEG Layer-3 Audio (*.mp3) under General Audio category.
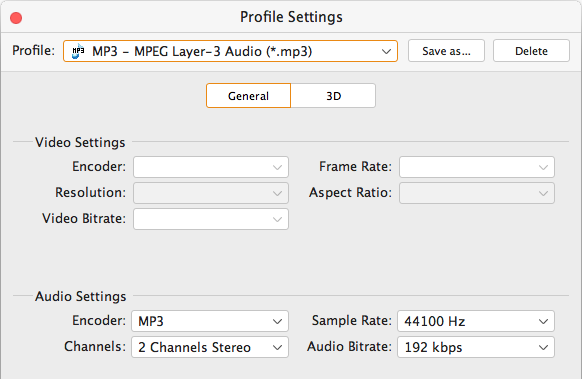
Optionally, click Settings icon near Profile menu to access the advanced options, then you can configure output encoding settings depending the final quality you need, including the resulting bit rate, audio channel and bit rate, sample rate.
Tip: Edit Audio File (Optional)
Similarly, if you're a music lover and picky about the hearing results of the songs, this audio converter provides a quick access to improve your music with its in-built basic editing tools. You are allowed to cut any clip from the original audio using Clip tab on the tool bar. Set the "Start Time" and "End Time" of the clip or just drag the slide bar to the accurate position. Also, you can adjust audio volume via Effect under Edit option.
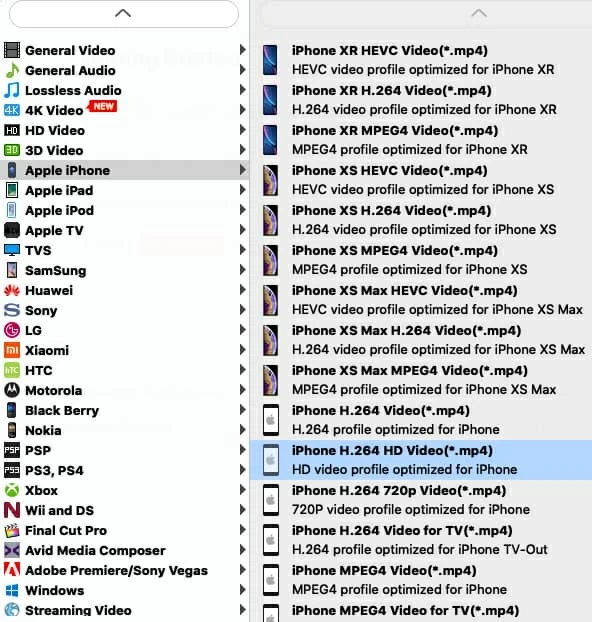
This Mac M4A to MP3 Converter also comes with pre-configured presets for those who do a conversion over to a particular device or want to simplify the process of choose the resulting settings or otherwise. If so, simple pick one matching your device model.
Next, once the settings are customized, use the Destination option beneath Profile menu to indicate a local folder for your converted video files to be stored in.
Step 3: Start .m4a to .mp3 Audio Conversion in Mac
When everything is all set, you go to the final step – M4A to mp3 conversion.
Click Convert button to start to convert your song(s) from M4A straight to MP3 track on your Mac machine. A progress window will appear to show the status of conversion.

Wait until the conversion is finished and open the destination folder you just specified to get the converted MP3 file(s) and transfer to your iPod, iPad, iPhone, mp3 player, Android handsets or somewhere else.
You're done!
Conclusion
Overall, this M4A to MP3 audio converter not only provides an easy-to-use interface that even a novice will feel comfortable using, but it also has a toolset to accomplish a variety of audio editing jobs. Now, you can try to do audio extraction from any videos you have or perform video conversion on your own.
Related Tutorial: How to convert tracks from MP4 to MP3 format on Mac/PC