
How to Convert a Video that is a WMV File to Play in iPad


WebM is an open source video format that is designed primarily to stream high quality videos in a webpage using HTML5 video tag. WebM initially used VP8 and Vorbis as video and audio streams. Later it was updated to support VP9 video and Opus audio.
WebM is specifically built for the web and is addressing the needs for users to stream videos on a webpage. That is to say, you can play videos directly in a webpage without installing plug-ins (just imagine flash player you used years ago). Nowadays, a growing number of popular sites and web browsers are using WebM videos, like YouTube, 4chan, Chrome, Firefox and Opera. Some web browsers may need to install components for the support of WebM videos like IE and Safari.
Get the Right Way to Convert Your MP4 Files to WebM for Easy HTML5 Videos
WebM provides smaller file size and more accessibility than MP4 in the context of HTML5 web. You probably have some interesting MP4 videos (shot by your devices or from other sources) that you want to integrate into your webpage or upload to YouTube using HTML5 technology for extensive sharing online, then why not convert MP4 file to WebM for easier embedding and smooth streaming?
There is a quick answer to the above-mentioned issues thanks to Video Converter for Mac, an effective video conversion tool. Whether you are converting one format to another like MP4 to WebM for use on a web page, taking care of output settings or customizing your own video footage, it is at your service at all times.
Step 1: Put MP4 media files onto the program
Run this software on your computer and click "Add File" (see top-left corner) to put MP4 videos files onto the converter.
You can see the imported videos arranged longitudinally on the left pane which are available for preview on the right pane.

Step 2: Choose profile settings
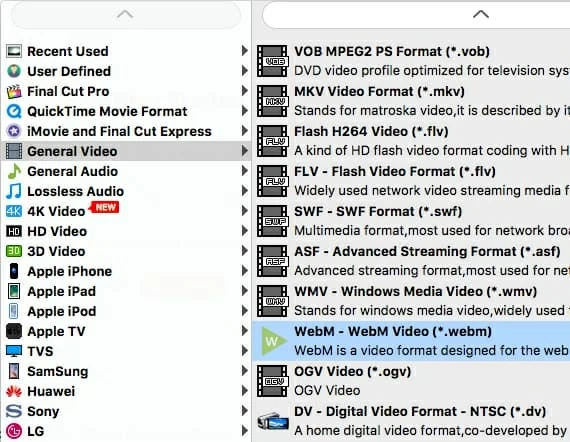
After adding the files, click the drop-down "Profile" list (see bottom side) and it opens a window like this. Head to "General Video" and set "WebM - WebM Video (*.webm) as output format.
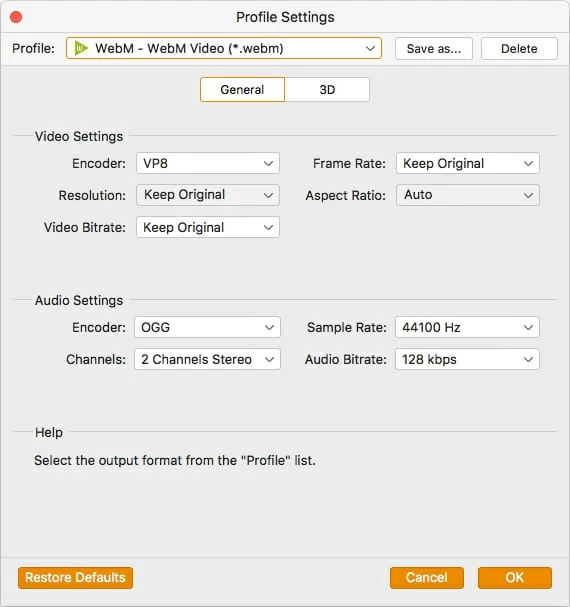
One of the great features our users like about this decent program is that it enables you to fine-tune the output settings manually to have the control over the result files if required. Once you click "Settings" (next to "Profile") and you get a dialog box where the value toward to Encoder, Resolution, Video Bitrate, Channels, frame rate, aspect ratio, sample rate are all adjustable.
If you've got some files where you always need to do the same thing in settings, you can hit the "Save as..." option at the upper right corner to create a custom profile for use next time.
Note: the default settings are good enough for regular users so most of us don't really need to modify this part. You can skip this section.
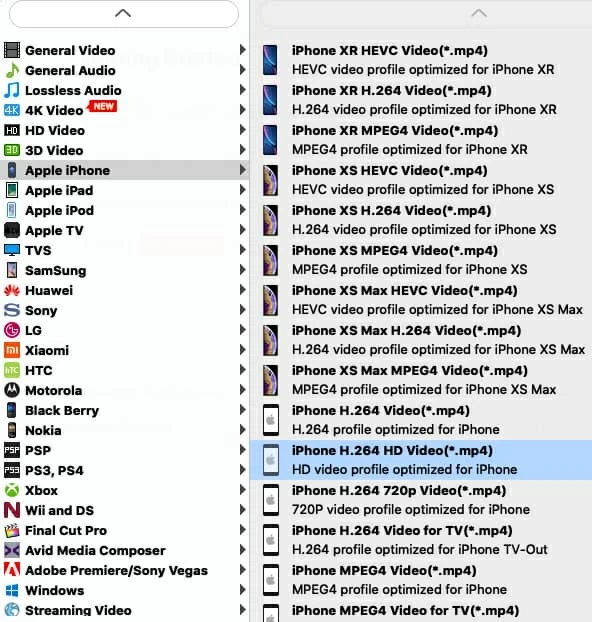
Everyday we have to handle countless video and audio formats from various gadgets and applications, which has already put extra burden on our busy life. In order to better organize and manage our video files efficiently, this MP4 to WebM converter has a large substantial number of presets for this.
Edit Video (optional)
The video editing feature is also appeared in the program, allowing users to apply some basic effects and edits before converting to WebM. In the toolbar there is a row of buttons: Video Enhance, Clip, 3D and Edit. This part is optional and self-explanatory.
Step 3: Get MP4 videos converted to WebM
After you have completed all the necessary settings, we come to the last step. Click on the "Browse" (below "Settings'') to choose a location for the resulting files, or keep the default path to no change.
Then, click the orange "Convert" button to initialize the conversion from MP4 video to WebM file format on your computer. Just wait for the process to finish. You can shut down some unnecessary desktop applications on Mac to assign more RAM to the process.
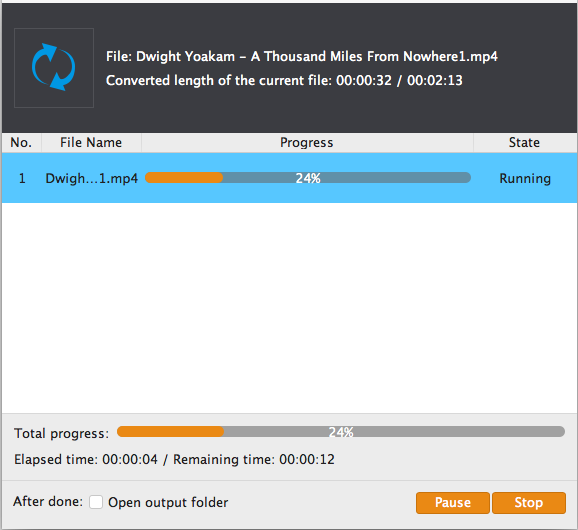
BTW, you can check "Open output folder" option in the bottom of the opening processing window to open the folder where the new minted WebM are stored automatically when the conversion process is complete.
Done!
Extended Knowledge about HTML5
HTML5, known as the new web standard with CSS and JavaScript, is developed to handle media files much easier. HTML5 is designed to deliver almost anything you would like to do on cyberspace, ranging from videos to music to pictures and apps, without the need to install third-party plugins. For example, the traditional HTML sites play video files via flash while HTML5 sites deliver WebM videos using HTML5 video tag. Most current dominant websites have already adopted HTML5 to improve user experience and accelerate web loading in desktop computer and various handheld devices.