How to Burn a MP4 to play on a Home DVD player


I have some MP4 business video clips that comes with h.264 video codec. A client wants them as .wmv format as he is using a HP laptop with Windows system. Is there an easy way to do this without a loss of image quality?
For the most part, MP4 is an easy-to-distribute format online and offline, almost all of players and multimedia devices today do support MP4 file. It is already adopted by everywhere that's it's difficult for other formats to replace it. Arguably, MP4 (mpeg-4, h.264/avc) format has become a common denominator in the industry.
However, the fact is that with so many operating systems, sometimes you still have a need to convert a MP4 to another format, like WMV, to suit the platform you on. And that's what we're going to talk about in this article. How can you convert MP4 format to WMV format in either a Mac or PC machine?
Before going deep discussion about MP4 converting to WMV, let's take a brief look at the WMV format. WMV is short for Windows Media Video, a format designed for compressing large video files into smaller files while still retaining considerably high quality. it's often combined with an audio stream of Windows Media Audio. Microsoft Windows systems have a native support of this video format.
MP4 to WMV Converter for Mac & PC
With the right software, you can easily convert a MP4 video to WMV on Mac or Windows to be used any way you choose. Amongst, Video Converter for Mac is one of the most stable and comprehensive software for converting video files from one format into another. It converts MP4, WMV, AVI, MTS, MKV, MOV, M4V, AVCHD, H.264 and audio MP3, FLAC, WAV, M4A, AAC, AC3, WMA. You can use its preset options that enables you to convert the video to a high quality format that will play just fine on a wide range of devices, along with plenty of advanced features for tweaks of the conversion settings.
Its equivalent Video Converter for Windows available for converting MP4 video to WMV file on a Windows PC.
Step 1: Add MP4s to the software
Start up this video converter.
To add items, click the "Add File" menu in the toolbar of the window. In the open dialog, select the MP4 movie files you wish to convert into .wmv video from its respective save location, and then click Open.
Drag-n-drop feature is also available for your files importing.

Do Basic Edits on MP4 (Optional)
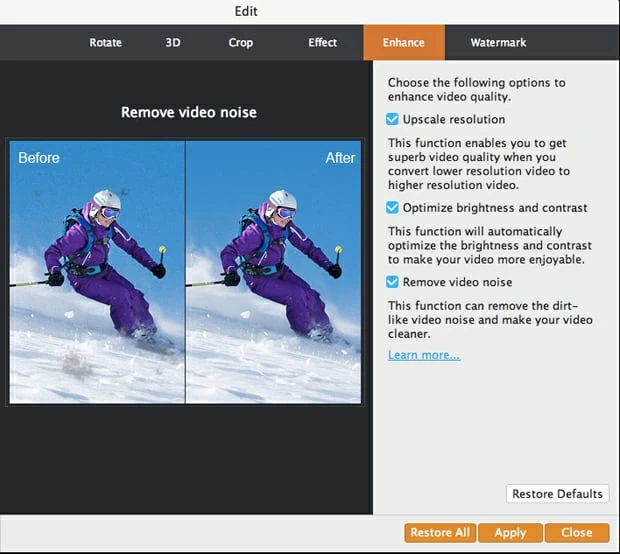
By clicking the "Edit" button in the toolbar, you'll get the video editing window where you can select filters for common tasks, such as cropping, watermarking, rotating, etc.
Step 2: Select WMV option from "Profile" menu
After you have loaded MP4s, you'll move on to choose the output format and its conversion settings.
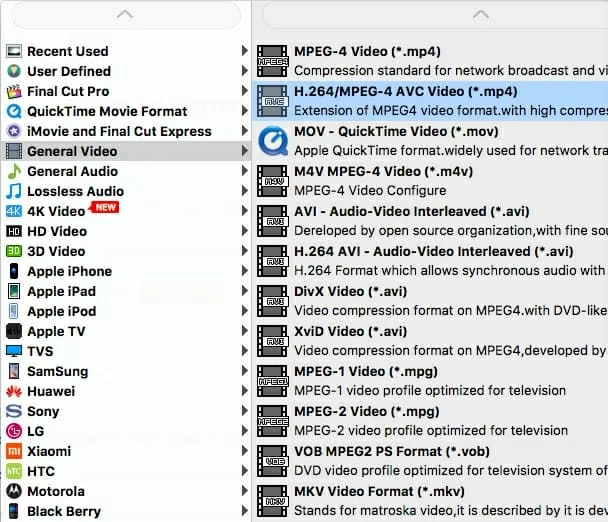
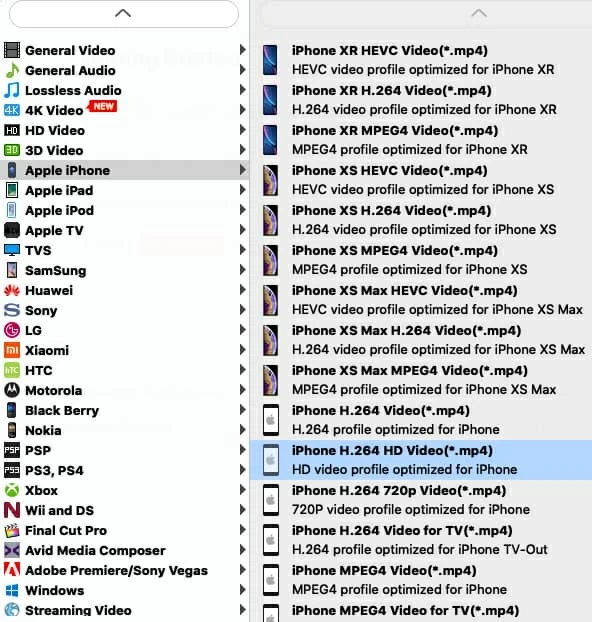
In the lower left-hand corner of the main interface, click the "Profile" drop-down menu which will bring you into the format-selecting panel, as picture shown below. As you can see in the left pane of the window that comes up, there are a large number of profile columns you can choose from.
If your original MP4 (mpeg-4) file is standard definition, head to "General Video" column, scroll down the list on the right pane, find WMV - Windows Media Video (*.wmv) and select it. Or if your MP4 (H.264/AVC) is high definition, click the "HD Video" column instead, from its list select HD WMV Video (*.wmv).
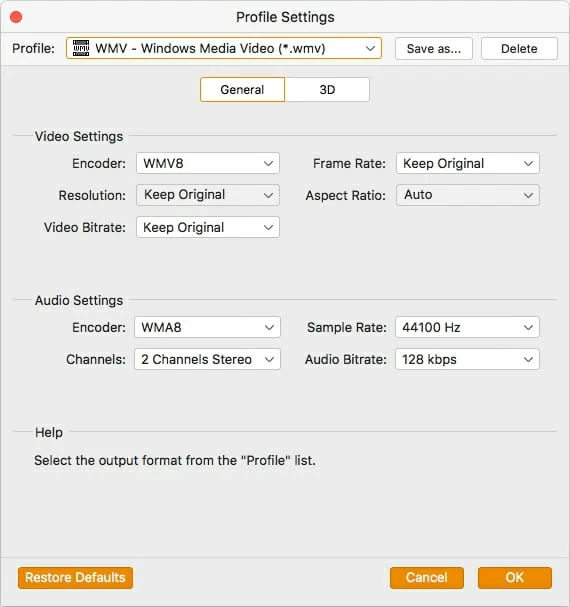
If you want to configure manually the MP4 conversion settings, assuming you're an experienced user, you can click the "settings" button that next to "Profile" menu to get into the profile settings window. This Mac MP4 to WMV converter application provides a group of options including encoder (codec), frame rate (fps), resolution (size), bitrate (kbps), sample rate (hz), etc. under Video and Audio field.
For example, in Video Bitrate, adjust the value of bitrate would affect the size of the final video. Keep in mind that as the bitrate increases, so does the file size, and the conversion time would take a bit longer.
For simplicity's sake, leave the settings at their default values unless you want to change the size, and quality of your video.
Please note that you can save the currently settings as a custom profile— just click the "Save as..." button in the upper right corner of the screen. a small dialog will open. Then type a new unique name and click the OK button. The saved custom profile will be displayed in the list of the "User Defined" category, and you will be able to use it later on to apply the same settings to another video.
Hit the OK button to close the window and back to the main interface.
Aside from choosing a specific format you need, You may note that there are a great selection of device-targeted preset columns on the left pane. This is great if you want to convert movies so you can watch them on a mobile device—no wasting time selecting a format and tweak the conversion settings to be suitable for your device.
Once you choose that preset, the Mac app automatically adjusts its resolution and quality and other settings related to the video, you don't need to make any choices of this sort.
Step 3: Starting MP4 converting to WMV file on Mac
This part is the simplest, but the longest.
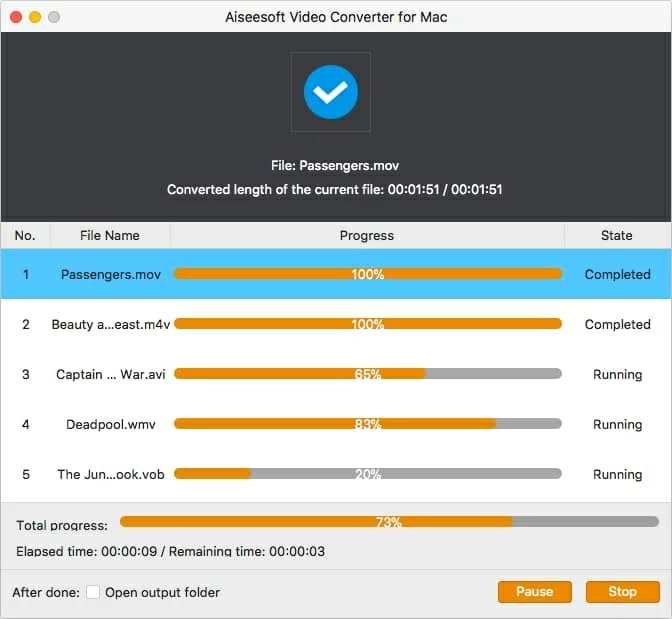
Press the orange "Convert" button in the lower right-hand corner of the program window, the software will begin converting your MP4 videos into WMV format on Mac OS X.
You should now see a new window that comes up, along with progress bar running as the conversion takes place. Make yourself a cup of coffee.
That's it! Happing MP4 converting!
The bottom Line
As you see, it's quite simple to take a video in one format and then convert it to another format, including converting from the popular 1080p .mkv file to .mp4 format on your computer. Even if you're a beginner that don't have any experience working with the video conversion utility, you should be able to get the job done with any problem.