
How to Play a WMV Video on an iPad (Air, Mini, Pro)


1080p, also known as Full HD, refers to a horizontal resolution in the order of 1920 pixels and vertical resolution in the order of 1080 pixels. Supported by ATSC and DVB standard, 1080p video commonly applies to television broadcasts, consumer-oriented televisions, projectors, computer monitors, Blu-ray discs and so forth. 1080p is the most popular configuration used in the market today.
However, higher resolutions require immense amount of graphics processing power and basically the higher the resolution, the larger the file size. Imagine you have an older, underpowered computer that can't play 1080p movie files smoothly, or you get a number of 1080p video files on your iPhone and find out there is only a few free storage memory left and you couldn't use the camera to shot pictures any more. What would you do?
Whatever the reason, definitely, there is a necessity to downscale your 1080p to something more accessible and less space-taken like 720p (1280 × 720) from now and then. Given that 720p presents High Definition video as well, but takes up a rather small space, downsizing 1080p to 720p would be a nice option ever whether you want to save space for easier playback or upload to the Internet.
If you keep wondering how this downsizing is gonna work, you're in the right place. In this article, we'll show you how to downsize your 1080p footage to 720p on your Mac or Windows computer. And the tool we'll use is Video Converter for Mac (for Windows), a powerful yet easy-to-use conversion tool with many advanced features. It's really about taking any digital video & audio file and getting it into the format that you prefer, and offers you options to fine-tune output settings including resolution discussed in this topic. In addition, it's fitted with a group of editing tools in most basic usage that you can configure video files in your stylish way by trimming video clips, cropping video screen, adding subtitles/watermarks, etc.
Keep reading and you'll get trouble-free instructions below on downscaling a video from 1080p to 720p step by step on your computer.
Step 1: Add 1080p source video into the software
Download and install the software on your either Mac or PC machine. In this tutorial, we take an iMac for example.
Once you fire up the program, you will find all the functional controls are logically placed on the main screen and easy to use. To add a 1080p file to the queue, click the "Add File" button on the upper left corner of the interface. You're allowed to load a whale of 1080p videos and convert them all to 720p at one time.
A more handy way to load your 1080p files would be to drag and drop them onto the program's middle interface directly.

Step 2: Select an output format and set resolution to 1280*720
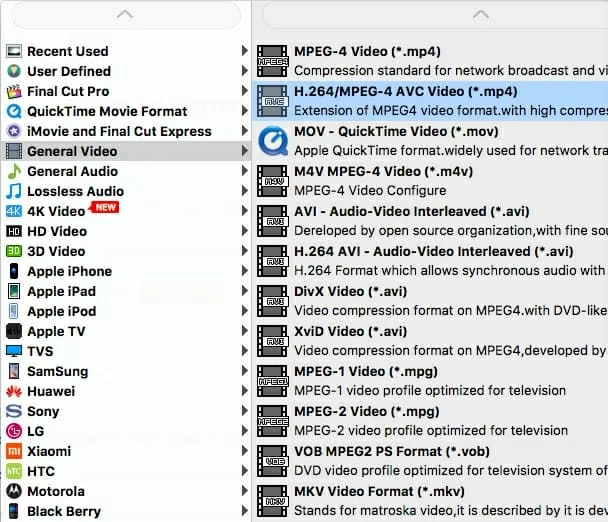
Click "Profile" pull-down on the lower bottom of the interface, it will open another dialog that will list all the possible format items. From there, scoll to find the format that you want your video to convert to. If you want to keep the same file extension as the original file, you can select the same output format in "Profile" box. Or select another format from the panel, as image shown below. The converter supports converting fomatted files from one to another without a pain.
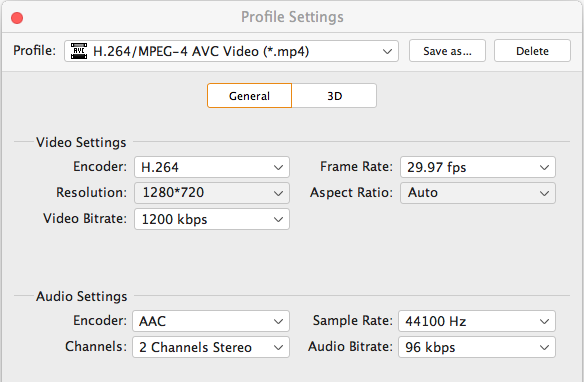
Important! Next, you'll have to click the "Settings" to the right side of "Profile" to open Profile Settings window, from where you can find Resolution option under "Video Settings" section.
Now change the value of "Resolution" from 1920*1080 to 1280*720. A oblivion of this step would lead to the failure of your video downsizing from 1080p to 720p. Other output parameters are configurable according to your requirements.
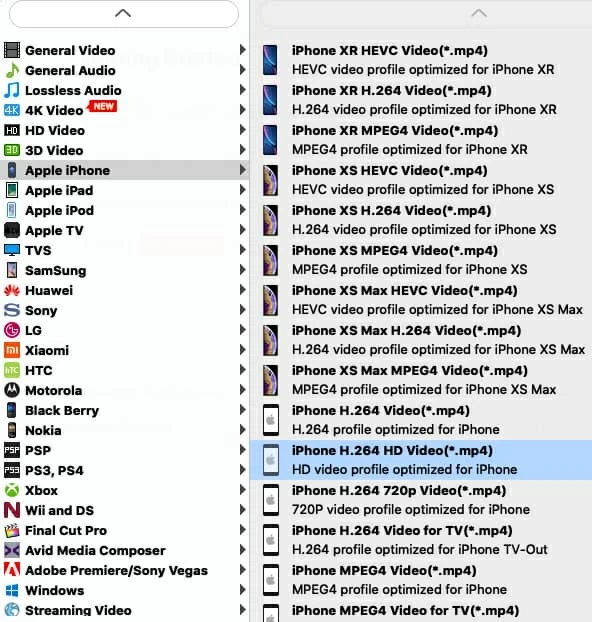
Likewise, there are a bunch of presets tailored for specific devices you can choose from if you want to convert your video to be suitable your portable device perfectly. In this way should you save a lot of time in delving into all the output settings the device needs.
Optional! In addition to the file conversion, this cross-platform converter also includes a slew of basic editing tools to let you increase video quality manually and are very easy to control. 3D, Brightness, Contrast, Saturation, Hue, Watermark, etc– everything to help the beginner create a professional-looking result.
Afterwards, make sure you choose a location from your computer with a lot of room: video files, especially HD files, can be quite large. You don't want to run out of room before you even get started! To do this, press "Browse" button beneath "Settings".
Step 3: Initiate conversion from 1080p to 720p on your Mac or PC
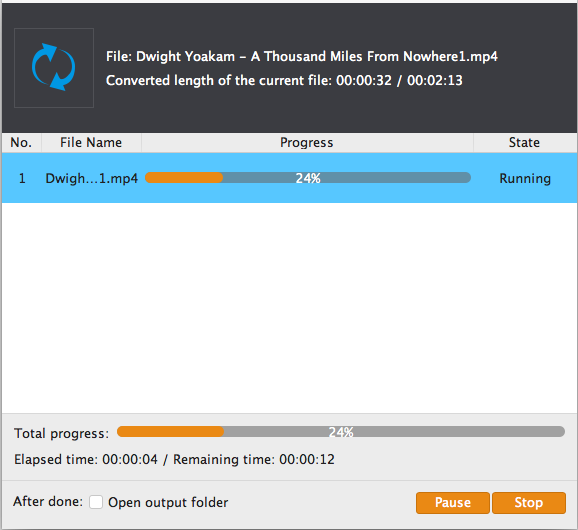
When everything is ready, just move your mouse cursor to lower right corner of the main screen and click on the big "Convert" button to initiate the 1080p to 720p downscaling process. The on-screen picture below should pop up showing you the status of the process.
After converting, you can handily enjoy the video on any player you have.
Happy 1080p to 720p conversion.