How to Restore Phone History from iPhone X


Just like the name implies, the built-in Voice Memos app on the iPhone gives you a wonderful way to make recordings of your voice and save in the device. You can use it to capture thoughts, musings, interviews, or anything at all. Regardless of how nice it is, you might sometimes delete a voice memo accidently or change the settings of the app and find the recorded voice memos disappeared from iPhone. Such an awful matter!
So what exactly should you do now? The answer is pretty simple: you need to recover your iPhone voice memos. Thankfully, there are lots of things you can do to revert the situation and get back voice memos to iPhone, no matter how the records lost. Here are four basic methods for retrieving voice memos. Check them out below:
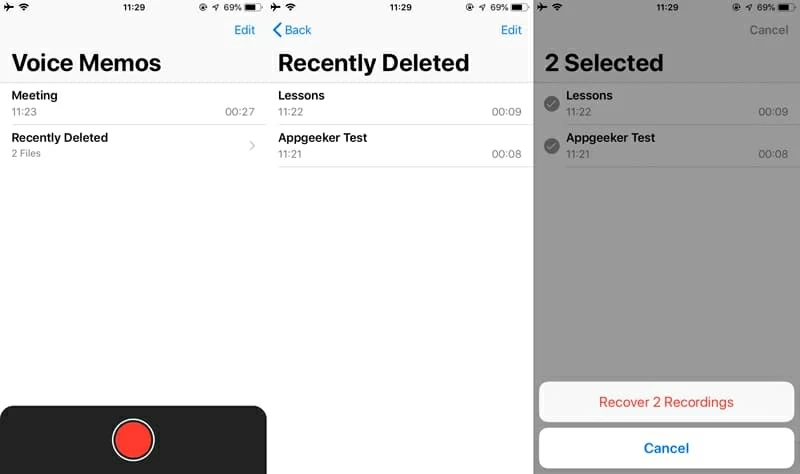
First thing's first, check the Recently Deleted folder in Voice Memos app. When you delete a voice memo on iPhone, it'll be moved to the Recently Deleted album, where it will stay for 30 days before being permanently erased from the device.
Follow these easy steps to restore voice memos from the Recently Deleted folder back to their original locations on iPhone:
It will quickly restore the voice recordings to where it belongs in the timeline.
If you can't find the missing voice memo in the Recently Deleted album, don't fret. Well thank to third party data recovery programs, you'll have a big chance to retrieve voice memos from iPhone directly by scanning its internal memory. This is really helpful when you don't have iCloud or iTunes backup to restore from. If success rate is your top priority, Appgeeker iOS Data Recovery is the tool you stick with.
It is indeed a great tool for voice memos recovery for iPhone. The built-in advanced search engine can scan the device memory deeply and completely and show you all recoverable voice memos that you can recover and save onto the computer. It also can recover other files including notes, contacts, call logs, messages, photos, videos and more
Here's the guide on how to recover deleted voice memos on iPhone without backup.
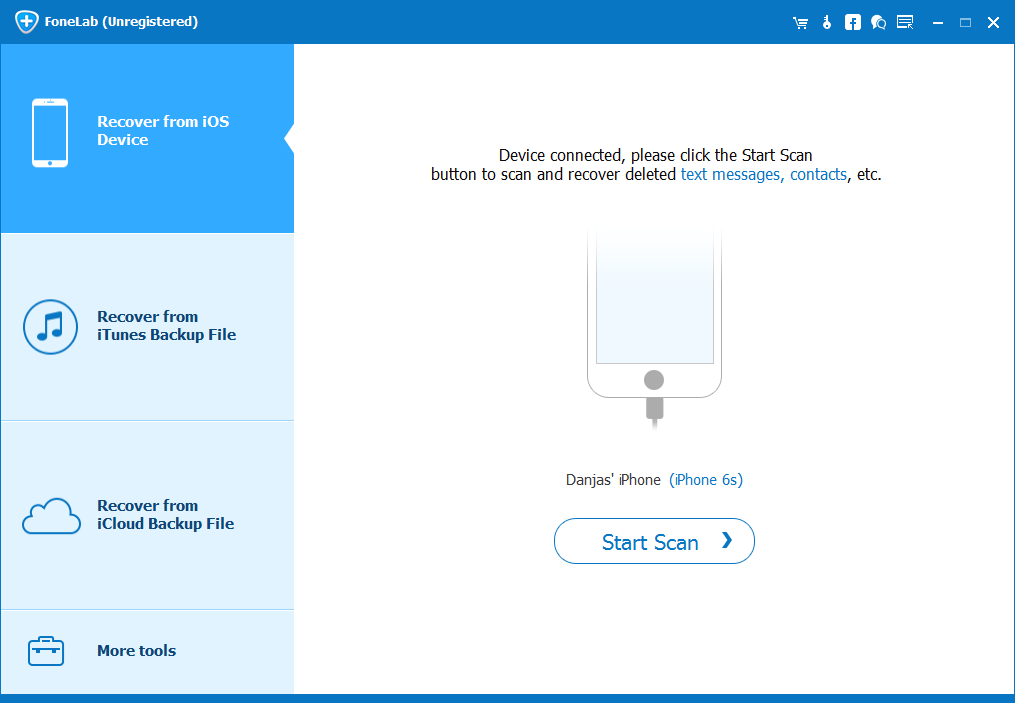
Step 1: Connect iPhone to computer
Start up the program, you'll be happy with its simplicity on the GUI front. Next, select the mode that says "Recover from iOS Device".
Then, connect iPhone to the computer using a USB cable.
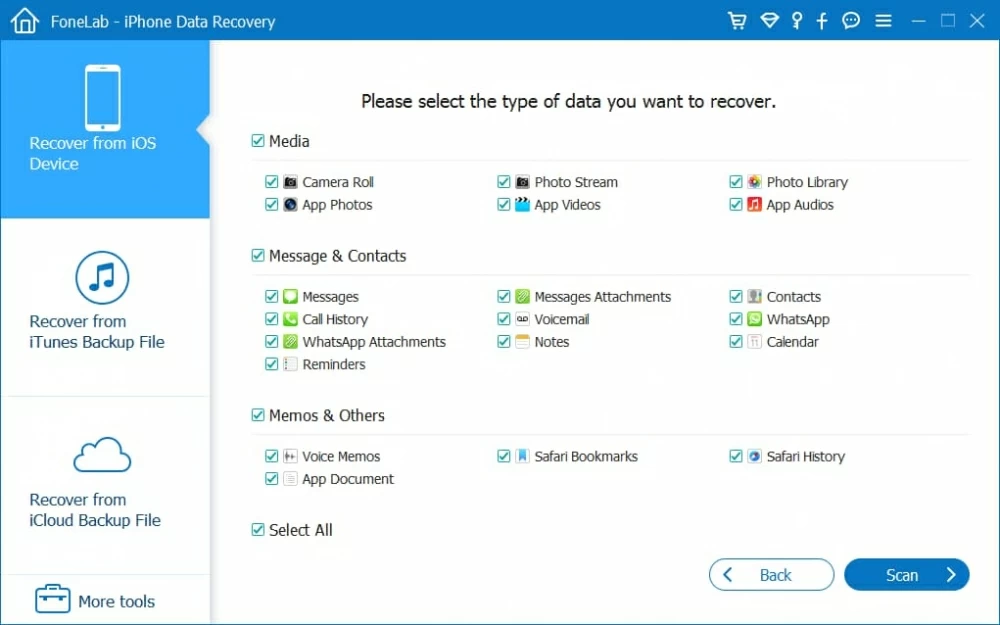
Step 2: Select voice memos to scan
On the next screen, you'll be able to choose the file types you want to recover. Since we're going to recover lost voice memos from iPhone storage, select the " Voice Memos" option, and then click Scan button to run a deep and complete scan of iPhone.
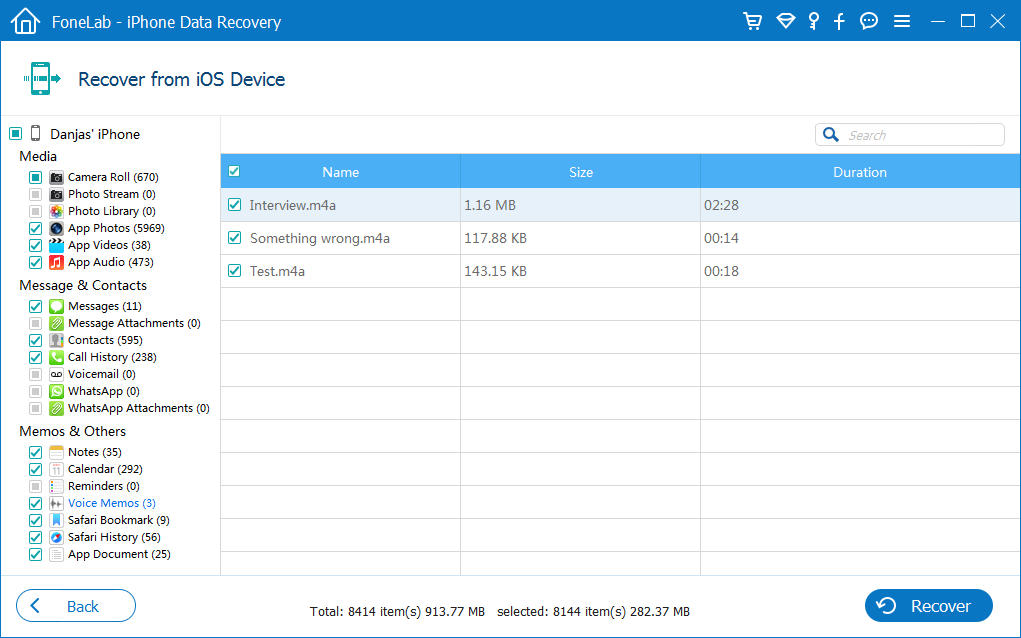
After the scan is completed, all found voice recording files will show on the window.
Step 3: Get the iPhone voice memos back and save to computer
It's time to recover what you want. Simply check the boxes next to each recording item on the list, click the Recover button and browse a location to save them on computer.
That's it!
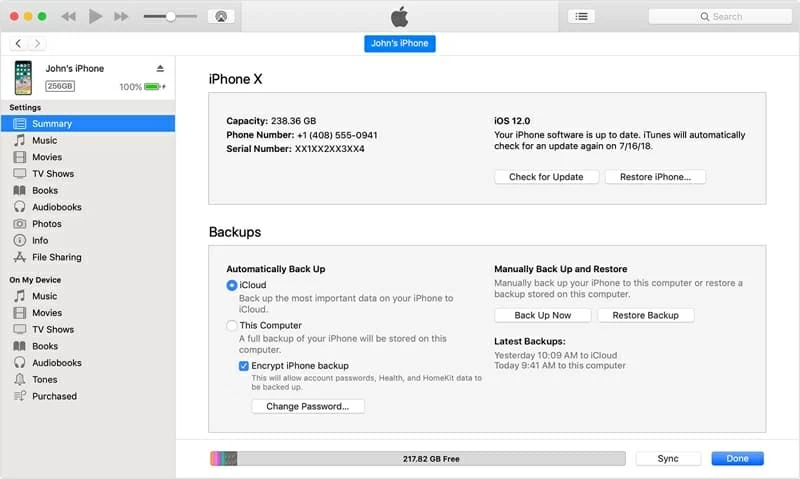
Provided you've backed the iPhone up with iTunes on computer before you lost the voice memos, you can simply restore iPhone from the backup and get deleted voice memos back. For those who're using a Mac with macOS Catalina with 10.15 or above, doing the restoring through Finder.
Leave the iPhone connected to the computer until the whole restoration to complete.
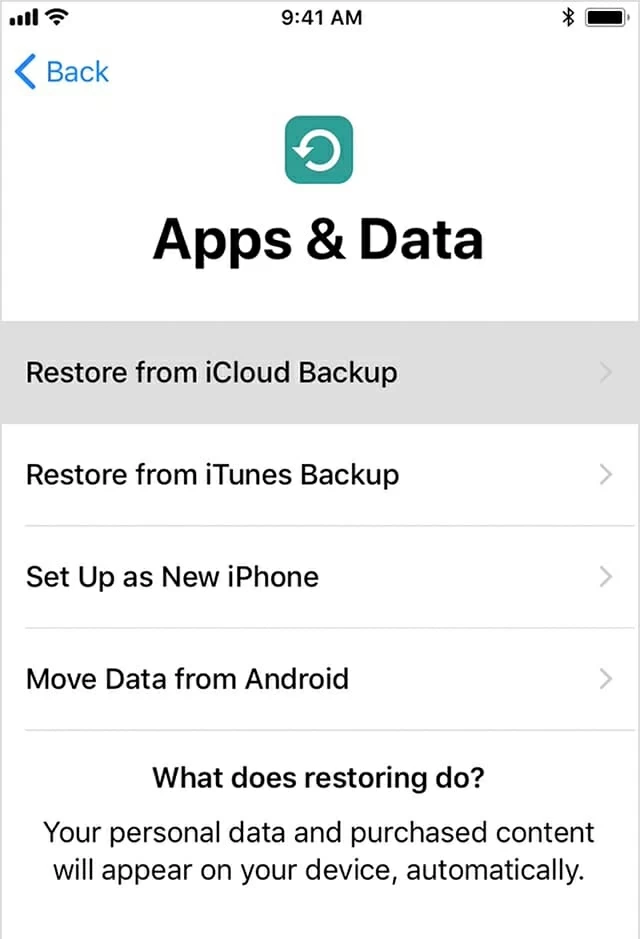
If you have recently created an iCloud backup of the iPhone instead, you can try following steps to restore voice memos. Please back up your important data on the device in advance as this method will reset your iPhone and restart as a new device.
Your voice memos should be recovered soon.
For the issue with the Voice Memo app icon lost or disappeared from iPhone along with some important recordings, it's possible that you accidentally deleted voice memo app on the device or just hidden it in somewhere you won't see.
Simply put, the common way to fix the issue in iPhones is re-download the app from App Store, and turn on Voice Memos in iCloud sync option to recover voice memos on iPhone. Read the article Delete built-in Apple apps on your iOS 12, iOS 13, or iPadOS device or Apple Watch and try to restore voice recorder app. If App Store indicates that the app is already installed, use Search function to locate it.
Alternatively, navigate to Settings > General > Reset > Reset Home screen Layout. This will reset the home screen to the default layout, and keep Voice Memo app icon in the Utilities folder.
Sending or sharing a voice memo is quite easy: