Copy Music Files from Your iPAD to Computer


The iPhone is a terrific portable media player. More and more people are using iPhone to replace their aged iPod for listening to the music on the go or at home. If you're anything like me that end up saving a lot of music files with iPhone, you'll undoubtedly want to get those favorites songs onto your MacBook Pro & Air at some point, whether you need to create a backup of your music locally, or recreate iTunes library after your computer crashed.
Unlike Android devices, iPhone doesn't allow you to access its file systems directly when you connect it into the MacBook. While putting music to your iPhone has always been easy with iTunes, it doesn't work the other way round. So how can you transfer music from an iPhone back to MacBook?
Now, iPhone Data Transfer offers a solution. It is an excellent 3rd party media management tool that makes copying iPhone songs to MacBook a whole new experience. This application positions itself as a replacement to iTunes for managing your iPhone, iPad, iPod without iTune. You will also find the capabilities to transfer, more than just music, your videos, podcasts, audiobooks, TV shows, playlists, photos to and from device of your choice.
The transfer process is simple: connect your iPhone, wait for iTransfer to scan it, select the songs you want to move, specify the directory on MacBook, and then sit back while iTransfer does its thing.
This app will work on the iPhone X, iPhone 8 (Plus), iPhone 7 (Plus), iPhone SE, iPhone 6s (Plus), iPhone 6 (Plus), as well as older iPhone models, iPad, iPod. Essentially you can use this for mainstream mobile devices that are running iOS.
Transfer Music to MacBook Pro & Air
Step 1: Hook up iPhone with the MacBook (Air, Pro)
When you first open iTransfer, you'll be presented with its main interface that is straightforward enough to begin with. All options are clearly laid-out in the interface.
Plug your iPhone that wish to pull off music from into Macbook with USB cable.
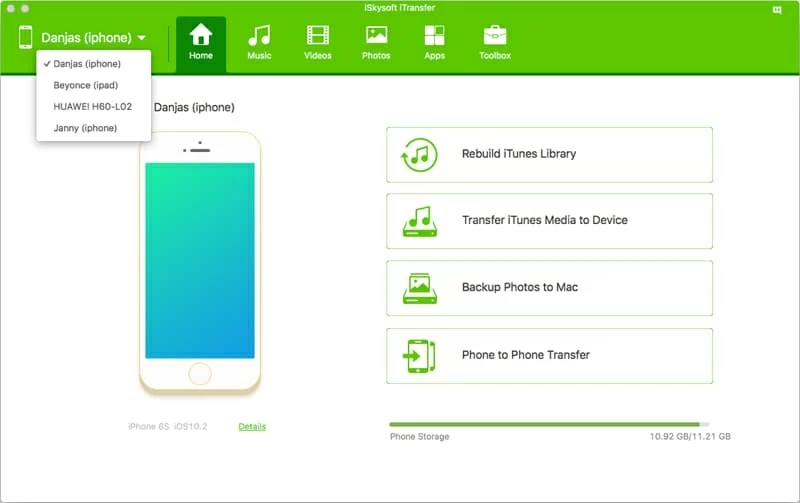
Note that if you want to move iPhone tracks to iTunes on your MacBook, you can take advantage of the "Rebuild iTunes Library" shortcut on the interface. This software can automatically detect whether or not a song is already in iTunes, and just transfer only the needed tracks to the library.
Step 2: Select what song to be transferred
Once connected successfully, click the Music button on the top menu, this should display the complete list of the tunes in the window, allowing you to sort the items by name, artist, album, and other criteria.
Click the Music category on the left sidebar to display all of music files on your iPhone.
Go ahead and select the songs you want to copy to your MacBook. You can do this by checking the boxes next to each one to select individual tracks, or tick the box on the upper left corner of the list to select all of songs.
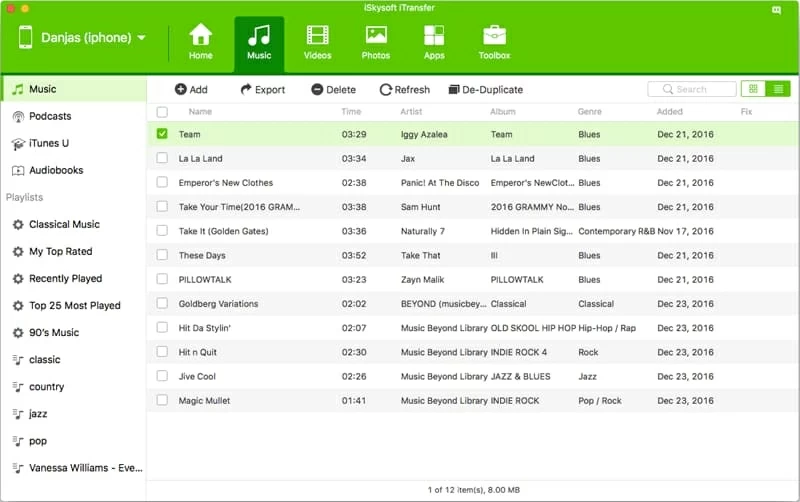
As you can see in the left sidebar of the window, the program show you all playlists created on iPhone. To just copy the songs in a specific playlist over to your MacBook, you can click that playlist, then in the expanding list select the ones you need to transfer.
Step 3: Start saving songs on iPhone to MacBook
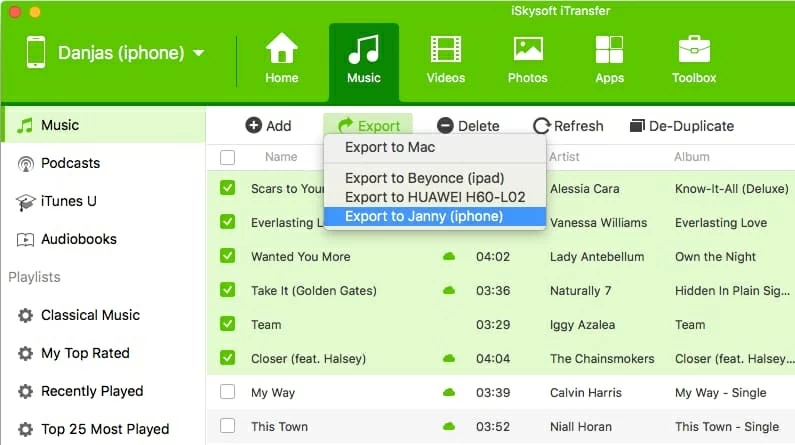
Press the Export button (under Music) and then select Export to Mac option from the drop-down menu. At this point, it will pop up a dialog box that lets you specify a saving path on MacBook. You just select what folder you want your iPhone music to land in.
Finally click the Save button in the dialog box and iTransfer will begin getting music off from iPhone and putting onto your MacBook folder.
After the transfer process is finished, all selected tracks that was on your iPod are copied and saved on your MacBook Air & Pro. Now you can play them on your desktop media player.
That's all there is to export your music from iPhone and back up to MacBook.
Conclusion
Apple deliberately prohibited the option in iTunes to let you back up tracks from iPhone onto MacBook. Fortunately, utility like iTransfer now bridges the gap between your phone and computer, you no longer have to worry about how to move your music and other media files to and from your iPhone.
Supported iPhone Models: iPhone 5, iPhone 5c, iPhone SE, iPhone 6 (Plus), iPhone 6s (Plus), iPhone 7 (Plus), iPhone 8 (Plus), iPhone X, etc.
How to Recover Messages from Android
How to Put Your Call Logs from Huawei Android Phone to Samsung Android Phone