
How to Move iTunes Library to External Drive

The notes on your iPhone can be available for you on your Mac, too. In this guide, you'll learn about how to sync your notes from an iPhone to a Mac without any effort.

There're a few simple ways for you to transfer your notes from iPhone to Mac.
In your daily life, you may like to use Notes to capture your thoughts, record your to-do lists, or save any other items as needed. Recently you've created some notes on your iPhone, and you want to check them on your Mac. Now you'll need to know about how to sync the notes from your iPhone to Mac.
This article will introduce you several ways to sync notes from an iPhone to a Mac, which include iCloud, AirDrop, and a robust third-party program iOS Data Backup & Restore. You'll find it super easy to sync your notes from your iPhone to your Mac, especially with the 3rd-party tool that helps stably back up the notes in a high speed.
Table of Contents
Using iCloud to sync notes from your iPhone to Mac could be easily done with a few simple steps. However, Apple offers only 5 GB of free storage for every iCloud user. And your notes can only be synced when your iCloud account has enough storage. For more space, it takes a monthly cost depending on the storage plan you choose.
Also read: How to backup contacts from iPhone to iCloud
Before you sync your iPhone notes to your Mac, make sure that:
Turn on iCloud for Notes on your iPhone to sync the notes to Mac:
1. Unlock your iPhone and open the Settings app.
2. Tap your name at the top, then select iCloud.
3. Tap Show All, and select Notes, then switch on Sync this iPhone.
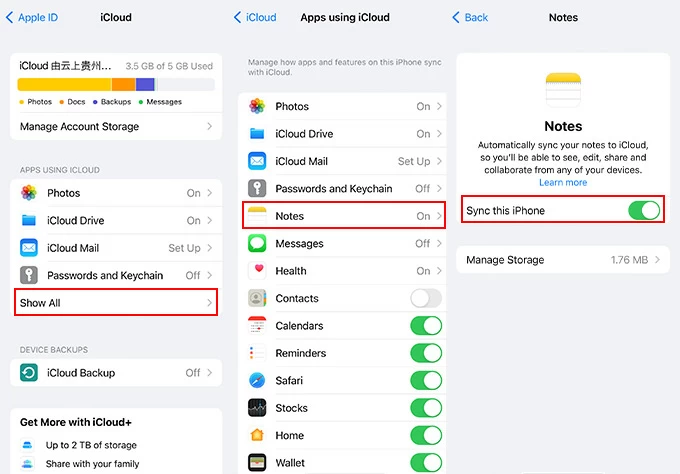
Tip: If your iPhone is running iOS 15 or earlier, step 3 should be enabling Notes directly.
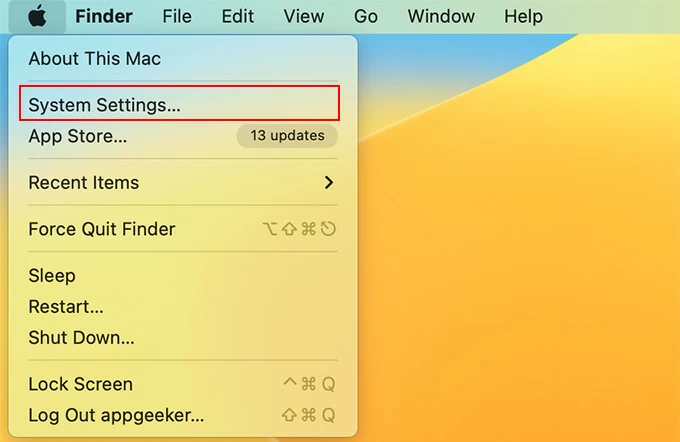
Enable iCloud for Notes on your Mac to receive the synced iPhone notes:
1. Click the Apple logo at the top left corner of your Mac's screen, and select System Settings from the drop-down list.
2. Click your name at the top of the left sidebar, and then select iCloud on the right side.
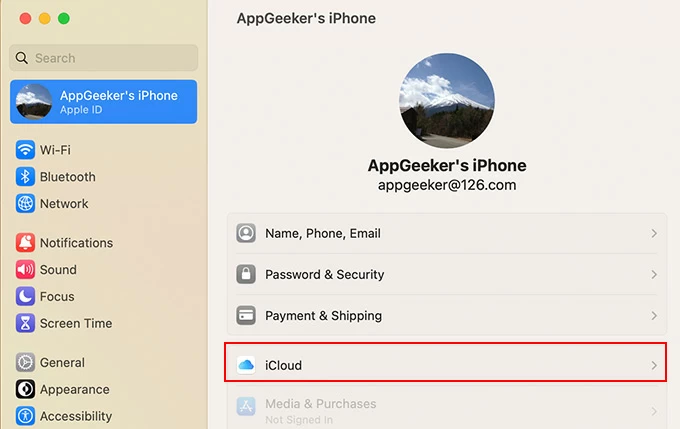
3. Scroll down and switch the Notes toggle to blue.

After the syncing, you can open the Notes app on your Mac to get access to your iPhone notes.
Learn more: How to backup iPhone photos to iCloud
If your iCloud storage is full, syncing notes from your iPhone to Mac using iCloud may fail. When your data size reaches 5GB, you won't be able to sync additional data to iCloud unless you upgrade your storage plan by paying. To address this issue, you may need a trustworthy 3rd-party program iOS Data Backup & Restore to effectively sync your notes from iPhone to Mac.
With this reliable software, you can sync all your notes stably and quickly from your iPhone to your Mac via a wire connection. And after the syncing, your iPhone notes will be available on your Mac, which you can preview and check anytime you want. Besides, this program also helps back up other types of your iPhone data to a computer, like your photos, videos, voice memos, messages and contacts, etc.
Now let's find out how to sync notes from iPhone to Mac in this way.
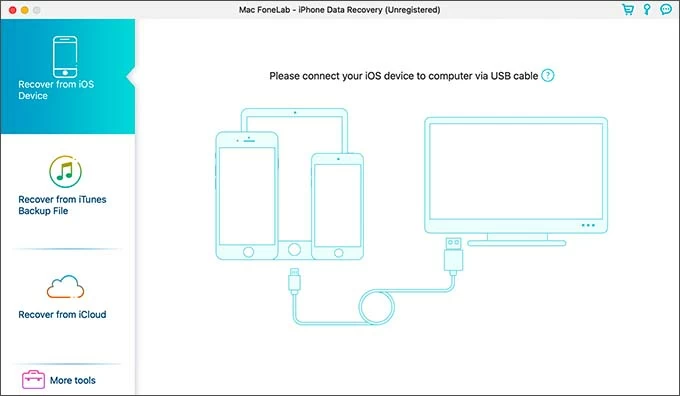
1. Use a cable to connect your iPhone with your Mac. Unlock the iPhone and tap "Trust" on the screen to let the computer access it if prompted.
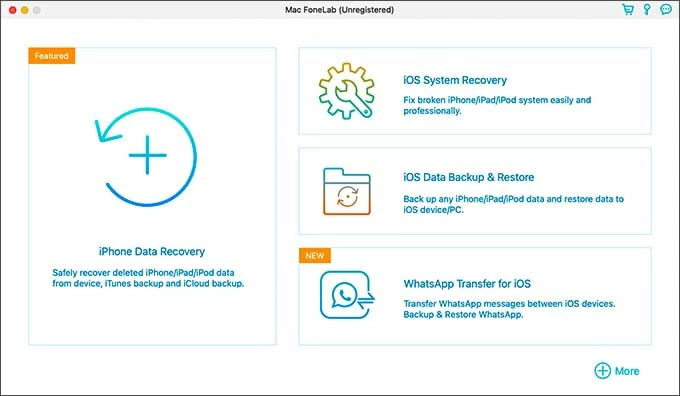
2. Open the software on your Mac, and click "More tools" at the bottom left corner.
3. Select "iOS Data Backup & Restore" on the right.
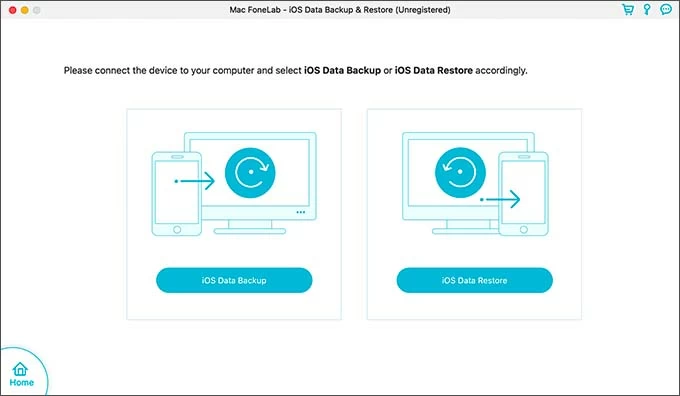
4. Click the "iOS Data Backup" box on the left, then choose "Standard backup" and hit "Start."
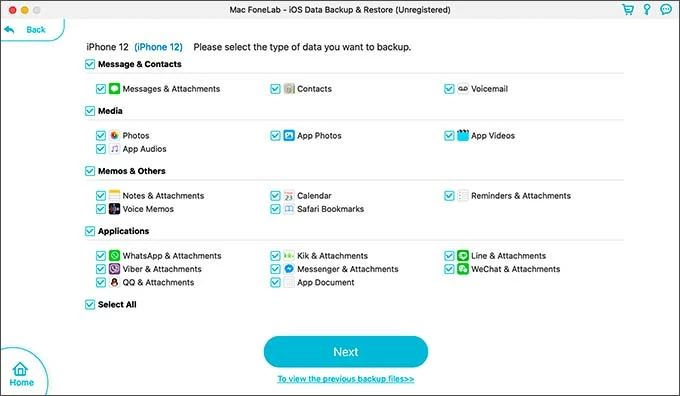
5. Tick the checkbox next to "Notes & Attachments" under the "Memos & Others" tab, then select "Next" to start the iPhone notes syncing to your Mac.
Tip: Pay attention that you'll need to enter your lock screen passcode on your iPhone during the syncing process.
When the syncing is over, you can click "Back" at the upper left corner, then hit "To view the previous backup files" at the bottom to preview your synced iPhone notes on the Mac.
You can also sync your notes from your iPhone to Mac wirelessly via AirDrop, as long as the two devices are close within 30 feet, and turn on WIFI as well as Bluetooth. Plus, ensure that you have turned off Personal Hotspot on your iPhone before you AirDrop the notes to your Mac.
If needed, you can also check our guide on how to AirDrop photos from iPhone to Mac.
Steps to sync notes from iPhone to Mac using AirDrop:
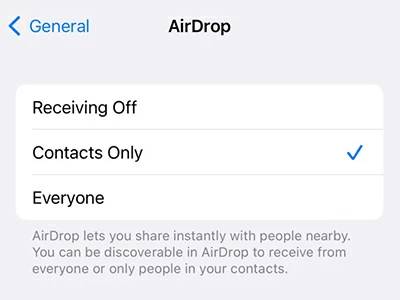
1. On your iPhone, go to Settings > General > AirDrop, then select Contacts Only or Everyone.
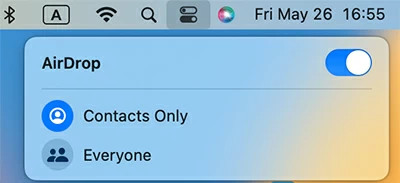
2. On your Mac, open Control Center at the upper right corner on the screen, click AirDrop and select Everyone or Contacts Only.
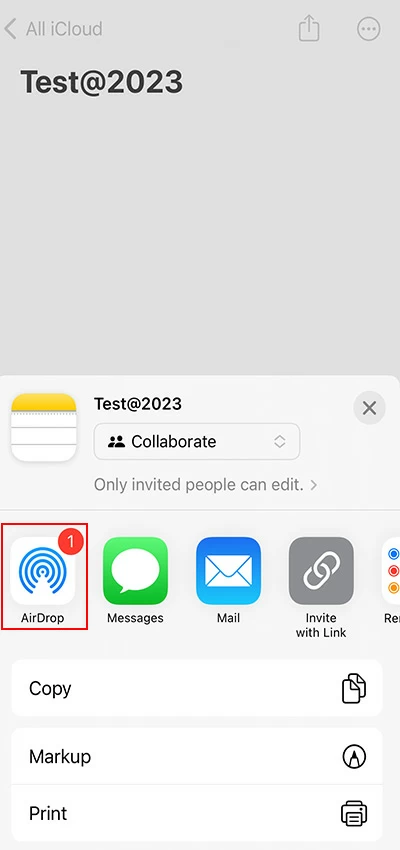
3. Open the Notes app on your iPhone, and select the note you want to sync to your Mac.
4. Tap the Share button at the top right corner, select AirDrop, and click your Mac's name to send the note.
If your Mac is signed in with the same Apple ID account used on the iPhone, then the computer will automatically receive the note. If not, you need to click Accept on the message that pops up from the upper right of your Mac.
Wondering where to find your AirDrop files? Here's a guide to solving your problem: Where do AirDrop files & photos go? Find files on iPhone, iPad, Mac
There could be several reasons why iCloud is not syncing notes from your iPhone to Mac:


