
iPhone Unavailable? How to Unlock

Carry all photos in your pocket even you upgrade to a new iPhone! Here's how to transfer pictures from an old iPhone to a new iPhone in 5 different ways.

![]()
You can transfer your photos over from an old iPhone to a new one effortlessly in a few different ways.
When you switch to a new iPhone but can't bear to part with the precious photos on your old iPhone, transferring photos from your old iPhone to your new iPhone is the kind of everyday chore that feels big until you know the shortcuts.
In this guide, we'll walk you through effective methods on how to transfer photos from old iPhone to new iPhone, ensuring a seamless transition of your valuable memories to the new device so you can access them anytime. From Apple's built-in solutions to creative workarounds, we've got you covered:
Backup Your Old iPhone: This is not only necessary to transfer your photos from old iPhone to new iPhone using iCloud, but also ensure the safety of photos and other data.
Ensure Both iPhones Are Ready: Make sure your old and new iPhone are running the latest iOS version to minimize compatibility issues; and both iPhones should have enough power or be connected to a power source.
Stable Network: Some transfer methods rely on a stable and fast Wi-Fi connection.
iCloud Photos is Apple's cloud-based conveyor belt, effortlessly lifting your photos and videos from your old iPhone and dropping them onto your new one through seamless syncing. Built into every iPhone, it uses your Apple ID to tie your devices together, making it a go-to for transferring your entire photo library from your old iPhone to your new iPhone after setup.
On your old iPhone:
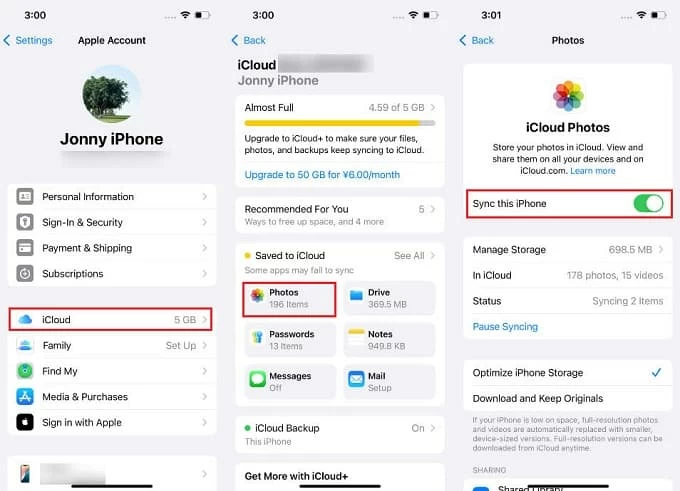
1. Open Settings app, tap [your name] > iCloud > Photos.
2. Turn on Sync this iPhone option.
3. Your photos will be uploaded to iCloud for storage and synchronization.
On your new iPhone:
1. Sign into the new iPhone using the same Apple ID.
2. Go to Settings > [your name] > iCloud, then tap Photos.
3. Switch on the toggle next to Sync this iPhone.
4. Choose either option for "Optimize iPhone Storage" or "Download and Keep Originals."
5. Open the Photos app and wait for photos to download from iCloud to your new iPhone.
Note:
Unlike iCloud Photos, iCloud backup captures everything—photos, settings, apps—in one go, then restores it via the cloud, offering a comprehensive way to transfer your photo collection as part of a full iPhone-to-iPhone migration. This method is especially useful for transferring your photos from an old iPhone to a new one if iPhone has not been activated or has just been reset.
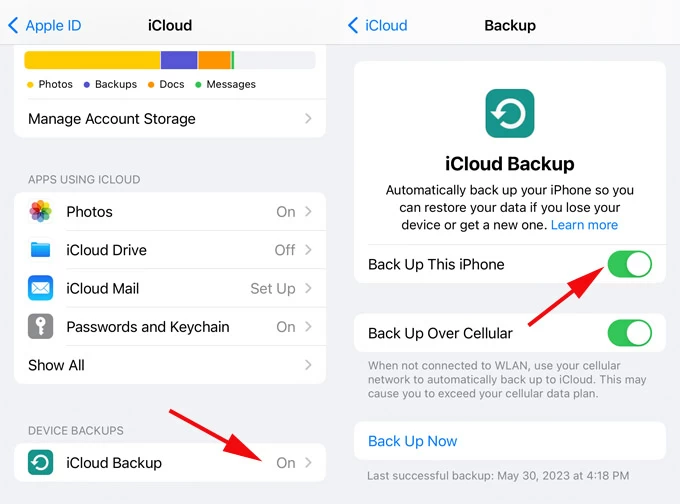
1. Create a latest iCloud backup on old iPhone.
2. Turn on your new iPhone and follow the on-screen instructions to complete the setup.
3. When you reach the "Transfer Your Apps & Data" step, select From iCloud Backup.
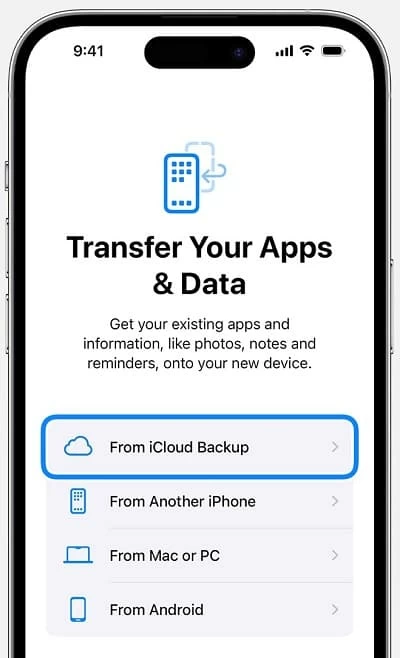
4. Log in with the same Apple account as your old iPhone.
5. Select the recent backup archive to restore from. And you will get the photos from old iPhone on your new iPhone.
When you upgrade to a brand-new iPhone, especially right out of the box, and want to find an immediate way to transfer your photos from the old iPhone to the new iPhone without iCloud, Quick Start, the built-in migration tool for iOS and iPadOS devices, is the best choice.
Quick Start is designed to directly move photos and other data from your old iPhone to the new one during the initial setup without manual iCloud backup or sync, letting you use your new device right away.
1. Power on your new iPhone and bring it close to your old iPhone that is connected to Wi-Fi and has Bluetooth enabled.
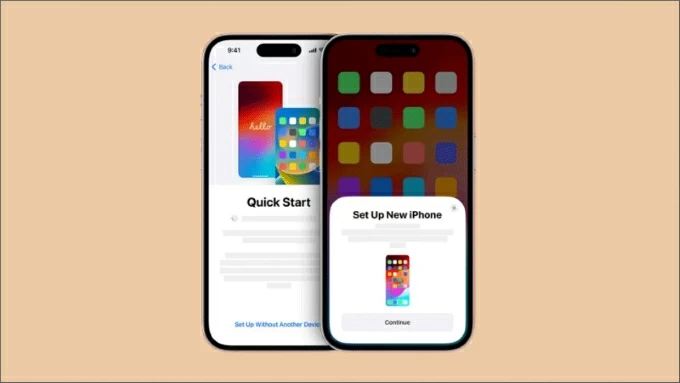
2. Follow the onscreen prompts and you will see the Quick Start screen.
3. A "Set Up New iPhone" notification will pop up on your old iPhone, prompting you to use your Apple ID to set up your new iPhone. Tap Continue.
4. Use the camera on your old iPhone to scan the pattern that appears on your new iPhone to establish a connection.
5. Enter the lock screen passcode of your old iPhone on your new iPhone to verify your identity.
6. Next, follow the instructions on your new iPhone to complete the Face ID setup.
7. When you reach the "Transfer Data from [old iPhone]" screen, tap Continue and agree to the relevant terms.
8. Once everything is ready, both devices will display a "Transferring Data" screen along with a white bar indicating the transfer progress.
After the transfer is done, you can view the transferred photos in the Photos app of the new iPhone.
Note:
To step outside Apple's ecosystem or transfer specific photos rather than your entire photo library from your old iPhone to a new iPhone, Appgeeker iPhone Data Transfer provides a bridge for seamless and flexible photo transfers between iOS devices.
Compared to other methods, the advantage of iPhone Data Transfer lies in its ability to either quickly transfer a large number of photos to your new iPhone at once or selectively transfer only the photos you want, without compressing their quality.
No need to worry about network and storage space issues, you can transfer photos—including those from your Photos Library, Camera Roll, and other sources—from your old iPhone to your another new iPhone while preserving their original quality. It even allows you to copy pictures between iPhones with different Apple accounts.
1. Lunch iPhone Data Transfer and plug your two iPhones into your computer. If required, tap Trust on your iPhones to build connection.
2. When connected successfully, choose the [old iPhone] as the source device at the top of software screen.

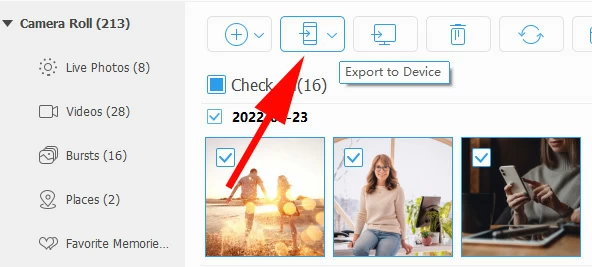
3. Locate Photos tab from the left sidebar. And the software will scan your photo library and display all photos within Camera Roll, Photo Library on its window.

4. Check the desired photos or specific albums you want to transfer.
5. To export photos stored on old iPhone to new iPhone, click Export to Device icon at the top, and select your [new iPhone]. The process kicks off and after a while, your photos will be on your new iPhone's Photos app.
Also read: How to transfer videos from iPhone to Mac
For those who want to transfer a handful of specific photos from an old iPhone to a new iPhone without iCloud and computer, this is where AirDrop plays a key role. AirDrop establishes a direct connection between the devices via Bluetooth and Wi-Fi, ensuring that the photos from old iPhone are sent to your new iPhone immediately.
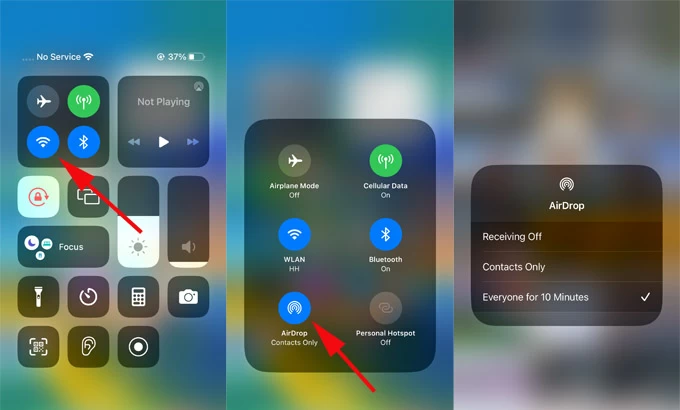
1. Enable AirDrop on both devices. Open the Control Center on both iPhones, turn on Wi-Fi and Bluetooth, then activate the AirDrop icon and set it to Everyone or Contacts Only.
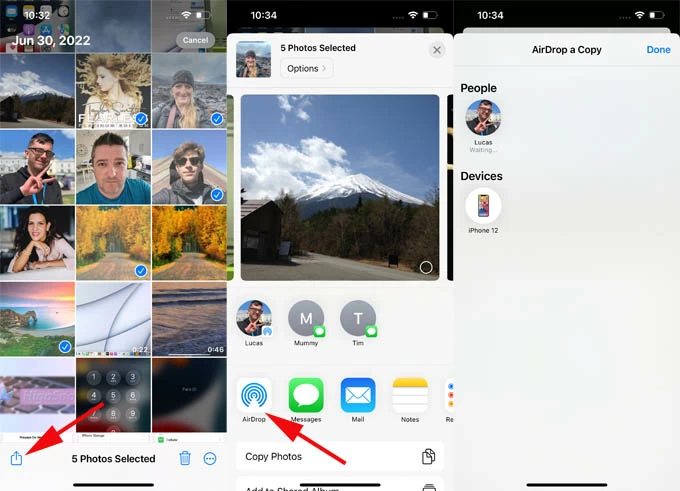
2. On your old iPhone, open Photos app, tap Select, and mark your pictures that you wish to share to new iPhone.
3. Tap Share icon at the bottom-left corner and choose Airdrop.
4. Select your [new iPhone] from the Airdrop menu. Be sure that two devices are as close to each other as possible.
5. On your new iPhone, tap Accept to let the photos get sent to Photos app.
Here are common troubleshooting methods that can rescue your photos when moving them from your old iPhone to your new iPhone hits a bump.
iCloud Troubles
If iCloud sync or backup stops—photos aren't showing or the upload's frozen—first check your Wi-Fi and make sure it is active and stable. Or re-enable iCloud Photos or iCloud Backup to re-upload photos to the cloud space. Also, pay attention to whether iCloud has sufficient available storage space.
Quick Start Failure
If you don't see the Quick Start screen, restart your devices. If Quick Start cuts out mid-transfer, ensure both iPhones are charged and placed side by side—almost touching. And the old iPhone must be on a Wi-Fi network and have Bluetooth turned on.
AirDrop Photo Sending Failure
To transfer photos to a new iPhone, the distance between your two iPhones should ideally be within 30 feet, with both Wi-Fi and Bluetooth activated. Most importantly, the AirDrop visibility on both devices should be set to "Everyone" or "Contacts Only."
New iPhone Not Showing Photos
Transferring a large number of photos might exhaust your new iPhone memory, you can consider optimizing your iPhone's storage space, for example, by going to Settings > [Your Name] > iCloud > Photos on your new iPhone and selecting "Optimize iPhone Storage."


