
The Easiest Way to Capture Clips on PC

Here's a tutorial for recording video on Lenovo laptop using the built-in recording tools in Windows as well as a couple of third-party video recorders for Lenovo laptops.

Lenovo offers a diverse selection of laptops, from the high-performance ThinkPad to the budget-friendly Chromebook, which is widely used by millions worldwide. With the growing needs of video recording, many users find it valuable to record video on Lenovo laptop, whether to capture game clips, create instructional videos, or record videos on laptop screen for online courses or work meetings, ensuring convenient accessibility in the future.

Users can easily record video on Lenovo laptop screen using a built-in screen recorder for Windows 10 and 11.
Running Windows OS, Lenovo laptop comes with built-in screen recording tools which allow you to record videos for free. Also, there are many 3rd-party video recorders for Lenovo laptop users to screen record desktop on Windows 10 and 11 with ease. If you're looking for a laptop video recorder to cover all your needs of video recording and editing, Screen Recorder by AppGeeker is obviously the go-to option to capture anything on your laptop screen.
In this post, we'll share how to record video on Lenovo laptop in multiple ways. Keep reading to find the best laptop video recording software for your Lenovo computer.
Table of Contents
Lenovo laptop comes with a built-in video recording tool called Xbox Game Bar, letting you record video on your laptop screen for free. Moreover, newer Lenovo laptops running Windows 11 have an additional screen capture program - Snipping Tool - that can record video on your Lenovo laptop and capture everything displayed on the screen.
Xbox Game Bar is the built-in screen video recorder on Lenovo laptop with Windows 10 and later Windows versions. This free video recording software lets your Lenovo laptop record videos on laptop screen effortlessly by pressing shortcut buttons.
While Game Bar was originally designed for gamers to enhance their gameplay experience, it has evolved to be a versatile tool with the most popular feature for screen recording videos on Lenovo laptop and taking screenshots.
However, keep in mind that this Windows video recorder can only record laptop footage within one single app and doesn't have the ability to record the desktop or File Explorer. See how to record video on Lenovo laptop using Game Bar below:
1. Open the app or window that you want to record.
2. Hold the Windows + G keys together to launch Xbox Game Bar toolbar.

3. Press the Windows key + Alt + R simultaneously to start recording. And a small timer will appear in the top right corner of the screen to indicate that the recording is in progress and how long you've been recording.

4. Press Windows key + Alt + R again to stop recording. Or you can click the Stop Recording button in the Game Bar toolbar.
Once you end the video recording on your Lenovo laptop, a notification Game Clip recorded will pop up. By clicking on it, you can preview the newly recorded video clips. By default, Xbox Game Bar will record laptop videos on Lenovo in MP4 format and save it to Videos > Captures folder.

There's an additional option to record laptop video on Lenovo if you're using a newer version of Windows. The latest update for Windows 11 has leveled up Snipping Tool. Used to a simple screenshot capture utility, the Snipping Tool can now record a video on Lenovo laptop and save the recording result as an MP4 file locally.
1. On your Lenovo laptop, press Windows + S keys to open Windows menu Search Bar.
2. Enter Snipping Tool and click the searching result to open it.
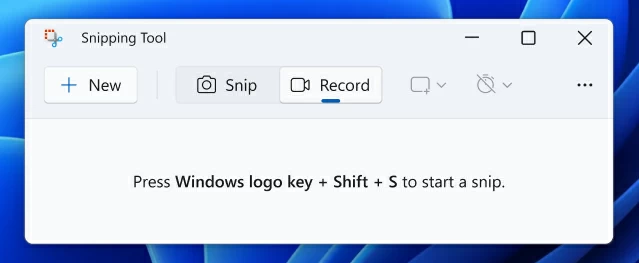
3. Go to the top controller and click the Record button to enable its screen recording feature.
4. Select + New button to create a fresh screen recording overlay. You can also use the Ctrl + N keyboard shortcut to open it.
5. Drag the cross cursor to choose the area you want to record from the laptop screen, be it a full-screen video, or a specific window or app.
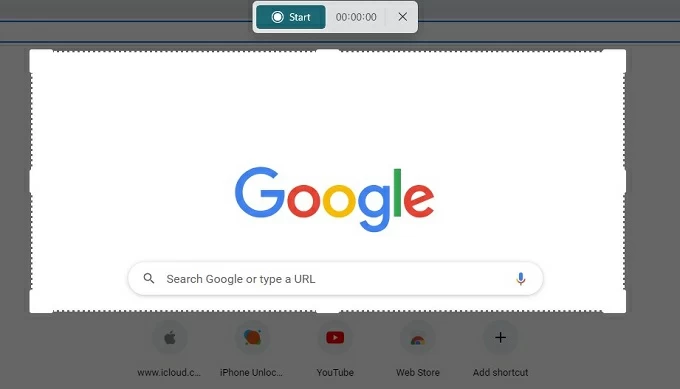
6. Begin video recording on your laptop by clicking the Start button; stop it from recording through the Stop button at the toolbar.
In its pop-up window, preview the result before saving the video recording on your Lenovo laptop.
If you want a laptop video recorder that is easy to use while offering better recording and editing features, AppGeeker Screen Recorder is a really simple yet powerful video recorder for Lenovo laptop users to record videos from their screen, webcam, or both.
With this user-friendly tool, even a beginner can easily record videos on Lenovo laptop from any onscreen regions and running apps, including but not limited to webinars, YouTube videos, online games, video calls, live streams and more. It also offers users extensive customization to edit and export laptop video recordings on Lenovo in the quality and format they want.
In addition to capturing videos with audio from Windows system and microphone, you can even record picture-in-picture videos with your webcam enabled simultaneously. Available for Windows 10 and Windows 11, here's how to record video on a Lenovo laptop:
1. Download and open Screen Recorder on your Lenovo laptop, then click Video Recorder button.

2. Choose a recording area on your Lenovo. Click Full to capture the full screen, or click Custom to record a particular area of your laptop screen. If system sound or microphone audio is needed while recording on Lenovo laptop screen, enable the options accordingly.

3. Hit REC button at the right side of the toolbar to start recording.
4. Perform any actions that are required to make an ideal video on your Lenovo laptop.
5. Hit the square Stop button at the floating bar to stop the video recording.
![]()
When the recording stops, a window will appear to offer you the ability for reviewing and editing the recorded video, just click Done to save it if you don't need any modification.
The open-source OBS is one of the best free video recording utilities for Windows, macOS, and Linux laptops. Packed with useful features, including multiple-source recording and customizable settings, this freeware allows you to assign hotkeys to quickly initiate a video recording on your Lenovo laptop, which makes it excellent for recording gaming footage, live streaming and more.
However, this free video capture tool has a complex interface and requires a certain learning curve. But if you're quick learner, this is how to record a video on a Lenovo laptop:
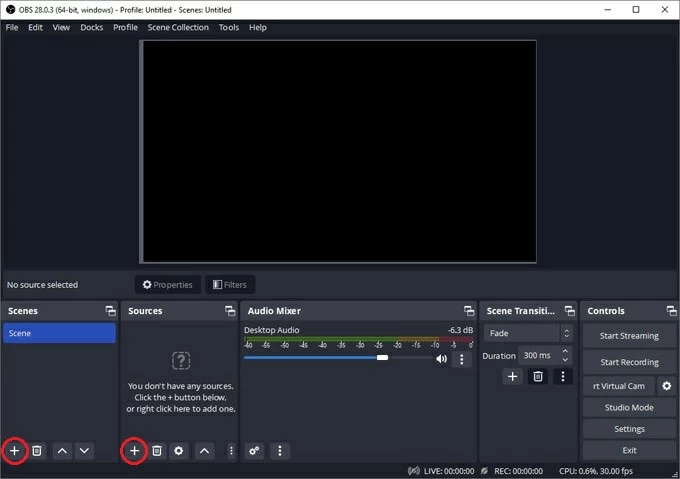
1. Download and install OBS on Lenovo, then open it.
2. Click the add + button in the Scenes section to create a new scene.
3. Hit the + button in Sources section, and choose Display Capture from the list to set a recording source.
4. In the Audio Mixer tab, add a sound source you want to record.
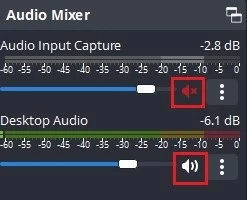
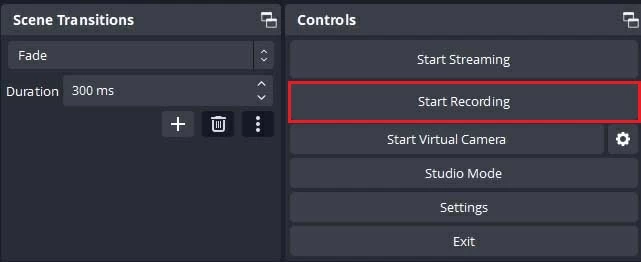
5. Click Start Recording under Controls to begin video recording your Lenovo laptop, and stop it through Stop recording button. The captured video will be saved automatically as .mkv files.
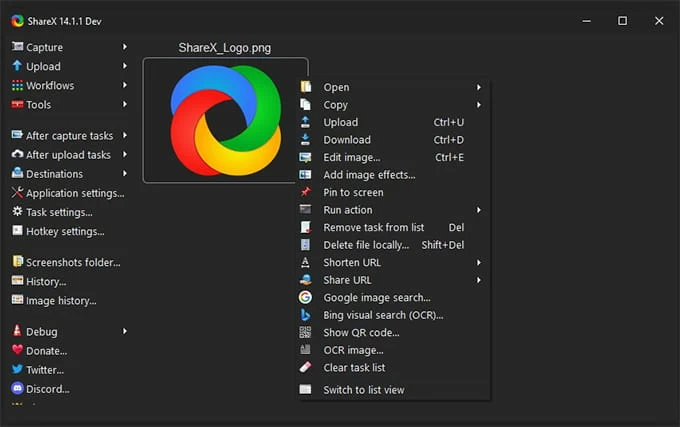
Another lightweight and open-source video recorder that's perfect for simply video recording on Lenovo laptops and desktops is ShareX. With this versatile tool, you can capture, process, and share screencasts, screenshots, and GIFs. Besides, ShareX includes a wealth of editing tools that make it easy to create good screen capture from a Lenovo laptop or Windows PC.
In case you would like to know how to record a webcam video on Lenovo laptop as well, here we'll introduce you to the quickest way to record videos with Lenovo laptop's built-in camera using the default Camera application.
The Camera app is a built-in feature in Lenovo laptop. It has a simple interface and very feasible settings to capture your videos. Here is how to record a video on Lenovo laptop using the Windows 10 Camera app.
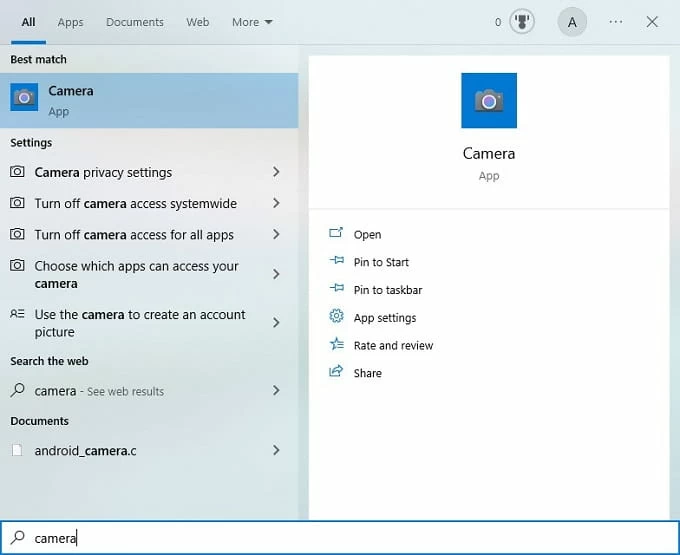
1. Type and search the Camera in the windows search box. And then open it.
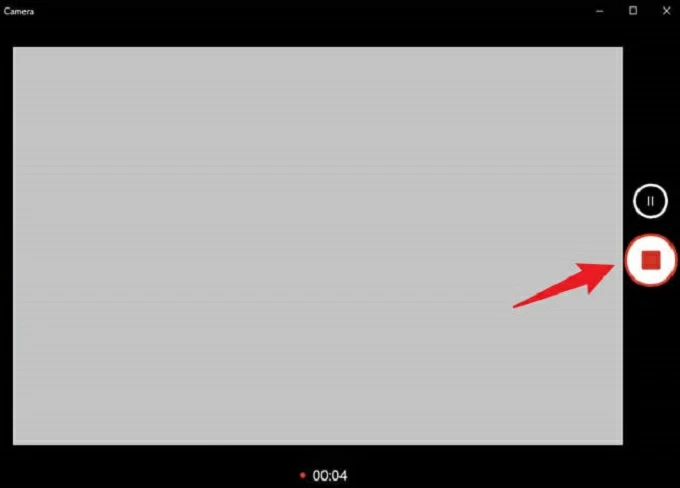
2. Click on the video icon to switch it to Video mode, then click it to start recording. While recording, you can pause the recording anytime by clicking the Pause button.
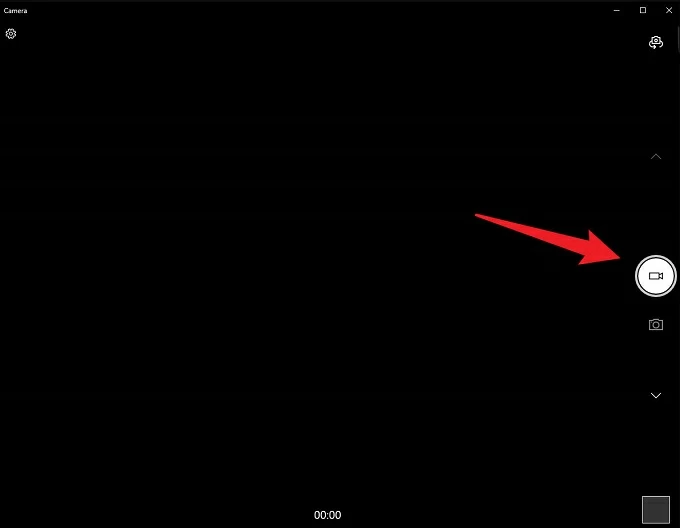
3. Click the Stop button to stop recording.
After completing the work, you can click on the thumbnail at the bottom to review previously captured videos. Overall, recording your videos on Lenovo laptop with the Camera app is pretty easy and straightforward.
1. How to record a video on my Lenovo laptop Windows 10?
If you're looking for a quick way to record screen video on Lenovo Windows 10, Xbox Game Bar is a built-in and free option. To use Xbox Game Bar to video record on your Windows 10 laptop:
2. How do I record video on my Lenovo laptop using the video camera?
Lenovo laptops have its own default video recorder and built-in video camera.


