
How to Record Zoom Meetings on Mac

Are you looking for methods to record your video with a webcam on your PC? In this article, we'll help you choose the suitable recorder and break down the features of each one.

For most Windows 11 users, recording video from webcam is frequently required in daily life.
With the increasing use of webcam on PC, the demand for recording videos with webcam has risen. Sometimes you attend a crucial meeting and want to record everything being said to work on your task efficiently. Or you just want to record some lovely moments when you talk to families on video calls. Maybe there is a webcam on your Windows 11, but you have no idea how to record the video with your webcam.
In this article, we will take you through 4 different methods of recording webcam video, including using a built-in Windows 11 feature Camera, a browser extension Loom, and a reliable third-party tool AppGeeker Screen Recorder.
Also read: How to record your computer screen and audio at the same time?
Table of Contents
The preparation of recording webcam videos is key to helping you produce videos effectively. Firstly, you need to decide what you will record through your webcam in specific scenarios, some of which are as follows:
After planning your video-recording type, the next step is to prepare for the recording. Below are some suggestions you can take to get yourself ready for the final recording.
1. Turn on sufficient lighting in your room for a meeting, stream video or virtual meetup.
2. Enable your webcam and system sound or microphone.
3. Check your microphone and sound from headphones/speakers.
Note:
Now that you are done with the preparation, let's see different methods that you can use to start the recording.
You may also want to know: How to record music on Computer?
One of the best parts for Windows 11 is that it provides the most necessary tools in the operating system, like the built-in app Camera. It allows you to record your webcam video with simple clicks. In the following, we will show you how to use Camera to record video from the webcam on Windows 11.
1. To begin with, you need to press the "Win key + S" shortcut and type "Camera" in the search bar, then open it.
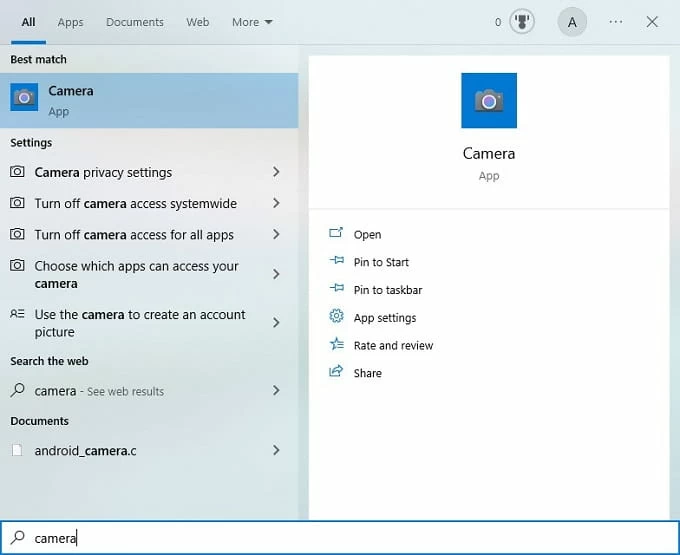
Tip: If you have a built-in webcam in your Windows PC or laptop, then you can move to the next step. If not, be sure that your peripheral or USB webcam has been connected and turned on.
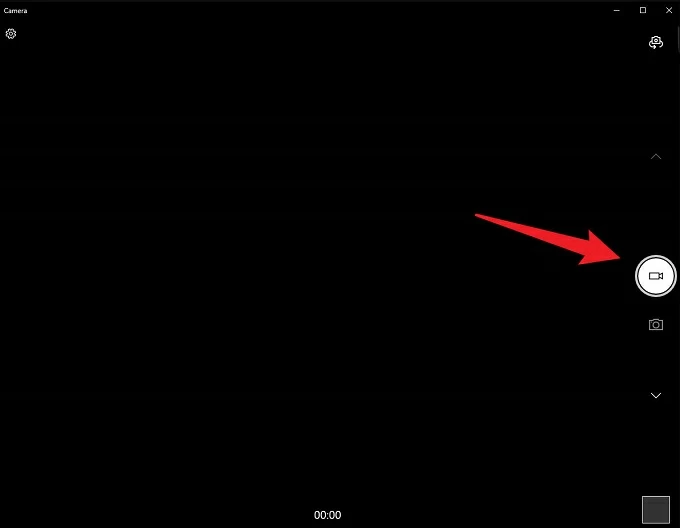
2. To start recording, switch it to Video mode and press the record button on the right side.
3. At any time during the recording, you can pause the recording by clicking on the pause button or pressing the stop button (the red circle) to stop recording.
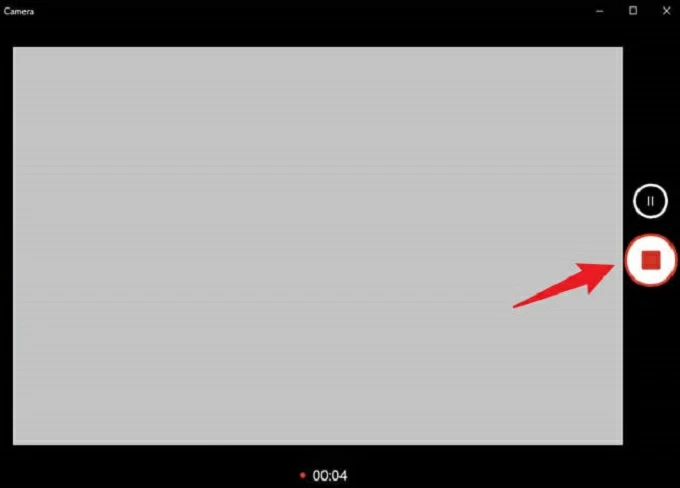
4. During the recording process, you can see a stopwatch in the bottom middle of the window telling you how long you have been recording.
5. Once done, you can review the recorded video by clicking the thumbnail on the lower right of the Camera app.
6. You can change your video recording settings by heading to the gear wheel icon in the upper left corner of the app.
Check this to learn: How to record a webcam video on Mac?
If you find the Windows 11 built-in Camera app only serves a simple capturing feature, and is hard to meet your advanced requirements, you can choose a third-party software Screen Recorder to record webcam video from capturing to editing.
It is a complete recording solution for your work and streams that you can do all your webcam recording in simple steps with professional quality. Followings are some of its unique features:
Below are the detailed steps to record webcam video via Screen Recorder.
1. After downloading, install and open the tool on your Windows 11.
2. On the main screen, click the "Webcam" button on the right side.

3. Before recording webcam videos, you can alter some recording settings in the bottom bar.

4. Once ready, hit "Record" to start recording your webcam video.
5. You can pause the recording at any time by clicking the pause button in the floating bar. When you want to stop recording your webcam, hit the red square button.

6. After that, you can edit the video with its built-in feature. Later, click "Done" in the lower right corner of the window, and then the software will save it to the default location automatically.
You can also use a browser extension to record webcam videos and chats. Chrome Store has a great number of screen recorders that you can add to your browser to capture your video. In the following, we'll use Loom as a demonstration.
Step 1. Go to chrome.google.com and type "Loom" in the search bar.
Step 2. Click the "Add to Chrome" button and tap "Add extension." After that, the browser will install it automatically.
Step 3. Hit the puzzle pattern to pin Loom for easy access.
Step 4. After signing in to your account, you can click "Start recording" to begin recording.
How to zoom in or out via Camera app?
Camera app doesn't offer this function. But you can zoom in or out your picture by cropping it using the built-in feature. To do this: GO to Start > Photos > Choose a Photo > Crop & Rotate > Aspect Ratio > Save a Copy > Save.
Can I change my Camera settings?
Yes, you can change your Camera settings in Windows 11. First, click "Start" and search for "Camera". Once open it, hit the settings button in the upper left corner. Then you can choose to change a number of settings, like the framing grid or photo quality.
How to switch a built-in webcam to an external camera?
If you want to record webcam videos from an external camera, you may go to Start > Camera > Change camera to switch a built-in camera to the external one.


