How to Record Desktop Audio with OBS on Windows

Want to get a Mac screen recorder to record the video and audio playing on a Mac. This guide walks you through the simplest steps to record video on Mac with audio.

What to know if you'd like to record video and audio on Mac:
It's possible to record the audio and video on a Mac with Mac built-in recording tools and third-party video recorder apps.
In the digital age, you will find yourself in situations where you have to record the video and audio on your Mac many times. Maybe you're playing an online game and want to make a video of it, or you want to record your Mac with audio to make a tutorial video. The good news is that there are built-in tools on macOS to help you record your video and audio on Mac.
However, keep in mind that macOS won't allow you to record your system sound for security and copyright reasons. That's why you will need some extra tools for video recording on Mac with internal or external audio, or both at the same time.
To make things easier, in this guide, we've put together the Mac's video recording feature as well as video recorder software on the market to help you record your video and audio on your iMac, MacBook Air, MacBook Pro and other Mac machines.
Table of Contents
macOS comes with the native video and audio recorders that allows users to make a video recording of the full screen or a certain area on the Mac screen. Also, you can record and mix your voice as well as other audio using a selected microphone.
If you're running a Mac with Mojave OS, or newer macOS version, you can use the built-in Screenshot Toolbar to record the video and audio on you Mac. You will just have to use simple keyboard shortcuts and the video recording with audio on Mac through Screenshot Toolbar will be started in seconds.
Note:
Follow the steps to learn how to video record with audio on your Mac using Screenshot Toolbar:
Step 1. How to access Screenshot Toolbar on macOS
Press the Shift + Command + 5 shortcut on your keyboard to open the Screenshot Toolbar. The onscreen controls will show up.

Use Shift + Command + 5 shortcut to access the Screenshot Toolbar on macOS Mojave and later.
Step 2. Select your audio source for video recording
Click on the arrow icon beside Options, you will find multiple options you can select for recording video. In Microphone, you can check a Mac's built-in microphone or an external one to include audio in your video recording. You can also change the storage location, or set a timer to count down before the video and audio recording start.
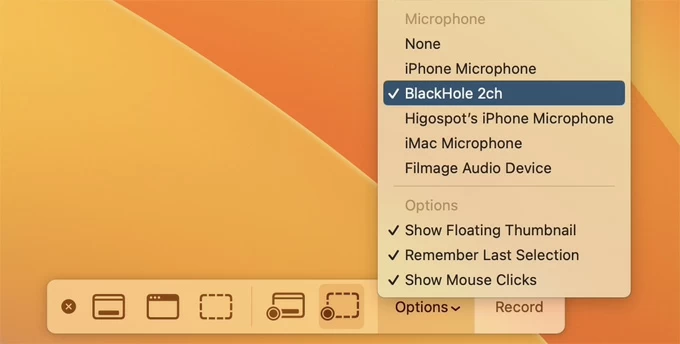
The options you can adjust in the Screenshot Toolbar before starting to record video and sound.
Step 3. Select to record entire screen or selected portion
In the middle of the toolbar, click the screen recording icon to record video of a full screen, or drag the cursor to select a specific portion if you only want for a video recording of a part of the screen. When you're ready, click the Record button to get started.
Step 4. Stop the video recording with audio
Now when your recording is complete, just hit the red Stop button from the menu bar to end it. You can also press Command + Command + Esc to stop your video and audio recording with Screenshot Toolbar. The video will be automatically saved on your Mac as an .mov file. You can now play and edit the video recording as you want.

Using Screenshot Toolbar to record video and sound on Mac is simple, without having to download extra software, and on top of that, it's totally free.
Another convenient method to record video and audio is through Mac's QuickTime Player. Like Screenshot Toolbar, you will not have to download extra software as QuickTime Player is already installed on your Mac as a system software.
Here's how to record your video and audio on Mac using QuickTime Player. It applies for MacBook, iMac, Mac Mini, Mac Studio and Mac Pro.
Step 1. Open QuickTime Player first. Search it in the Launchpad and click it to open.
Step 2. Click on the File in the top menu and select New Screen Recording.
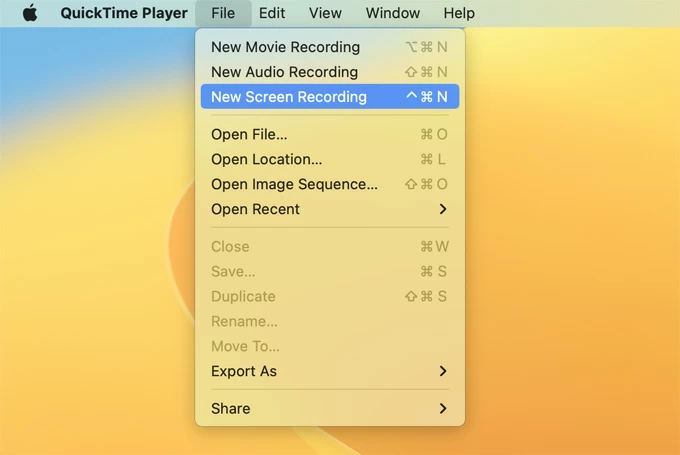
Select New Screen Recording from QuickTime Player to enable the video recording on Mac with audio.
Step 3. Click on the Options and select your audio input for the video recording.
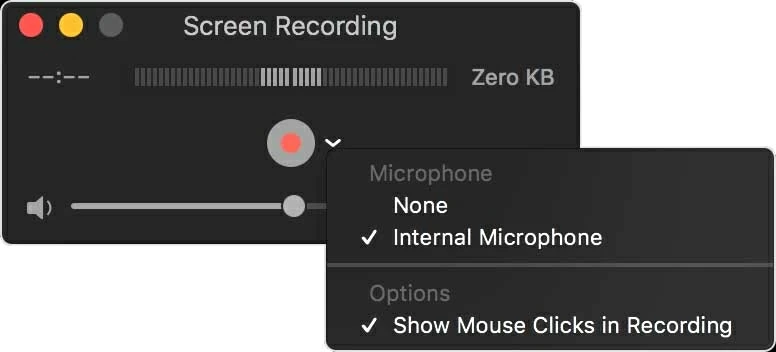
Select your audio source you want to record with video in QuickTime Player.
Step 4. To record a video of the full screen, click the Record button and click anywhere on the screen to start recording. To record a portion of your Mac, specific what part, followed by Start Recording.
Step 5. When it's completed, simply click on Stop from the menu bar to end your video record, or press and hold Command + Control + Esc. The video you recorded will be stored on your Mac desktop by default, and open automatically with QuickTime Player.
It is important for you to know that the recorded video you made on a Mac with QuickTime Player will be named as 'Screen Recording + date + time.' You can then play and share it on other media platforms.
QuickTime works well on most version of macOS. However, just like Screenshot Toolbar, Mac's QuickTime Player will only record video with audio from built-in and external microphone. It cannot record computer audio or system sound, such as the sound from a video playing in YouTube, track from a Music file, other participants' voice in an online meeting, etc.
You don't want to just record a video with voice from a mic voice the way Screenshot Toolbar and QuickTime Player does. If you want to record your mic audio and the system sound coming from the video or other active apps on your Mac, you'll have to switch to third-party recording tools.
Using the AppGeeker Screen Recorder is an ideal option to record the video and audio on your Mac at the same time. It is capable of capturing all your video activities with audio simultaneously. The best thing is that you can record the internal and external audio selectively or both, so you will find it more effective in recording and mixing the system sound, microphone audio when you preform the video capture.
Plus, it can also use your webcam to record a video with your face to make picture-in-picture videos, which makes it pretty convenient to record your YouTube videos with audio or make a tutorial guide showing what happens on and in front of your Mac.
Let's see how to record video on Mac with microphone audio and computer sound Appgeeker.
1. Launch Appgeeker Screen Recorder for Mac. Once it opens, select Video Recorder for the purpose of recording video and audio.

2. In the next window that open, Select Full for recording a video of the entire Mac screen or select Custom for specifying a portion to video capture. It depends on how you want your video recorded from your Mac.
Next, Enable the System Sound option if you want to record the audio coming from your Mac. The Microphone option is also available if you'd like to record your own voice on Mac.
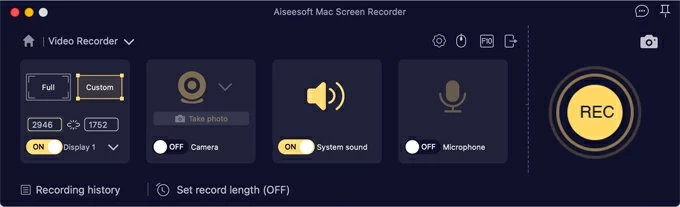
3. After you've configured all video and audio settings, click the REC button to start recording the video and computer sound on your Mac.
![]()
Before starting your video recording, if you prefer to create a more advanced video recording with audio on your MacBook or iMac, hit the Gear icon at the upper right corner to configure more recording settings to make everything recorded from your Mac as you require.
4. Once done with the Mac video recording, you can now click the Stop button to end the task.
The preview window will come up automatically. Play the video and export it on your Mac by checking the Save button. You can clip the video recording as well.
If you don't like the video and audio recording you just made, hit Re-Record to start a Mac video and audio recording again
With this easy-to-use video recorder tool built-in Appgeeker Screen Recorder, you can record everything on your Mac, including video, system audio, and external sound from mic.
Here in this guide, we tried to tell you some of the easiest ways to take a video recording on Mac with audio. You can make it with the built-in recorders of macOS, but sometimes you will need a more advanced option like AppGeeker Screen Recorder which offers a wider range of features to do a more flexible and efficient video and audio recording with controls.


