How to Transfer Videos from iPhone to Mac


Platforms
Developed for both Windows & Mac users

Are you looking for ways to transfer your videos from an iPad to a Windows computer? Here is everything you'll need to know about how to import a video from your iPad to PC.

Whatever your reason to transfer videos to a PC from your iPad, you can resort to many tools to complete the task. Appgeeker iPhone Data Transfer can be a great option for transferring iPad videos to PC (or vice versa), since it's excellent for fast video transferring, on-the-fly video format conversion as well as simple video management.
![]()
After downloading your videos from iPad to computer, you can enjoy watching the clips on the PC's larger screen.
If your iPad is feeling slow, it might be time to do a little maintenance. For example, you can transfer your videos from the iPad to your PC to clear the storage space for faster running.
Transferring videos from your iPad to Windows PC not only helps speed up the iPad, but also makes it more convenient for you to edit your videos using more professional software on the computer. Here's how to transfer videos in an iPad to a PC by different means.
Table of Contents
Windows PC provides some native tools for you to transfer videos from your iPad to the computer, such as File Explorer and the Photos app.
File Explorer can be found in every Windows computer. However, you can use the Photos app only if your computer is running Windows 8/10/11.
Note:
Instructions on transferring PC photos to iPhone can be found here: How to transfer photos from your Windows PC to your iPhone
On newer Windows systems like Win 8/10/11, you can transfer your movies from iPad to PC using the built-in software, the Photos app. As long as your iPad gets detected by the app, you can easily import the iPad videos to your computer. Besides, you can edit your videos directly in this tool like trimming or merging. But it's worth noting that it may take a long time to transfer multiple large videos in this way.
Tip: The Photos app in Windows computer also helps transfer videos from iPhone to PC.
Step 1. Use a cable to connect your iPad into your computer. Make sure both ends are stably plugged in.
Step 2. Unlock your iPad and allow your PC to access it. Enter the passcode into your iPad to unlock it, and tap "Trust" if you see a prompt on the device.
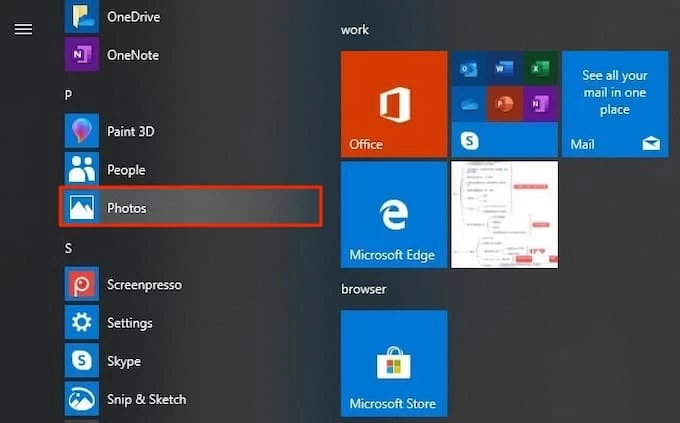
Step 3. Run the Photos app from the Start menu on the PC. If you can't find it on your computer, go to Microsoft Store to download and install it first.
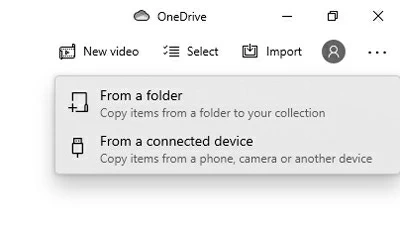
Step 4. Click "Import" > "From a connected device" in the upper-right corner to let the app read your iPad.
Step 5. Select the videos in your iPad to transfer to the PC. From the video preview list, choose the clips you need to upload by ticking the box in the top left corner of each video's cover.
Step 6. After you picked the videos for transferring, click "Import ... of ... items" at the bottom of the window to start importing. Wait for some time, and your selected videos will be transferred to your PC. You can then watch them in the Photos app directly.
Note:
Another viable option to transfer videos from your iPad to PC is using File Explorer. It may seem like a straightforward way, but it also comes with a set of challenges and limitations.
For instance, transferring videos through this method can be risky, as any accidental disconnection or interruption can result in data loss. It is crucial to keep the devices connected during the entire transfer process, which can be challenging if you plan to transfer large videos since the transfer time is lengthy.
Moreover, iPad video files are stored within the camera roll, which is difficult to access through File Explorer. The folder structure is not organized in a traditional manner, and you may find it time-consuming to locate your videos.
1. Enter the passcode on your iPad to unlock it and plug it into your PC.
2. Open File Explorer on the computer, and navigate to This PC > Your iPad name > Internal Storage > DCIM.
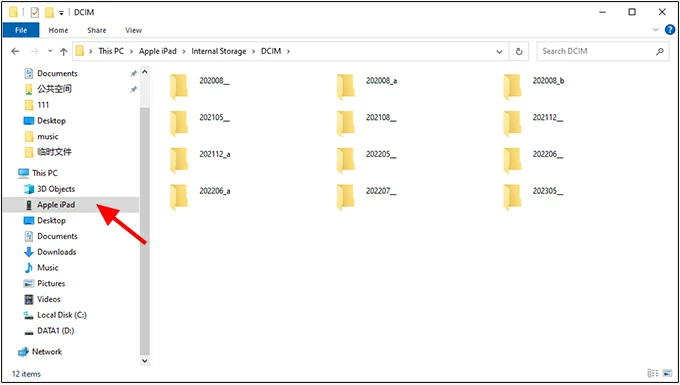
3. Locate your videos for uploading. Double-click the file where the videos are stored to. The file titles are named according to the videos saving and shooting time.
4. Right-click the videos and select "Copy."
5. Open the file where you want to save the videos on the PC, and right-click on the blank area in this file to choose "Paste." After a while, the videos you selected will show up in the file then.
To upload a multitude of large videos efficiently, you can't miss Appgeeker iPhone Data Transfer. With this professional tool, you can quickly transfer videos in bulk from your iPad to your PC. Better still, the video quality will not be compressed after the transfer, and any incompatible video file will be converted automatically into a format playable on your PC during the transfer process.
And no matter if your iPad videos are recorded clips, movies, TV shows or music videos, you can easily transfer them to your PC in a blink. It also features other practical functions:
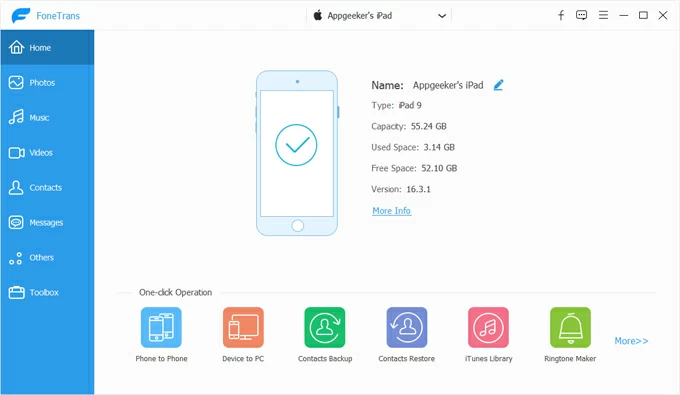
Step 1: Launch iPhone Data Transfer
Download and install the software on your PC, then open it on the desktop after the installation.
Step 2: Connect your iPad with the computer
Connect your iPad with your Windows PC via a cable, and unlock your iPad if it's locked. When you got a message asking if you're going to allow your PC access your iPad, tap "Trust" to go on.
Step 3: Select the iPad videos for transferring to PC
Click "Videos" on the left-side list, and choose your desired videos from the preview list to upload.
Notice that the videos show up here are the ones on the Apple TV app of your iPad. To reach the videos saved in the iPad's Photos app, click "Photos" in this step instead.
Step 4: Start the videos transfer from iPad to PC
After the video selection, click the computer icon at the top and then "Export to PC" to get your iPad videos off to your Windows PC.

Tip: Want to record a video on PC? It can be a breeze if you have the right tool. With the AppGeeker Screen Recorder, recording screen on your computer is made simple and efficient thanks to its exceptional features and user-friendly interface.
If you want to transfer videos wirelessly from your iPad to your PC, try iCloud. Without the need for cables or third-party software, your iPad videos will be automatically synced to iCloud after you've enabled "Sync this iPad" in the device, and you later can log into iCloud's website with the same Apple ID account on your PC to download the videos.
Check out how to use iCloud to transfer your iPad videos wirelessly to a Windows PC.
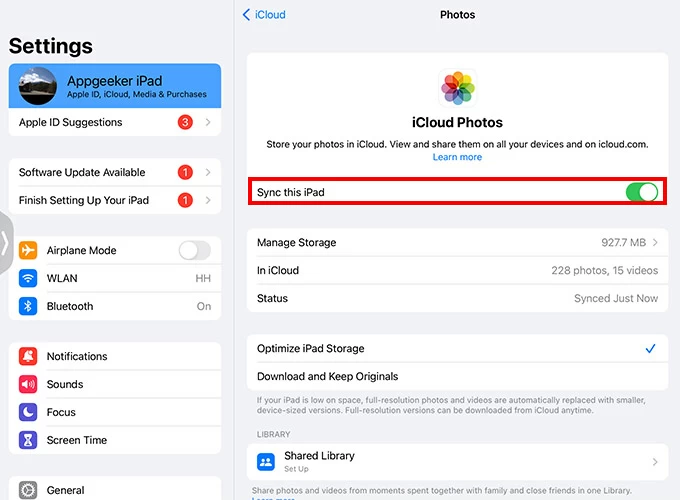
Step 1. Go to Settings > Your name > iCloud > Photos on your iPad, and tap the slider next to Sync this iPad to activate the iCloud syncing.
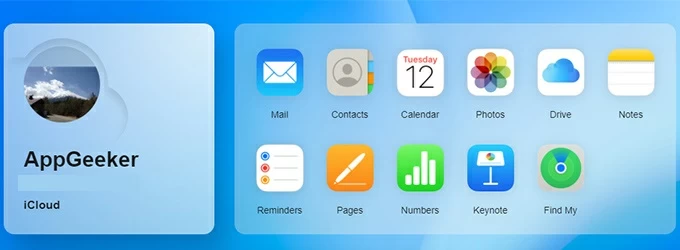
Step 2. On your PC, open a browser and sign into icloud.com with the Apple ID and password used in your iPad.
Step 3. Select Photos on the iCloud home page. It may take some time to load all the synced videos and pictures.
Step 4. Choose the videos you need to transfer to your PC, and hit the Download option on the top right corner to download your selected videos.

iCloud offers only 5GB of free storage space for your videos and other data, which can be a limited amount for you if you have a great many of videos to upload. In this case, you can upgrade to iCloud+ in your iPad for up to 2 TB of storage. Here's how to.
Anyone looking for detailed advice on photos restoring from iCloud would be well advised to visit this page: How to restore photos from iCloud backup
Transferring videos from an iPad to a PC can sometimes be fraught with difficulties, with a range of potential problems crop up along the way. Fortunately, there are solutions to these issues, which we'll explore below.
1. iPad not showing up in PC: This is a common problem that can be fixed by updating your iPad's drivers, restarting your PC, or checking your cables and connections.
2. Incompatible video formats: Some video formats may not be compatible with your PC. To fix this, you can convert your videos to a compatible format using a video converter tool before the transfer. Or you can just use iPhone Data Transfer to transfer your iPad videos to PC, which will convert your videos automatically to a playable format on PC.
3. Videos not syncing to iCloud: If your videos aren't appearing in iCloud, make sure that iCloud is enabled on your iPad and PC, and that you have enough storage space available.
Conclusion
Record a YouTube live stream video, or download a lengthy film on your iPad and want to transfer it on your PC? By following the steps outlined in this article, you should now have a good understanding of how to transfer videos from an iPad to a PC. Simply choose the method that best suits your needs and start the video transferring process with ease.

