
How to record desktop audio with Audacity on Mac & Windows

Microsoft has updated many functions on Windows 11, which makes users confused when capturing their computer screen. Read this article to figure out the recording specific steps.

There're some differences and updates on screen recording between Windows 10 and Windows 11.
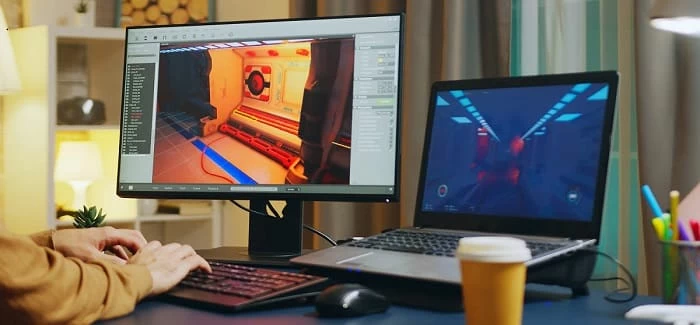
Microsoft released Windows 11 on Oct. 5th, 2021. This latest Windows operating system has many updates on use and interface. If you are a new Windows 11 laptop user, you may need some time to adapt to the new version. When you want to capture the important happenings like lecture videos from consulting them later or want to make a tutorial for others, you need to record a video on your Windows 11 laptop.
Various Windows-based screen recorders are available nowadays to record your computer screen. You can use the default tools or try third-party software on Windows 11 pc to capture a video. Read this article to discover the way that works best for you.
Table of Contents
Xbox Game Bar is a native tool to record video on Windows 10 and Windows 11 laptops. Developed by Microsoft, the tool was initially used for capturing game clips. But the use is more illustrative than that. People now widely use it to record video tutorials and other desktop activities as well.
Don't forget to switch on the Game Mode before recording. Go to the Settings option in the Start menu. Choose Gaming > Game Mode for a stable performance while recording video. Then let's delve into the recording process via Xbox Game Bar.
Step 1: Tap the Windows + G shortcut on your keyboard to open the game bar on the required screen. You will see various Game Bar widgets with multiple options for screenshots, audio, and video capture.

Step 2: Click the Record button on the Game Bar widget to set up a video recording. Alternatively, you can press the combination Windows key + Alt + R on your keyboard to start recording video on your Win11 laptop. After that, you can see a floating bar on your screen showing the recording progress, and you can continue your activity.
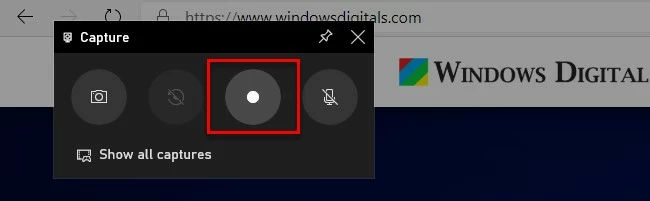
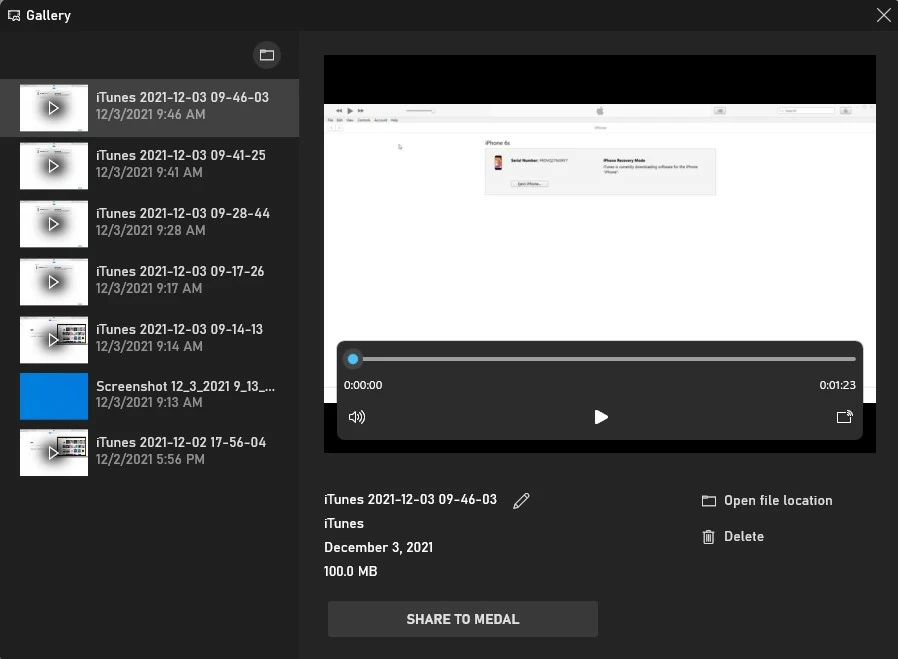
Step 3: When finishing recording, you can hit on the Stop button to stop recording, then the recording will be saved in the default path. You can check it by clicking the Gallery button or directly going to the output folder.
Presets before recording if you'd like to adjust:
At this level, you can modify the advanced settings of the tool. Head to Settings > Gaming > Captures to do this.
Xbox Game Bar is free and easy to use, but the downside is that it can only capture one application at a time, and desktop and File Explorer recordings are unavailable. On top of that, it currently has a limit of a 2-hour video recording and doesn't capture a complete screen. But in general, Xbox Game Bar is convenient to record Win11 laptops screen. If you want an optimal experience of video recording, we suggest you try reliable video recorders like AppGeeker Screen Recorder.
Unlike Xbox Game Bar, AppGeeker Screen Recorder. offers screen recording services on Windows and Mac, capturing all the screen activities within the recording range with optional internal and external audio, including webcam, in different formats. The simple recording process is friendly to novices, but if you are an advanced user, you can customize the recording parameters while capturing video on your Windows 11 laptop to control the recording quality.
1. Install the Screen Recorder
Launch the Screen Recorder on your Windows laptop. Select the Video Recorder from the available capturing options.

2. Select the recording area
You can either capture the specified area or the full screen in your video recording. Choose between the Full or Custom options located on the panel. Turn on the sound in demand to confirm the audio source. If you just want to record the audio on computer, you can choose Video Recorder to proceed.
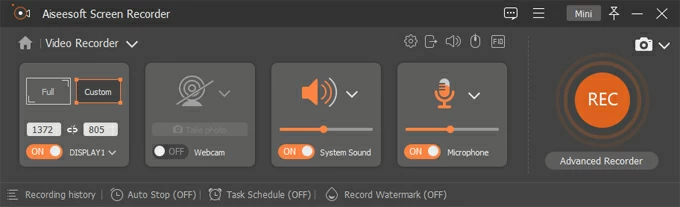
3. Record video on a laptop Windows 11
Click the gear icon to configure the advanced recording settings. Adjust the output format, file location, sound settings, or others. When everything's ready, start recording by hitting the REC button.
4. Stop and Preview the Recording
Once you've completed the recording, hit the Stop button. Before exporting the file, make sure you are satisfied with the recording.
![]()
If you've ever tried to search for software that can convert audio and video files on Windows, you might know how hard it can be to find dedicated solutions that are actually free and function as advertised. There are a lot of ways to do it and a lot of different programs out there like we mentioned above, but a third-party tech-savvy tool OBS Studio helps you with it flawlessly.
The OBS Studio is commonly used for live streaming and video recording. It's available for Windows, Mac, and Linux, and it'll record your file into compatible formats for any device, like an iPad or Android phone. You can record a tutorial while mixing your gaming activity, system audio, mic sound, and computer screen. Follow along with these instructions.
1. The first step is to launch the OBS Studio on your Windows 11 laptop and click the + icon in the Scenes area to create a new recording task on your Windows 11 computer.
2. Go to the Sources box, and tap the + icon. Afterward, proceed to the Display Capture menu to record the entire screen of your Win11 laptop. Once you have selected the required settings, click OK to confirm the changes.
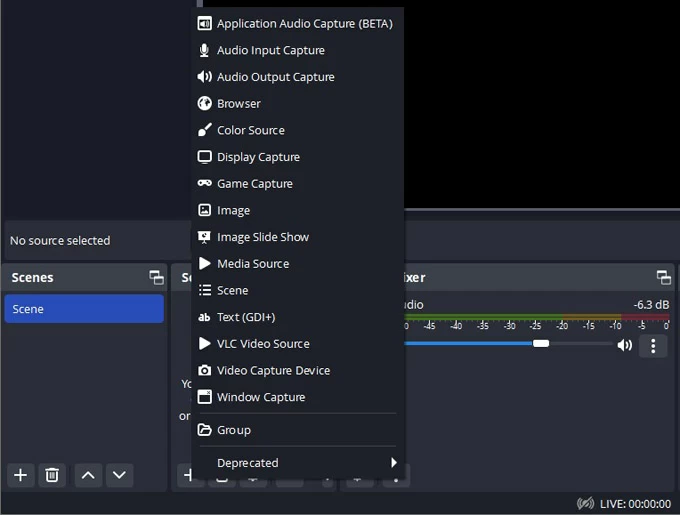
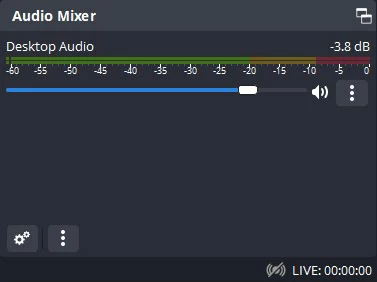
3. Next to the Sources area is the Audio Mixer, where you can adjust the volume of the recording.
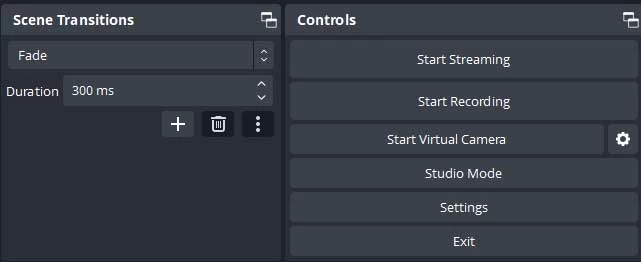
4. 4. In the final step, tap the Start Recording button to record the video on a Win11 laptop.
OBS Studio has a complex interface, which is not friendly for beginners. It is more suitable for advanced users. However, you have alternatives if you're not good at using this complex tool.
If you don't fancy downloading any particular software to record Win11 laptops' entire screen, Microsoft PowerPoint is another viable but unexpected option for recording presentations. You can use it to capture all activities on Windows 10 and 11 PCs without limitations like using Xbox Game Bar. But compared to Xbox Game Bar, PowerPoint is unavailable to record internal audio. On the other hand, users can't edit the recording like using AppGeeker Screen Recorder. But the key point is that PowerPoint is easy to use.
When you already own the version of Microsoft Word 2010 or later, it's a straightforward way to record a video on your Windows PC. Follow along for a detailed look at the steps to screen record your Windows 11 laptop.
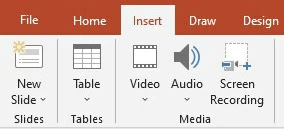
Step 1: Create a new PowerPoint file and add a new slide to activate the toolbar. Choose Screen Recording in the Insert tab.
2. Press the Windows + Shift + A keys or tap Select Area to drag your mouse pointer over the desired area.
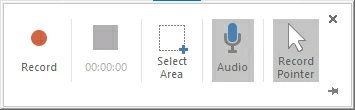
3. Click on the Record option to start video recording. You can manage your video records using the Stop, Pause, and Record options by hovering the pointer.
Note:
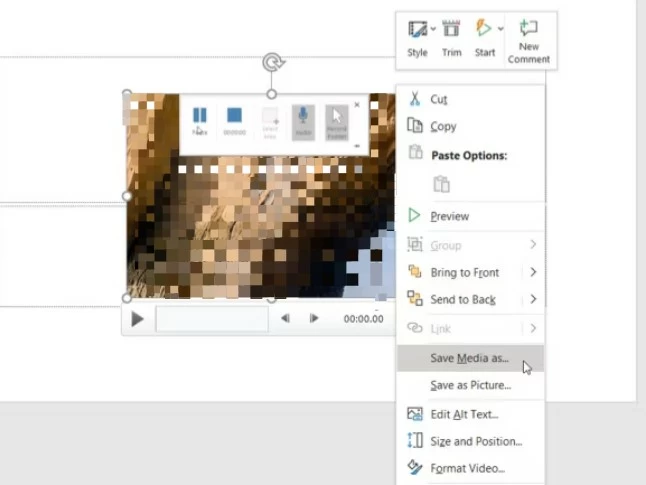
4. Finally, you can view the recorded video as a presentation slide. Right-click on the slide and tap Save As to save the file at the appropriate location.
Pros:
Cons:
Final Touch
We have elaborated on how to record video on Windows 11 laptop using some popular recording tools. Each of the tools mentioned above has its pros and cons. Most users prefer using built-in tools for recording video on a laptop Windows 11. However, these default tools may not offer you advanced results.
A user-friendly desktop tool like AppGeeker Screen Recorder can be the best way to do you a favor. Once installed, you can use this all-in-one tool to record everything you like. You have advanced editing options to create and customize high-quality video recordings. Avail of this fantastic tool now to record video on a laptop Win11 like never before!


