
How to Record Netflix on PC

If you want to save streaming audio content from the internet to enjoy later, this article will show you how to record streaming audio on your Mac with ease.


You can use preloaded QuickTime or other third-party streaming audio recorders to record streaming audio macintosh.
If you like streaming music on the Internet, such as YouTube, Spotify, Pandora, but you can't download these audios to Mac, then knowing how to record streaming audio on Mac will greatly help you solve your troubles!
The native audio recording software only allows you to capture the sound from microphone by default, while recording sound from Mac computer, such as recording streaming audio, requires additional assistance. Don't worry, this post will walk you through several excellent streaming audio recorders for Mac to record streaming audio.
Table of Contents
QuickTime Player is a built-in multimedia player on Mac. Besides the function of playing movies and videos, you can also use it to record streaming audio on your Mac or MacBook, like music, lectures, movie soundtrack, and so on.
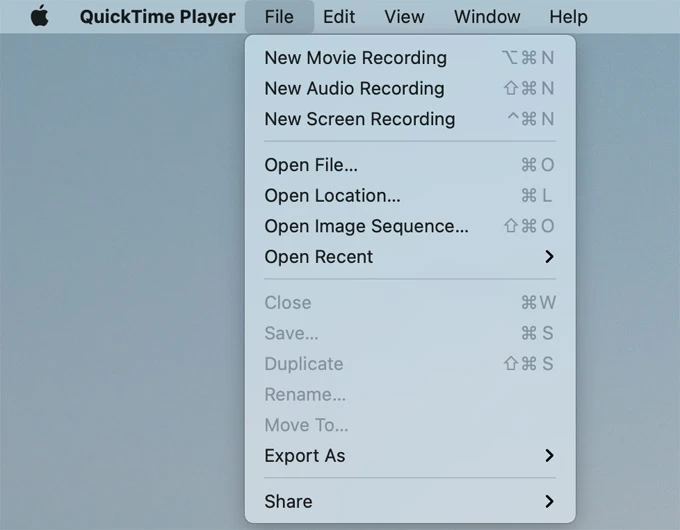
1. Open QuickTime Player
Click QuickTime Player in "Launchpad", or search it from "Launchpad" and run it.
2. Create a new audio recording file
Go to File > New Audio Recording from the menu bar at the top of the screen.
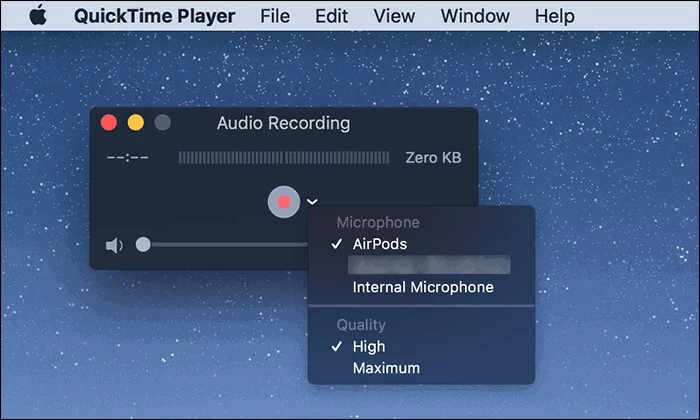
4. Start recording your streaming audio
The Audio Recording window will appear with a red circle button and a down arrow. You can click the down arrow, and choose a built-in microphone or any external microphone you're using. Then, click on the red Record button to start your streaming audio recording on the Mac.
5. Stop recording
Once finished, click the grey icon to stop recording. Later, the streaming audio will show on the screen, and you can click the "Play" button to review.
6. Save the streaming audio recording
To save the recording, select the "Save" option in "File," and then you can rename and check it in your selected folder.

QuickTime Player itself can only record microphone sound and cannot capture internal audio on Mac. To record streaming audio from a website or an app on a Mac, QuickTime must be used with an additional sound driver, such as Soundflower.
Set Soundflower as your Mac's audio output source, and QuickTime will be able to capture computer sound from Mac, including streaming audio.
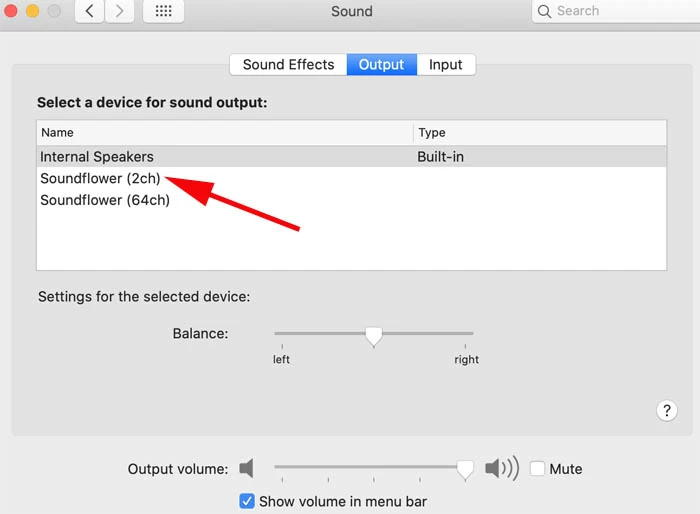
1. Download Soundflower from the website soundflower.com, and follow the instructions to install it on your Mac.
2. Tap on the Apple icon in the upper-left corner of your Mac, then choose "Sound" under the "System Preferences" or "System Settings" tab. Next, select "Output" tab and hit "Soundflower (2ch)."
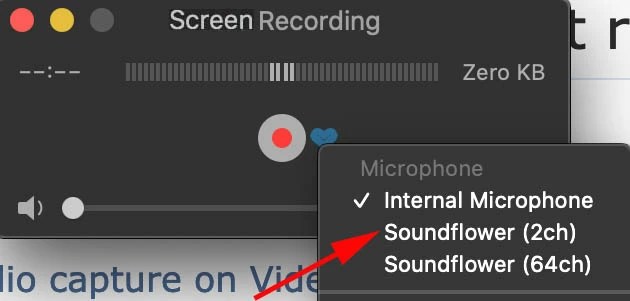
3. Activate the extension in QuickTime to record streaming sound playing on Mac. Launch QuickTime and head to File> New Audio Recording, then hit "Soundflower (2ch)" when picking a microphone.
Then you can follow the steps in the first part to record streaming audio on the Mac without any background noise.
QuickTime Player may not be your ideal choice for audio streaming recordings on your Mac due to its limited functionality. Compared to QuickTime Player, Appgeeker Screen Recorder is a more comprehensive streaming audio recorder that not only captures internal sound on your Mac without additional tools, but also records microphone and system sound separately.
This streaming audio recording software can capture audio from any source, including browser, app, system sound, microphone, and supports outputting audio in multiple formats. It also offers editing functions such as cutting to personalize recordings. With its intuitive interface, you'll find it a breeze to record streaming audio on a Mac in high quality.
Here's how to record streaming audio on your Mac while browsing an online streaming audio service or streaming audio application:
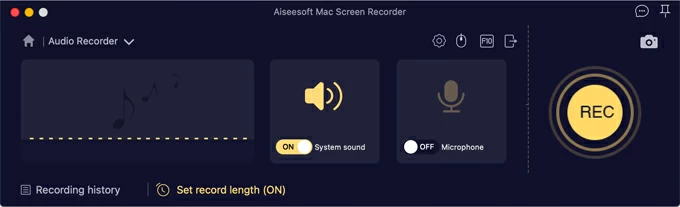
1. Download and open the software on your Mac and select "Audio Recorder."

2. Choose your audio source. You can choose to enable "System Sound" or "Microphone" as needed. To record streaming audio from a Mac, you need to enable "System Sound."
4. Open a streaming page that you would like to capture the audio.
5. When you are ready, click the "REC" button to start recording the streaming audio.
6. To stop recording, hit the "red square" icon.
![]()
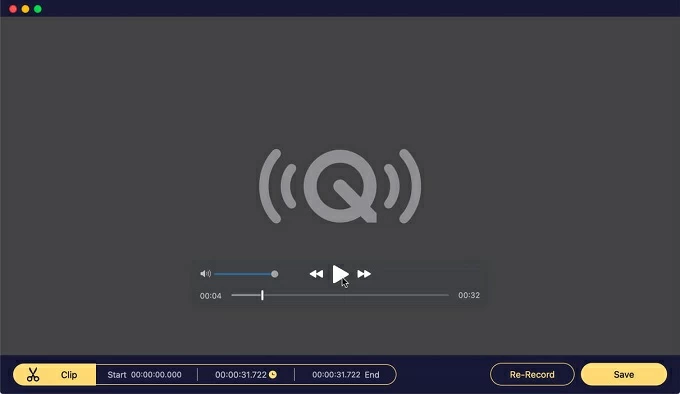
7. You can clip the streaming audio recording on the preview page. Later, click "Save" to save the recording file on your Mac.
No matter which platform you want to capture streaming audio on the web, such as recording audio from YouTube, this program can satisfy you!
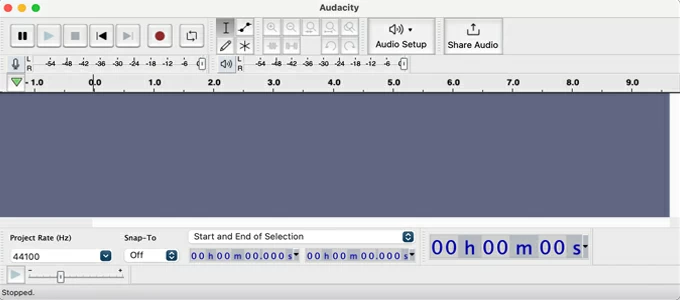
To record streaming audio on Mac for free, you can use Audacity, which captures audio by converting a signal from digital to analog. It is also a multi-track audio editor, you can quickly edit your recording after capturing the streaming audio on MacBook or Mac.
Wondering how to record internal audio via Audacity? Let's see the detailed steps:
1. Prepare a loopback cable and connect it to your device.
First, you need a cable with a 1/8" plug at each end, then plug the headphone output port to the line input port.
2. Set Sound panel on Mac.
Click on the Apple logo in the upper-left corner of your computer, then select "System Settings" or "System Preferences." Next, head to the "Sound" panel.
To better capture streaming audio on Mac, you can adjust the input volume slider at the bottom of the "Sound" panel.
3. Adjust Audacity settings
Launch Audacity application, find the microphone icon in the Device Toolbar, then select "Built-in Input." And ensure "Software Playthrough" is not checked in the "Transport" menu.
Once the above steps are finished, you can start playing streaming audio and create a new track in Audacity to record it. You can also use additional audio devices like Soundflower to record system sound.
Also see: Audacity won't record from the computer
Apple has a pre-installed recording feature called Voice Memos that lets iPhone, iPad, and Mac users to capture streaming audio through their device's microphone. Some streaming audio platforms may not allow you to record streaming audio on your device, but if you're streaming live, you can record your streaming audio on Mac or MacBook through the microphone!
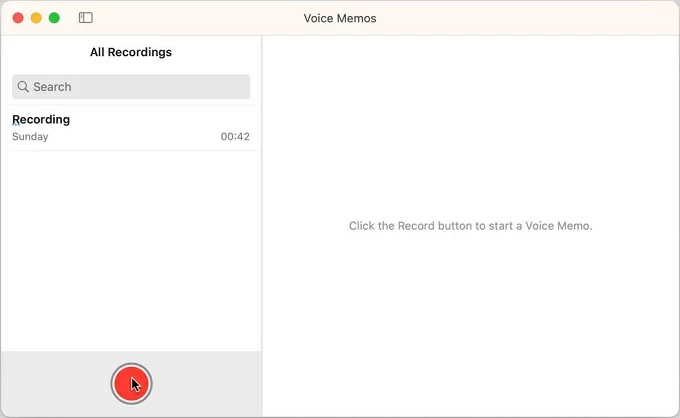
Step 1: Open Voice Memos app on your device.
Step 2: Tap on the red "Start Recording" circle to start recording streaming audio.
Step 3: Then play a piece of audio you like, it can be a song, in-game sound, etc.
Step 4: Back to the Voice Memos, you can see the recording process on the screen. Press the square "Stop Recording" icon to finish.


