
Audacity Won't Record from Windows and Mac [Fixed]

Want to know how you can record your Webex meetings easily? Perfect! It's time we finally do it. Read in detail to learn how to record Webex meetings in this complete guide.


Recording online meeting in Webex is easy for host, and available for participant after receiving the host's permission.
Webex is a suite of online meeting tools developed by Cisco Systems that works with Windows and macOS computers. It provides video conferencing, web conferencing, online meetings, screen sharing, and other collaboration tools and is used for virtual meetings, webinars, and other remote collaboration tasks on computers and mobile devices.
Cisco Webex is bundled with a recording function that provides users with an easy way to capture, store and share important meetings on computers, browsers, and mobile devices. It allows hosts to record the meeting with audio. With Webex meeting recording, users can review the meeting at a later time.
Table of Contents
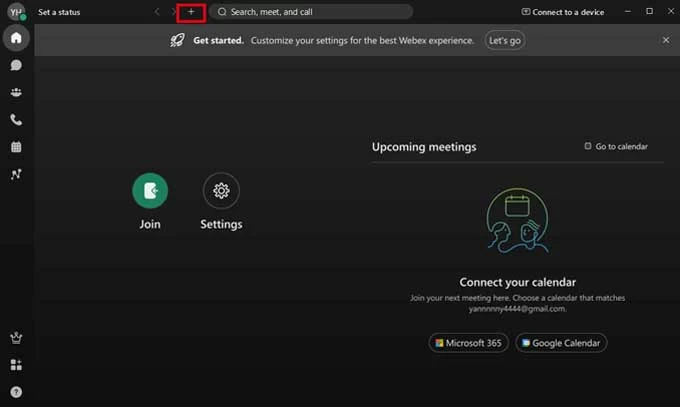
Webex permits the host to capture the conference in real-time, who can view the Record button on the desktop Webex during the meeting. Unfortunately, if you are not the host, you are not allowed to use the built-in recording features. Let's look into some of the probable causes of Webex meeting recording failure.
For both Windows and macOS users, it is possible to set up cohosts or presenters in Webex meetings and provide them with the capability to record the gathering as a host:
Step 1. Open the Participants panel and find the one you want to make a cohost.
Step 2. Right-click the attendee's name and choose Change role > Make Cohost/Make Presenter. Then the Recorder icon will appear in their session controls.

Hosts, cohosts, and presenters can grab the on-screen meeting with the inbuilt recorder on computers as follow:
Step 1: Start the meeting on Webex software.
Step 2: Navigate to the Record button at the bottom of the Webex window and click it.
![]()
Step 3: Choose the saving path on your computer and click the Save button.
Step 4: Then click Record to start the online meeting recording process. There would be a pop-up window in the bottom right corner that allows you to pause or stop recording.
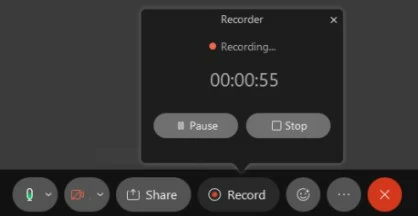
Step 5: Once done, the file will be saved in the folder you set before in MP4 format.
As aforementioned, participants can't capture the conference from Webex. For attendees, AppGeeker Screen Recorder is the ultimate way to record the meeting on desktop Webex without role limitations.
AppGeeker Screen Recorder is a professional tool compatible with Windows pc and Macs and records Webex online meetings with optimized audio. All Webex layouts performed on the screen, including shared files, chat panel, and participant panel, can be captured and exported by adjusting the proper recording parameters.
Download AppGeeker Screen Recorder and follow the steps below to capture the Webex meeting on your computer without role and computer limitations:
Step 1: Whether you are a host or a participant, start or join the Webex meeting.
Step 2: Launch AppGeeker Screen Recorder and choose Video Recorder.

Step 3: Customize the recording boundary. You can click the Full button to record the entire screen, or hit the Custom button and set the Webex window as the recording area.
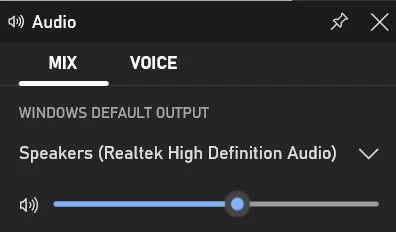
Then control the audio source by turning on or off the button below the System sound and Microphone.

AppGeeker Screen Recorder offers advanced settings for professional users. Go to the user guide for more details.
Step 4: Start recording by clicking the REC button.
Step 5: When the meeting ends, click the Stop button and check the recording. When you are satisfied with it, Export it to your computer.
Every computer has a native recorder, like Xbox Game Bar for Windows 10 and later pc and QuickTime for Mac. Xbox Game Bar is pre-installed on Windows 10 and later computers. It supports recording online meetings on Webex, but records only one window at a time and doesn't allow Windows users to change the size of the recorded software or the recording will automatically
1. Join the Webex meeting and lay the Webex window on the top.
2. Press Windows + Alt + R to start recording the meeting.
3. Press Windows + Alt + M to control the microphone on or off during the recording process.
4. To stop recording, press Windows + Alt + R again.
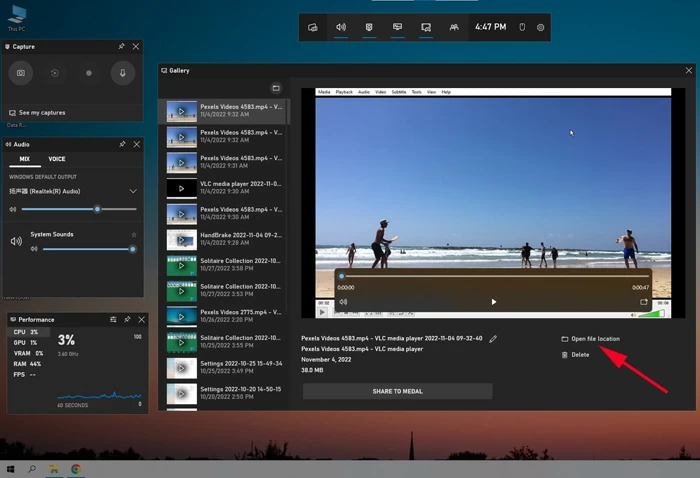
The recording will be saved on your computer under My Computer > Captures > Videos as an MP4 file. You can also check the Webex recording in the Gallery.
Unlike Game Bar, QuickTime allows Mac users to adjust the recording area and capture the meeting from desktop software and web-based Webex.
1. Start or join the Webex meeting from the app or browser.
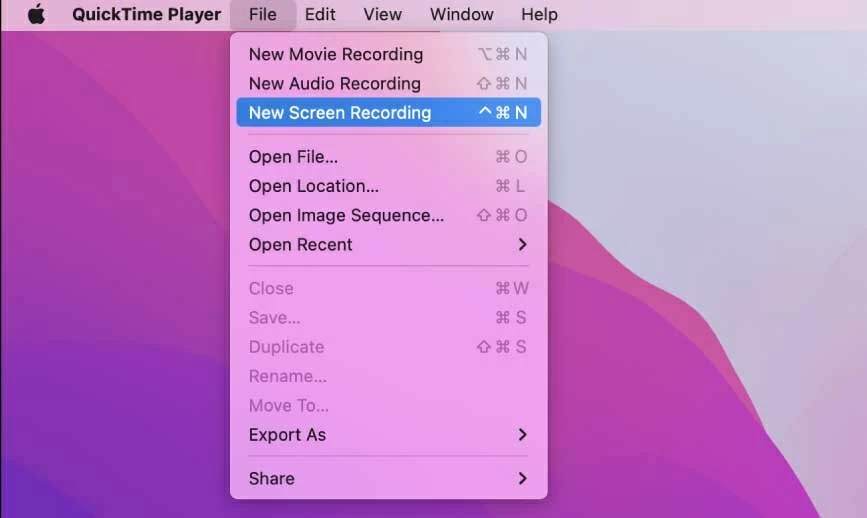
2. Press Command + Shift + 5 simultaneously on the keyboard to open the QuickTime Screenshot Toolbar.

Alternatively, you can go to Launchpad > QuickTime > File > New Screen Recording to open the toolbar.
3. Customize the recording area as the Webex window.
4. Record the audio from the microphone by clicking Option > Microphone.
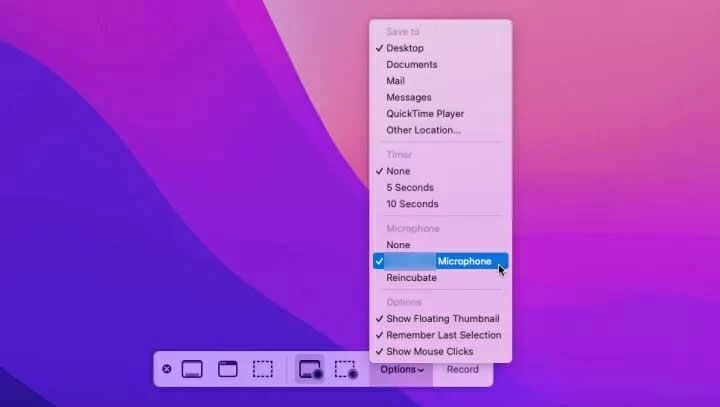
5. Hit Record.
6. Press the Stop recording icon locates in the top-right corner to stop recording.
![]()
QuickTime Player only captures the screen with audio from the internal microphone on Mac, which means the audio from the computer can't be recorded. You have to use a third-party recorder like AppGeeker Screen Recorder to capture the Webex meeting with audio from the microphone and computer.
The host, cohost, or presenter can capture online conferences if the site administrator has allowed local recording of Webex for their sites, and we introduced several ways above for meeting recording.
However, the Webex meeting recording includes the participant's audio, video, and anything shared during the meeting. To protect participants' privacy and the information security of shared files, you have to ask for other attendees' consent to record them.
Webex's built-in recording feature is currently available from the mobile app. If you are the host and start the meeting from your phone, you can record the conference as follows:
Step 1. Download and open the Webex app on your mobile device.

Step 2. Hit the Start Meeting button to launch the meeting.
Step 3. Hit Record at the bottom of the screen.
If you are a participant, you have an access to capture the meeting interface with the native recorder on your Android or iPhone.
On Android
1. Open the Webex app on your Android and join the meeting.
2. Swipe down from the top of the screen to open the quick panel and find the screen recorder button.
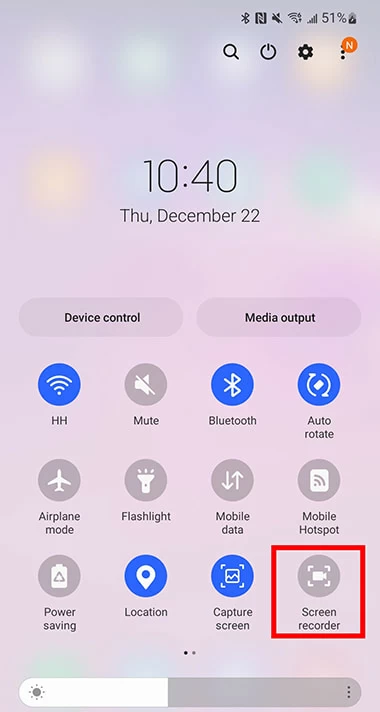
If the screen record button doesn't show up, tap the three vertical dots and hit the add button to add the record icon.
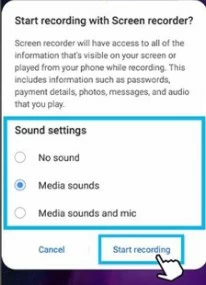
3. Hit the Start Recording option to start recording the Webex meeting.
On iPhone
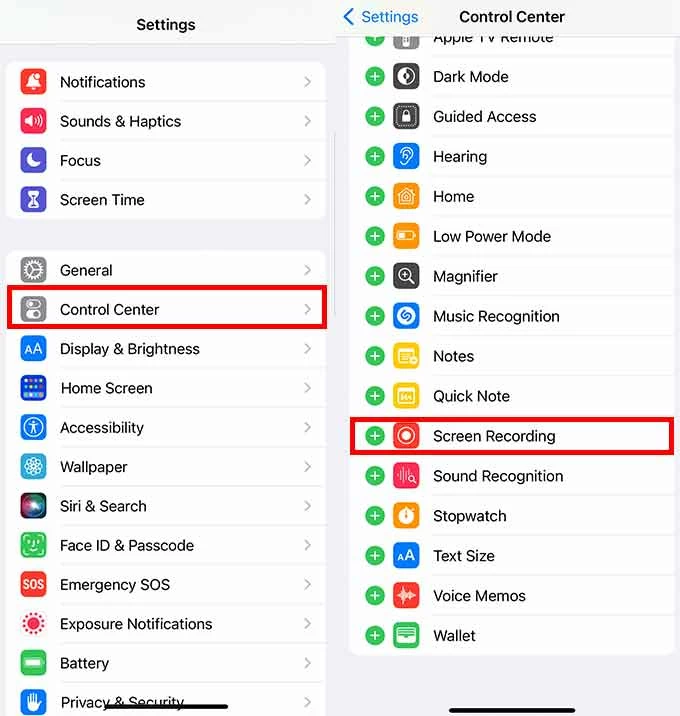
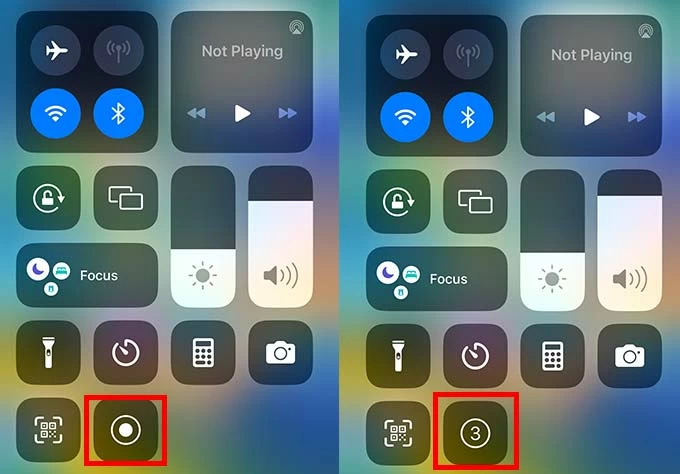
1. Open the Control Center.
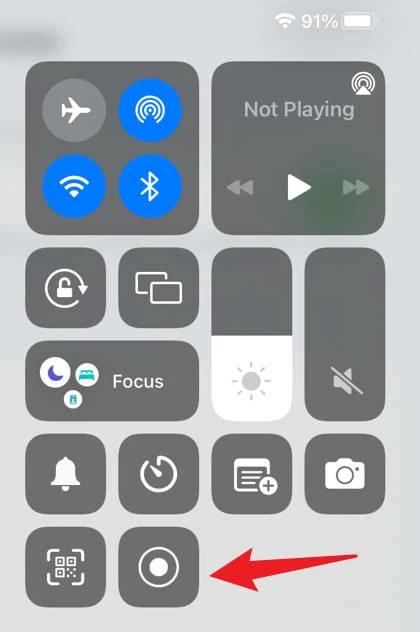
You can go to Settings > Control Center to find the Screen Recording and hit the green add button to add the icon to the Control Center.
2. Long press the Screen recording to launch the Microphone option.
3. Then enable the Microphone to record your sound at the same time.
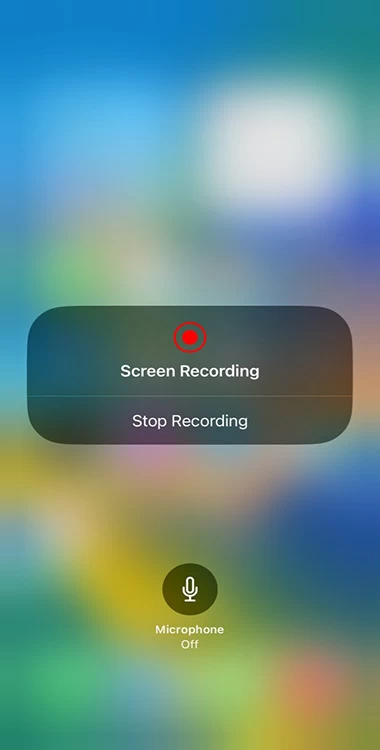
4. Hit the Screen Recording button and wait for 3 seconds count-down to start the Webex conference recording.
Webex will save the recording on your computer's local drive and the Webex site. Recorded files are saved in the Documents folder in My Computer by default on Windows computers. For Mac models, recordings are saved to the Home folder by default. Or you can download and share the savings from the Webex site.
You can check the recording in the gallery if you record the meeting using mobile Webex or the internal recorder on your phone.


