
How to convert MKV to MP4 on Windows 10

There are times when you must record your desktop. But do you know how you can do it? Read this article in detail to learn to record the desktop on Windows 10 and 11 in detail.


Desktop, File Explorer, and command are unavailable to be recorded on Windows 10 and Windows 11 by default.
A video is equivalent to a million thoughts, as the saying goes. For most Windows users, Windows' built-in screen recording functionality is useful for demonstrating how to use any program, from productivity suites to video games. The Xbox Game Bar feature in Windows 10, and Windows 11 has built-in screen recording functionality, making it simple to capture your activities on Win10 and Win11 computers. But you may find it can't capture the desktop on your computer screen. In this article, we'll introduce 3 ways to record the desktop on your Windows 10 and 11 computers.
Table of Contents
Unfortunately, no. Xbox Game Bar is initially designed for recording game clips, chatting with other game players, and tracking achievements. It's easy to record gameplay and other activities or take screenshots on Windows 10 and Windows 11. But if you're looking to record the Win10 desktop, Xbox Game Bar has certain restrictions. Only one application can be recorded at a time, and it is unavailable to record the computer desktop. You will have to resort to third-party applications.
You can still read the following instructions to record your screen on Windows 10 using Xbox Game Bar:
Note:
Step 1: Press Windows + G to activate Xbox Game Bar. Select Captures to open the capturing widget.

Step 2: To begin recording a new clip, click the circular Start recording button or use the combination Windows + Alt + R. Click the same button to halt the recording.
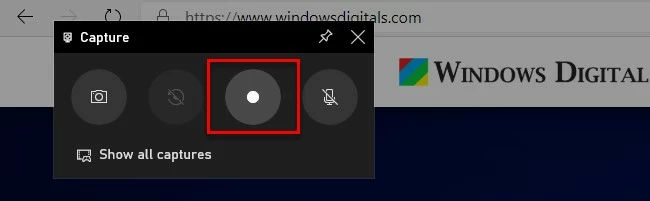
Step 3: To snap a snapshot of what's occurring in-game, use the camera button in the Capture widget.
Step 4: Once done, you can check the recording file in Gallery.
Then how to record the desktop on Windows 10 computer without limitations? You can't go wrong with Appgeeker Screen Recorder. This full-featured Windows 10 screen recorder allows you to record anything from your computer's display, including the Windows desktop and File Explorer, which Windows Xbox Game Bar doesn't have.
The software is widely regarded as a reliable recording tool due to its wide range of features. Videos can be recorded in various common formats like MP4, and all activities displayed on the entire screen will be captured no matter they are games, online classes or meetings, or tutorials with webcams. The intuitive design of the program's user interface makes recording a snap. Just run the software and start recording.
Key Features of Appgeeker Screen Recorder
Step 1: To start recording the desktop on your Windows 10 computer, launch the Screen Recorder app and click the Video Recorder button.

Step 2: Choose the area of the screen you wish to record from the available options; either the full screen by clicking the Full button or a customized region by clicking the Custom button.
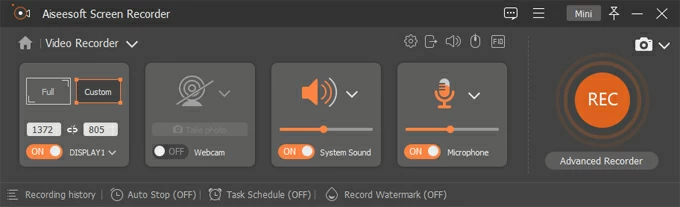
Step 3: If everything seems OK, click the orange Rec button on the right side of the software window to start recording the Win10 pc screen. Then back to the desktop, and the desktop will be recorded.
Step 4: Once you finish all operations on the Windows 10 desktop, click the red square button to stop recording. Once done, the recording will be automatically presented on your screen. You can preview it and set the start and end if necessary. Later, save the recording on your Win 10 computer.
![]()
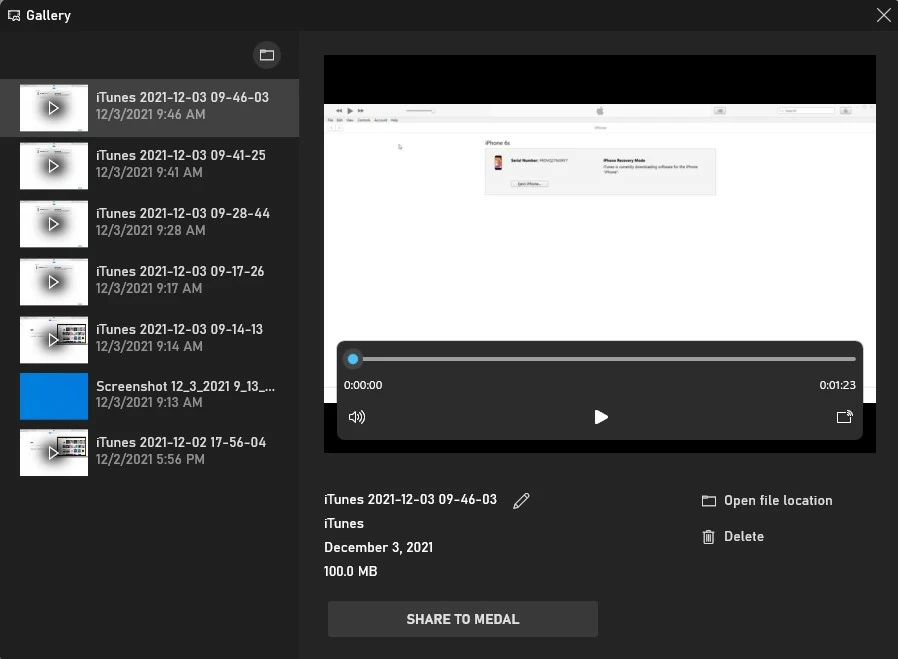
You can access your recordings by selecting Recording history on the system's toolbar in the window's bottom left corner.
Apart from using Appgeeker Screen Recorder, another method to record screen on Windows 10 is using OBS Studio, a nice free screen recorder. This application can run on various operating systems like Windows, Linux, and macOS, and record their desktops.
It is a sophisticated tool that provides a broad variety of different possibilities for personalization, but it's also a complicated tool to record the desktop and other activities on Windows 10, which means it's not user-friendly, especially for novices. In general, OBS Studio is more suitable for programmers and advanced users. But don't worry, we'll give a full guide to recording the desktop of a Windows 10 pc using this tool.
Step 1: Launch the software and open it. To record the Windows 10 computer desktop, you are prompted to create a scene by clicking the add button in the Scene windows at the bottom left corner.
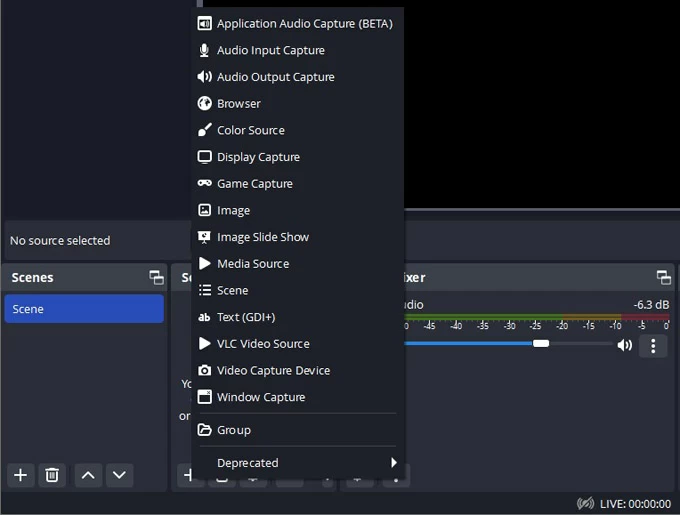
Step 2: Later you should choose a source for recording. To record the Windows 10 computer desktop, choose Display Capture by clicking the add button in the Source module. It will capture all activities on your Windows 10 computer screen, including the desktop.
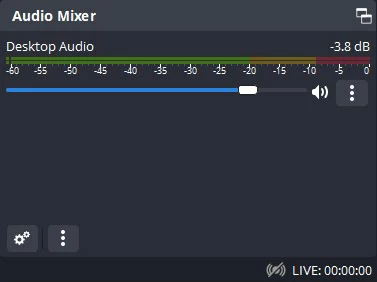
Step 3: Next to Source shows the audio that will be recorded. You can adjust the volume or mute the internal or external audio due to your demands.
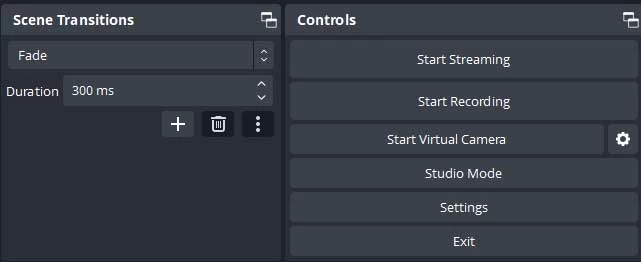
Step 4: Once settled down, hit on the Start Recording button in the bottom right corner. Then you can back to the desktop of your Windows 10 pc. After then, click on Stop Recording.
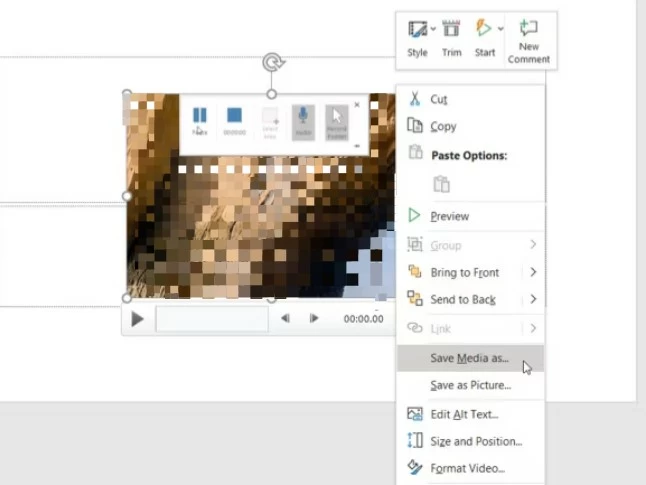
When creating slides for presentations, everyone is familiar with using Microsoft PowerPoint as the program of choice. What if we told you that you are capable of capturing the desktop of a Win10 PC via Microsoft PowerPoint? Users of Microsoft Office products could record their screens with audio at no additional cost since the release of PowerPoint 2013, but most users never expected this. Then read the steps below to find out how you can record Windows 10 PC desktop by Microsoft PowerPoint:
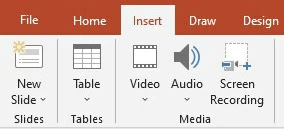
Step 1: Create a new ppt file. Select Screen Recording from the Insert tab's drop-down menu.
Step 2: The next step is to decide where you want to start recording in the room. The area you want to record can be highlighted by clicking Select Area and dragging the mouse.
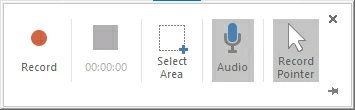
Step 3: To begin recording the desktop of your Win10 pc, press the Record button.
The point is that you can't change the output format, and can't adjust more advanced settings as using Appgeeker Screen Recorder either. But for basic Win10 PC desktop recording, it is suitable.
Conclusion
Capturing a snapshot on a smartphone or computer is straightforward and quick. Still, there will come a moment when you want to learn how to record a desktop on Windows 10, whether to show off some amazing games on social media or create an application instructional for your YouTube channel. We have shown you three different methods of recording desktops on Windows 10 and Windows 11 pc, and Appgeeker Screen Recorder is the most recommended. Have a free download now!


