How to Play a AVI File on Apple TV with Big Screen


Final Cut Pro X is Apple's revolutionary video editing application that allows users to really have fully control over their footage. It's intuitive enough for amateur users to grasp while offering advanced options demanded by professional editors. It gets everything done in the way you want it to be.
Let's say you have some MP4 (H.264, MPEG-4) footage that you would like to edit in Final Cut Pro X on Mac machine, if that's the case, then converting MP4s to ProRes .mov files before your import them into FCPX is probably the way to go. Less compressed than MP4 which's used mainly for web delivery, ProRes 422 .mov video format is designed by Apple to work specifically with the Final Cut Pro X software for editing purpose.
About Apple ProRes
Bulk Convert MP4 to ProRes 422 with Video Converter for Mac
There are a lot of tools that will get the MP4 to ProRes conversion work. Among them, Video Converter for Mac introduced in this article is a near-perfect piece of software which can cover nearly any situation you could find yourself in.
The software is able to sort things out. It handles pretty much any video & audio files you throw at it and then convert into something more accessible. Just drag into its window the movie files you want to convert, pick an output format or select a device preset to convert it for from Profile dropdown menu, specify a local path, and click Convert. The level of customization it offers is also quite extensive.
Step 1: Import MP4 files
Click "Add File" in the upper left-hand corner to navigate to where your MP4 (h.264, mpeg-4) video files are, and then load them to the software. Drag-and-drop is also workable if you like.
BTW, you can click the small downward arrow icon beside "Add File", and select "Add Folder" from the drop down menu. Then in the dialog that opens, select a folder to import an entire folder of MP4 files.
The app should import the videos and you should see a window similar to the one below.

Step 2: Select QuickTime ProRes under "Profile" dropdown
Moving to the "Profile" drop-down menu, this video converter provides a number of export options - from outputting the built-in video & audio formats, to your own customisable file, to presets for using on iPad, iPhone, Android phones, tablets, game consoles, applications, Facebook, YouTube and more..
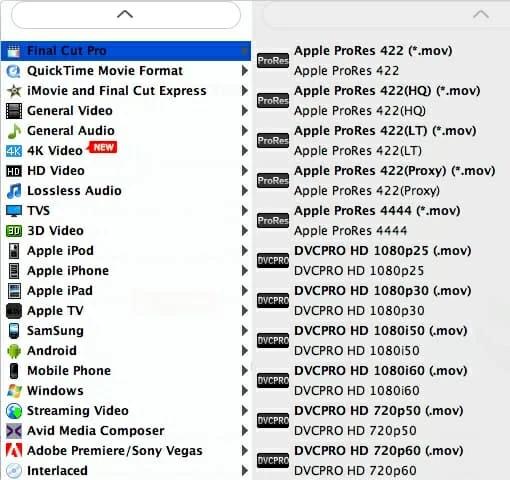
For purpose of this article, you click the dropdown menu "Profile" and head to "Final Cut Pro" Category. Select any Apple ProRes codec you need: Apple ProRes 422, ProRes 422 (HQ), ProRes 422 (LT) (recommended!), etc. As you can see, DVCPRO HD is also feasible. This is based on how you want your videos.
Note that ProRes is just a codec, the video encoded with ProRes will be wrapped in a MOV container.
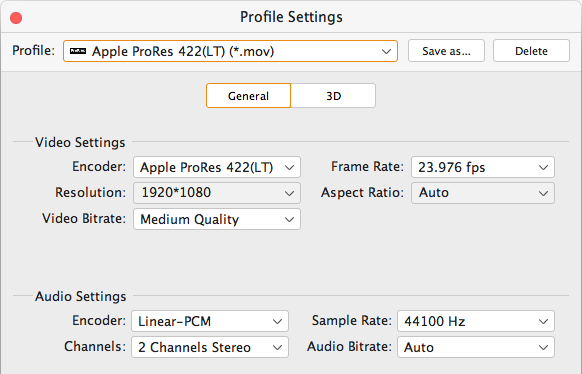
If you are critical about the output quality, you can adjust the parameters about the videos. As is true of video, audio settings is also important in adding a premium to the video quality.
Just click "Setting" by the side of "Profile" and you are ready to tweak.
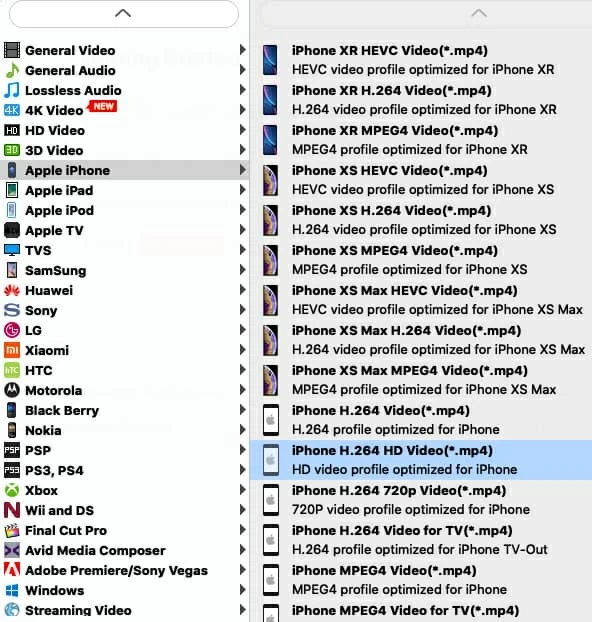
In some cases you will play your files on diverse devices and players, for example, Apple iPhone, iPad, various brands of Android phone. All you need is to choose any preset that goes with your device and let the program do the settings.
Step 3: Begin converting from MP4 videos to Apple ProRes MOV files on Mac
After you have decided on your setting preferences, choose a location to store your exported files via "Destination" option on the bottom center of the screen. Make sure the location has enough space.
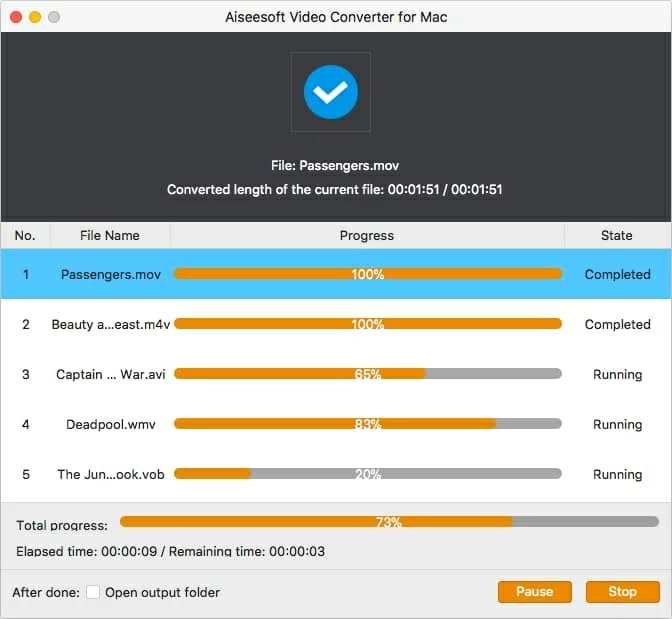
Next, click "Convert" to execute the conversion process. This can take a few minutes accordingly to the length of source MP4 video files. You can keep track of the progress with a status window, as image shown below.
After all of MP4 media files have been converted to Apple ProRes MOV file, close the software.
And that's it. Now you are able to import the ProRes mov files in Final Cut Pro X and perform editing tasks.