How to Convert a 1080p MOV Footage to 720p for Mac


Final Cut Pro X, the Apple's flagship professional video editor, is hotly anticipated by video enthusiasts on the Mac. It's totally upgraded from scratch with groundbreaking features and tools that make it one of most powerful yet easy to use video editing software available. FCP X makes doing editing for high-end videos on Mac easier than ever before and brings you an amazing experience.
Having some interesting footage in WMV video format, either grabbed from the video-sharing websites or shared by friends who using a Windows PC, and would like to edit some scenes in Final Cut Pro X on Mac? The problem is that Apple Final Cut Pro X application limits the video and audio file formats it can accepts. Unfortunately, FCPX can not open WMV by default. In other words, you may always encounter the importing issue for editing on FCPX, let alone WMV is not a editable format. In order to take full advantage of the WMV files on Mac without any limitation (i.e. to play it on QuickTime, edit it in iMovie, etc.), you'd better convert it over to a Mac-compatible file format.
Many of us continuously look for apps to help us convert WMV to something that's recognizable in Final Cut Pro X. Video Converter for Mac is one that can convert your WMV files to a FCPX editable file type first, say Apple ProRes 422 LT, before importing for hassle-free editing.
It is a fantastic piece of utility that can take just about any media source in different formats and offer batch conversions for playing on portable gadgets or any software else. The software supports for batch converting multiple files simultaneously and fits with user-customized video outputs, file merging as well as saves all converted videos to a pre-designated destination for quick access and organization. With a rather simple workflow but operating great as is, it's really easy for everyone to use: just load up a single or more video files and convert to any of the defined output formats.
Step 1: Add WMV video files
Open up this application, and once you learn the primary interface, you'll find it clear-cut and easy to drill down to the exact settings you are looking for. To perform a conversion, what should be done first thing first is to add raw files to the program.
Mouse over and click Add File button on the upper-left corner of toolbar and this will open a window proposing to choose the source WMV footage that you want to be a FCPX edit-friendly format from your media drive. Alternatively, the center of the window is where you can drag your WMV videos directly to. Your loaded files will show as thumbnails and be in a waiting line, like the screenshot below.
One of this software's useful features, Merge into one file (at the right bottom of the window), lets you combine together clips or audio sound tracks, so that you can move them as one and everything will stay in sync.

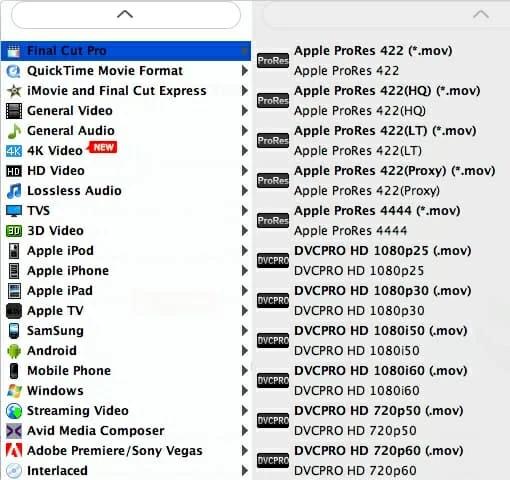
Step 2: Define Apple ProRes as the output format
With your WMV files in place, head to the lower left corner of the interface, then a click of Profile drop-down will open the out format selection panel. To get the best video quality for Final Cut Pro X, the optimized option here is to select Apple ProRes 422(LT) Video (*.mov) under Final Cut Pro category.
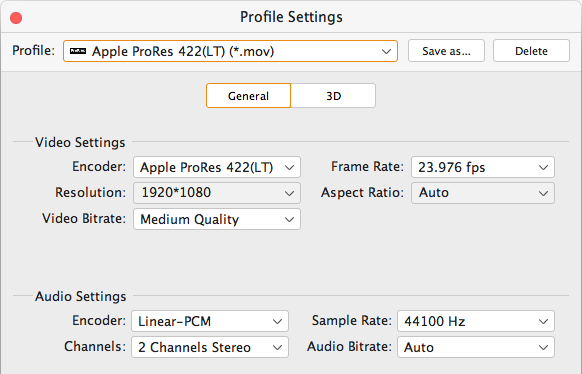
If you care more about the quality of resultant videos, you can press Settings icon. This button is located right beside Profile field and will take to access the Profile Settings panel and go for the advanced conversion configurations. The options like video resolution, frame rate, bitrate and audio encoder as well as channels are all at your disposal.
But in general, all these encoding parameters are well in preset and give you the best possible result. So you don't worry about that.
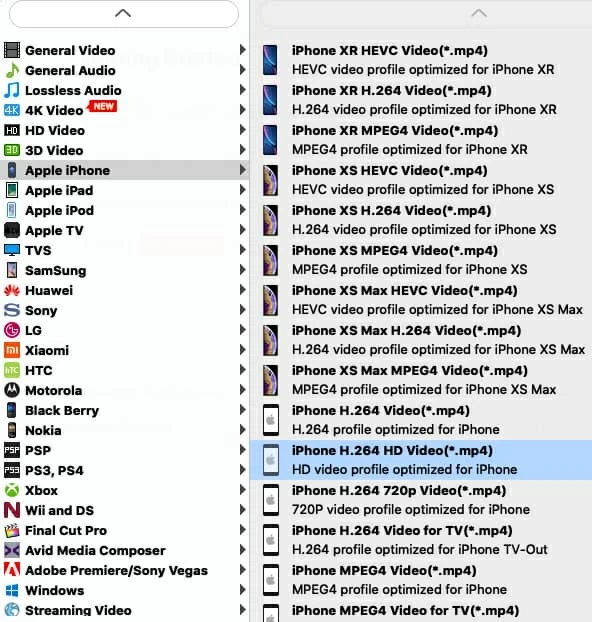
Suppose that you want to get your WMV videos over to your handheld devices or TV sets, luckily, this WMV converter can also help you accomplish it in a breeze. What you need to do is choose the tailored device-compatible format and convert them straight to devices for the sake of successful playback.
Step 3: Start WMV to Final Cut Pro X conversion on Mac
After customization, you should choose a location to save the resulting files by pressing Browse icon underneath the Setting icon, otherwise, all you've done will go for nothing.
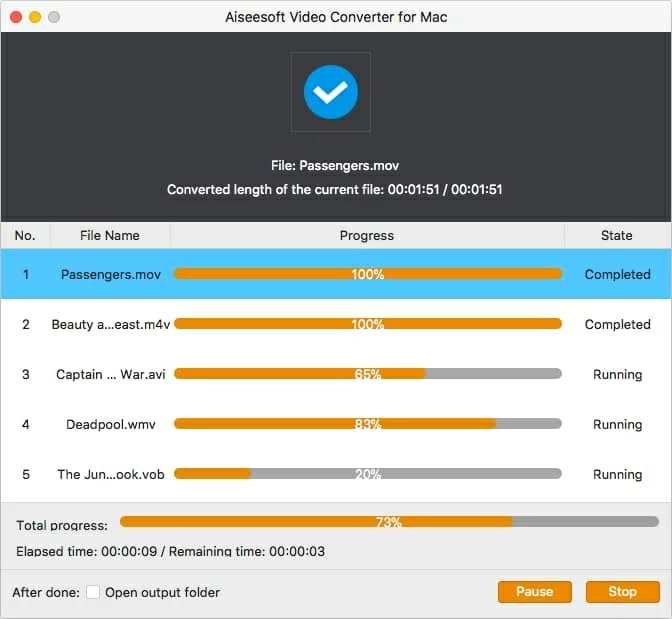
Then, just hit the Convert button on the right bottom side of the program window to kick off the conversion from WMV files to FCPX ProRes .mov files on Mac. The processing window pops up with progress bars that shows you the remaining time.
Normally, the conversion process will take you a few minutes. The program makes full use of the entire power of your computer and by default runs as many simultaneous converting processes as the number of cores your CPU has. You can tweak this parameter in Preferences.
That's it! Your WMV footage has been converted to Apple ProRes LT Video (*.mov). Now you're able to transfer the new converted video files to Final Cut Pro X timeline without any hassle and edit to create your stunning movies or trailers.
Happy editing!