A Complete Guide to Change GoPro MP4 File to WMV in Mac


QuickTime Player is the Apple's media player preinstalled on Mac out of the box, which lets you play, edit, record, and share audio and video files on your Mac machine. But one thing we should note is that QuickTime player doesn't open WMV files, it only supports a limited variety of video formats like M4V, MOV, MP4, Mjpeg. Hence, when you try to play a WMV in QuickTime, you may usually get an error message saying "You may experience problems playing a video track in [name of video].wmv because the required compressor could not be found."
Actually, WMV (Windows Media Video) is the Microsoft's proprietary format that's native to Windows platform and can be played in Windows Media Player without any problem. But for Mac ecosystem, the certain restrictions and the incompatible codecs have make it a rather hard WMV playback via Apple QuickTime Player.
The Easy Way: Converting from WMV to QuickTime Video File
To get out of this problem, you need to first convert WMV to a format playable on QuickTime Player. In this article I'm going to use the Video Converter for Mac software. This is the easy solution. It features a simple interface that can handle tons of media formats you throw at it, and produce video in a variety of formats in the shortest possible time within a few pretty easy steps. All you need to do is to import source WMV file(s), choose the QuickTime readable output profile, and then a click of Convert icon and you're free to go.
Better still, there are dozens of conversion options you can use to make full control over the quality of resulting files. If you are looking to take a movie well-matched with the myriad of multimedia devices for portable playback, you are also given a group of tailored presets.
Step 1: Load MWV Files to the Software
Once you navigate the software, at first glance, you'll find most of the main features are on main screen that makes you use most out of the app.
To begin with, import source WMV files onto the middle panel of the interface by dragging-and-dropping. Alternatively, head to the top left corner of the toolbar, click Add File button to browse to the location on your Mac computer where your WMV files are stored and select them to open.
Your added videos will list in a queue as you can see below.

Step 2: Select a QuickTime Supported Format as an Output
The next step is to set up the output format and conversion settings of the files you are going to save.
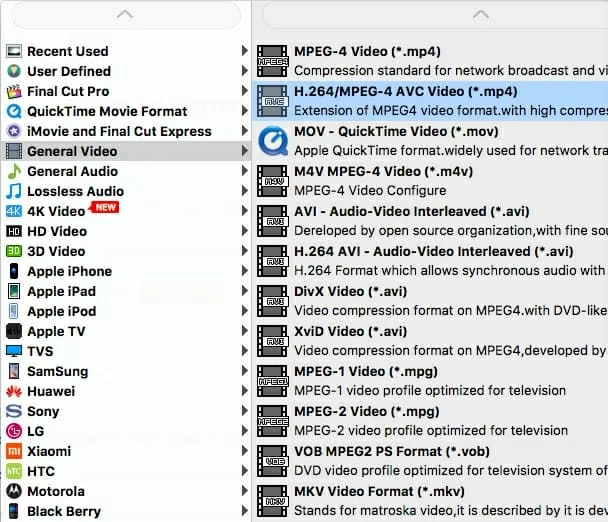
Forward to the lower left side of the screen, a click of Profile drop-down arrow will reveal the output format panel on which are the specific video/ audio formats and tailored presets, then you can choose a target format according to your playback preference.
In this tutorial, in order to play videos in .wmv to the QuickTime, you may select MOV - QuickTime Video (*.mov), MPEG-4 Video (*.mp4) or M4V MPEG-4 Video (*.m4v) from the extending list under General Video column.
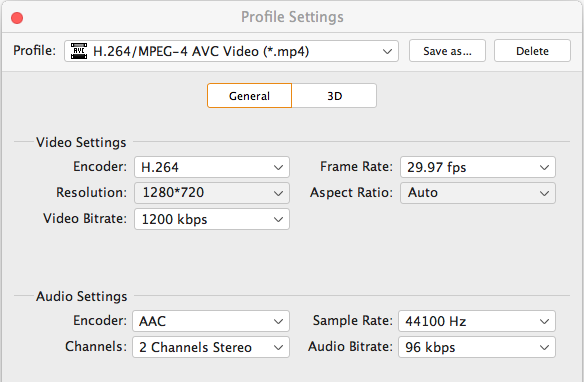
If you want to alter the quality settings of the final video, this WMV to QuickTime converter gives you solid highly advanced tweaks to get this job done. Just press Settings tab right beside Profile field to open Profile Settings window. Video frame rate, resolution and audio sample rate, bitrate, and more codec settings are all available to be configured manually and it's at your option.
It is important to note here that you understand what you're trying to achieve rather than just garble the default values. Generally, you can skip this part, since the default configurations are optimized enough to lead to a successful conversion.
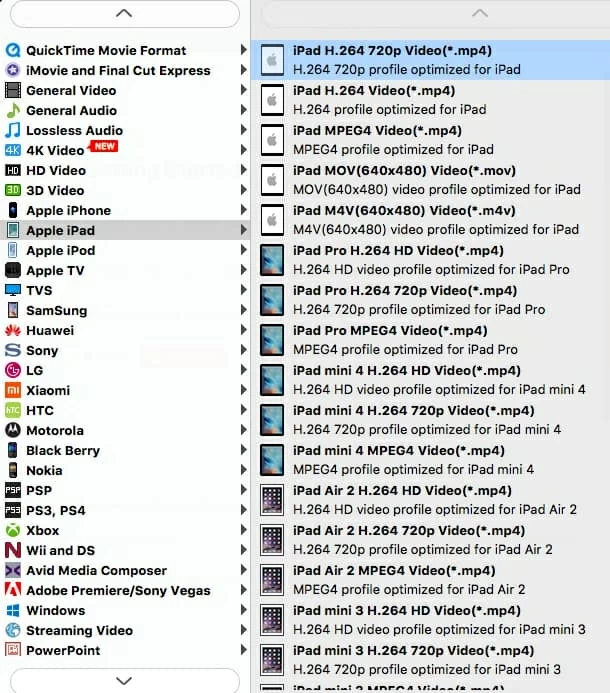
On top of all that you may sometimes get to setup video conversion for devices like Apple devices, Android smart phones, editing applications, etc. in one click using the device presets which are available. Once you've select the model and the program will automatically optimize files for that device's screen size, resolution and other particular aspects.
For example, if you feel like importing and playing WMV footage on a iPad which happens to be carrying in your pocket, you can scroll to Apple iPad category and pick up an appropriate model.
This is an optional part. If you want to deal with video editing, this software will help you out with a sequence of editing tools to let you apply adjustment for creating a more professional video clip. Head to the top tool bar and you can trim, crop, add watermark, rotate, change contrast/colors and more.
Once you've picked your output references, back to the main window of the program and press Browse button directly underneath Settings to choose a location to save the converted videos.
Step 3: Start to Convert WMV to QuickTime Playable File Format
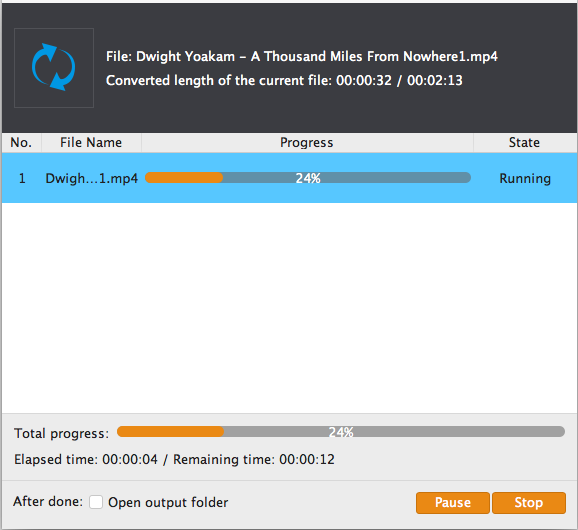
At this point, simply hit Convert button at the bottom right corner to initiate the conversion of WMV files to QuickTime videos process on your Mac. The convert progress bars attached on the pop-up window will show you how much of the encoding is completed.
After it is accomplished WMV converting process to QuickTime video files, you can open the destination folder to check the newly minted files.
Now, you can get QuickTime to play the new minted video files on Mac, add them to iTunes and then on your iPhone & iPad.