How to Play a Blu-ray Disc on QuickTime on Mac


Adobe has made it really easy for you to edit video footage and movie files on a computer with its Premiere Pro (CS4, CS5, CS6, CC) application, a part of Creative Cloud. Thanks to its sleek and streamlined interface, unmatched ecosystem of tools, multiple file formats support, and the new added capabilities of support for VR, 8K and HDR, Adobe Premiere Pro played a very large part in the professional video editing market.
If you've got some quality MKV files ripped from Blu-rays or downloaded online or other source, you probably want to edit these MKVs using Adobe Premiere Pro to create your own custom movie. Beforehand, you should have a basic picture of Adobe Premiere Pro before anything you do comes to no avail. Adobe Premiere Pro accepts a wealth of formats as input natively, but MKV isn't one of them. When you try to open a MKV on Adobe Premiere Pro, you probably get a message "Error trying to open source media file", or something like that on the screen.
In order to edit mkv video with Premiere Pro, it's required to first convert the MKV to something useable using 3rd party video conversion tool. If you want a tool which converts your video files to the proper format with a simple front-end or get plenty of control over audio and visual settings, Video Converterdeserves a try.
The program does exactly what it says it does. It's simple and painless to creat conversion among a vast array of video & audio file formats-including some not-common types for use on a broad range of handheld devices, media players, game consoles, applications and sites. For advanced users, the software even offers a lot more choices that you'll be able do much more for giving a personal touch to your media files - from tweaking the video conversion encoding, removing dark frame, splitting unwanted part, to adding watermarks, adjusting brightness, contrast, saturation and hue, etc.
Video Converter is easy to use. In this article we provide three basic steps to help beginners get started with it to convert MKV to a more accessible format that's editable in Premiere Pro (CS4, CS5, CS6, CC), and some advanced tricks that will benefit experienced users.
If you're running a Mac and need to convert MKV files, please refer to Video Converter for Mac.
Step 1: Load MKV Files
Launch the software on your computer. It will first shows the startup interface with a few choices including Add files, output format, output path, edit option and more. Click "Add File" in the top-left position to navigate the source MKV footage from the local media library and import them into the software.
Alternatively, hold Ctrl on the keyboard to select more than one, and then simply drag them and drop to the software window.
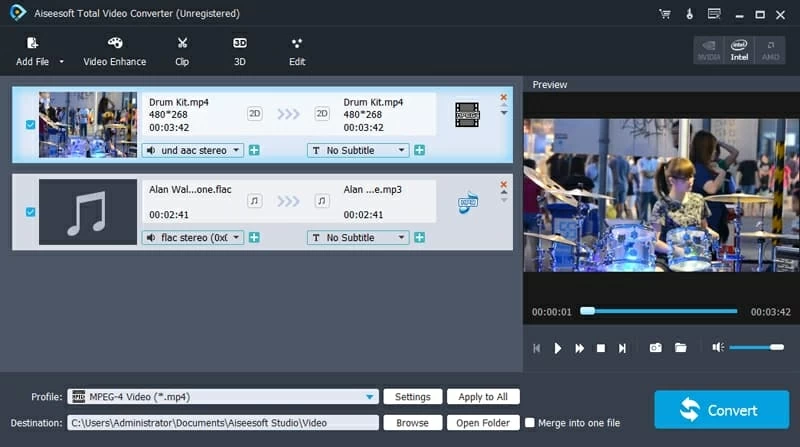
If you work on several video clips and want to combine into a unit for creating and enjoying a small movie, then you can check "Merge into one file" option lying at the bottom of the window.
Step 2: Set the Desired Output Format
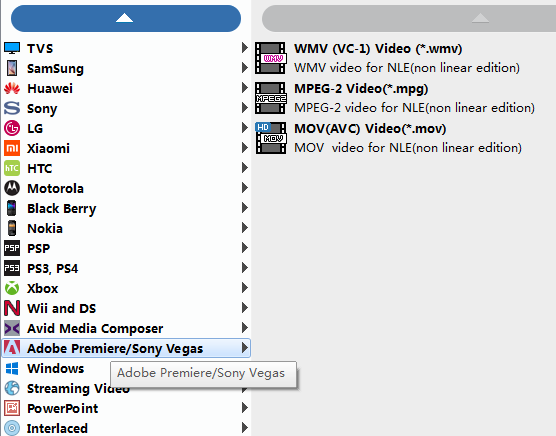
Step two of video converting project is set output preferences. Click the "Profile" drop-down menu located in the lower left side of the window, and all format types avaiable will be listed in it, the screenshot you can see below.
Then select one format profile that can be worked with Adobe Premiere Pro such as WMV, MPG, MOV under "Adobe Premiere/ Sony Vegas" category.
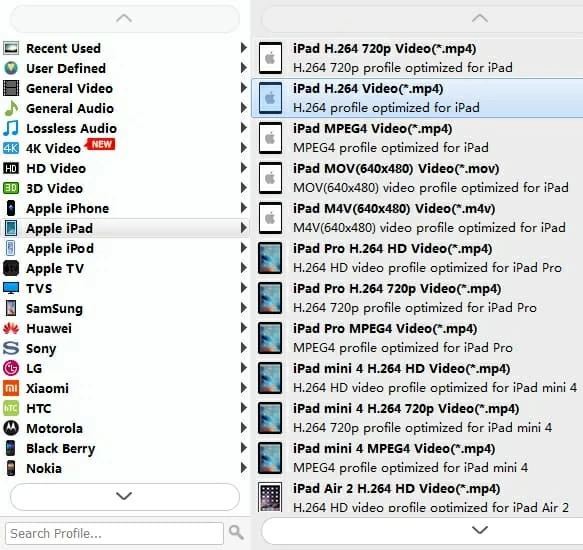
As you can see in the image below, aside from the specific formats for output, this MKV converter also lets you do batch conversion to target muitiple devices in an easy job so you can save your time, such as a series of mobile phones, iPads, HDTVs, etc.
You can choose from tons of hand-picked presets from the device-oriented categories. Once you select a particular preset, this video converter will generates videos optimized for that device you chosen. This will most certainly prevent any configuring errors. For instance, if you would like to play a video on iPhone, you simply choose an iPhone model profile from "Apple iPhone" category.
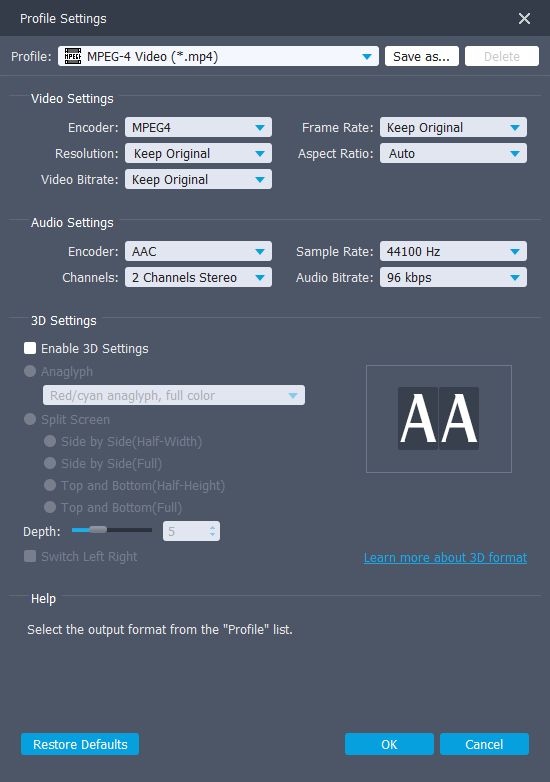
The finally quality of the output files always has much to do with the encoding parameters. If you are picky about that, you can use the "Settings" option (next to "Profile" menu) to open the profile settings window where a number of conversion parameters (Encorder, Resolution, Frame Rate, Bit Rate, etc.) can be configurable.
When you are done configuring settings, you'd better know what you are doing here, otherwise leave them as their default values.
Step 3: Start the Process of Converting MKV to Premiere Pro Editable Format
Before you start the process, select a save path on your machine to store the output video files via "Destination" field in the bottom side of the program window.
Now that your video is edited, it's time to export. Hit the blue "Convert" button on the lower right corner to initialize the MKV to Adobe Premiere Pro File conversion. Sit back and have a rest.
Well done! With just a few simple steps we successfully convert MKV videos to Premiere Pro friendly files. To open the destination folder containing the new created files, click the "Open Folder" button next to "Output Folder" field.
Now, all you need to do is launch Adobe Premiere Pro and click the "File" option to import your files. Happy editing!
More Related to Adobe Premiere Pro Editing