How to Recover Lost Data from iPhone 7 Plus Easily


Losing data on iPhone or iPad and want to restore iCloud backup to get files back? Read this article thoroughly and get two efficient ways to recover data from iCloud backup.
iOS users are always at the risk of losing their data because of various reasons. Maybe your iPhone or iPad is misbehaving, or your iPhone or iPad was stolen, severely damaged or system crashed. Or perhaps you're upgrading to a new iOS device and plan to move all your current data.
Whatever the reason, you will want to restore data from iCloud backup you made previously. Here're two ways to accomplish the task.
We firstly introduce the official way from Apple. The process of restoring from an iCloud backup begins by wiping your device and putting it into the clean state. So be sure to perform a backup of important data before doing a reset on your iPhone or iPad.
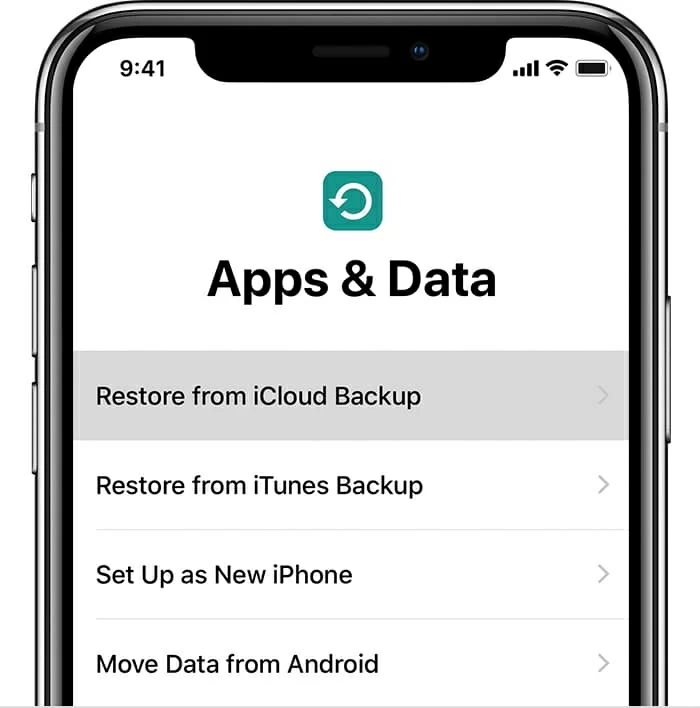
Restoring from an iCloud backup can take some time. Be patient. Keep in mind that during the entire process, you can't access iCloud backup, nor choose what data file you need. Worse still, this method will erase all your existing data on the iPhone or iPad.
Using 3rd party backup extractor application is another way to help you restore iCloud backup and get data back to iPhone or iPad. n today's discussion, we'll introduce a very useful tool named Appgeeker iOS Data Recovery. It's an efficient and reliable, letting you access the backup and preview the data in window and recover exactly what file you need. It won't wipe out your current content on iPhone, making it really useful when you just need to regain some specific data files other than everything.
Plus, this program supports recovering data from iPhone memory, as well as from iTunes backup. Just read on and learn how to restore data from iCloud without resetting.
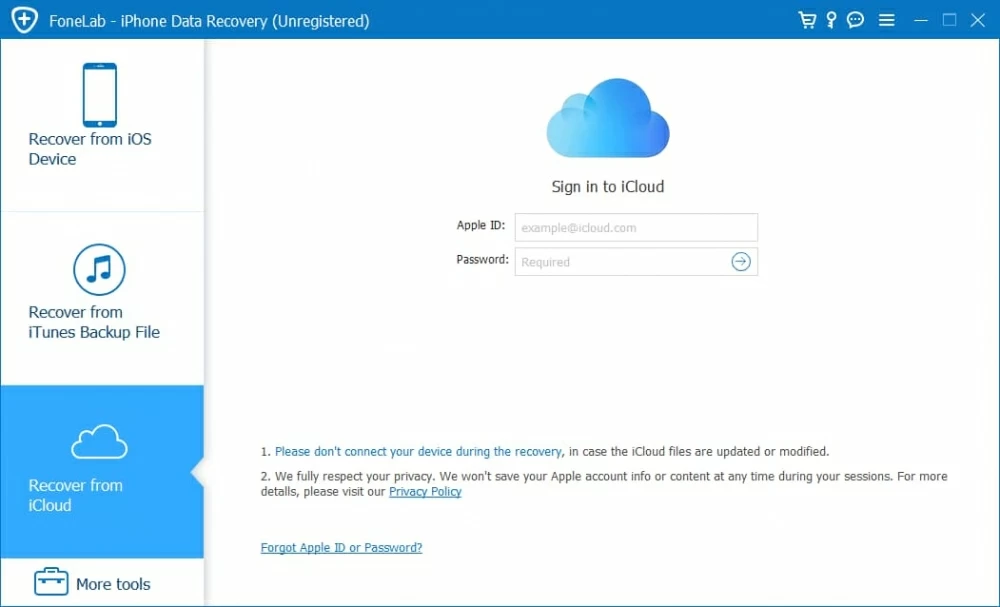
Step 1: Sign in to iCloud account
Download the software and install it on the computer then open it, you could see a well-designed startup interface, which makes the process as easy as possible.
Next, select the "Recover from iCloud Backup" mode on the left side of the interface to proceed.
Enter your Apple ID and password to log into iCloud account when prompts.
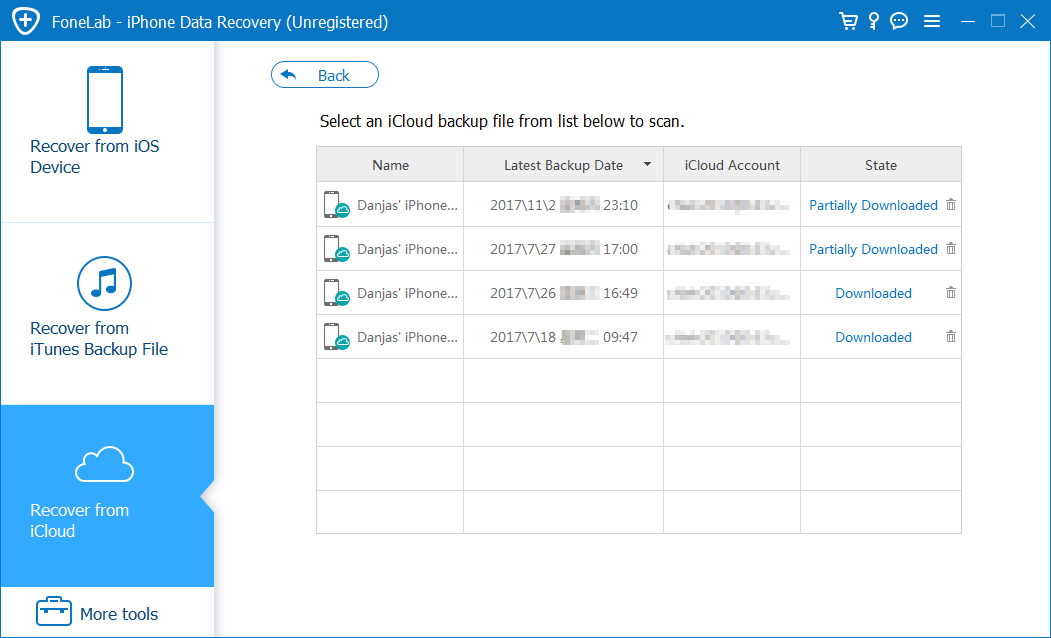
Step 2: Select an iCloud backup file to download
After Login, you'll see a list of iCloud backups. Choose the right and latest backup version of your iPhone, then, click the Download button to go on.
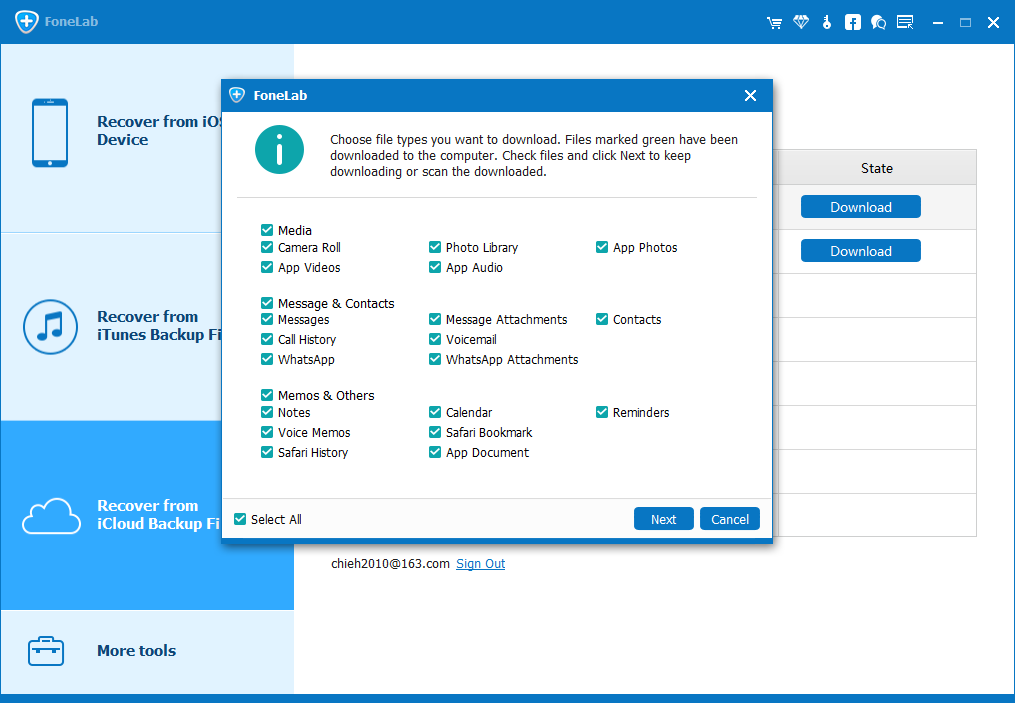
The software will then ask you select the type of data to download in the opening dialog box. By default, all files are selected.
Simply tick the appropriate boxes in the dialog and then press the Next button to download the files.
Step 3: Preview data files
Once downloaded, you'll see a list of categories on the left sidebar (below the name of your device).
The program allows you to have a preview of each categories. To do so, simply click on any category and all its contents will display on the right pane of the window.
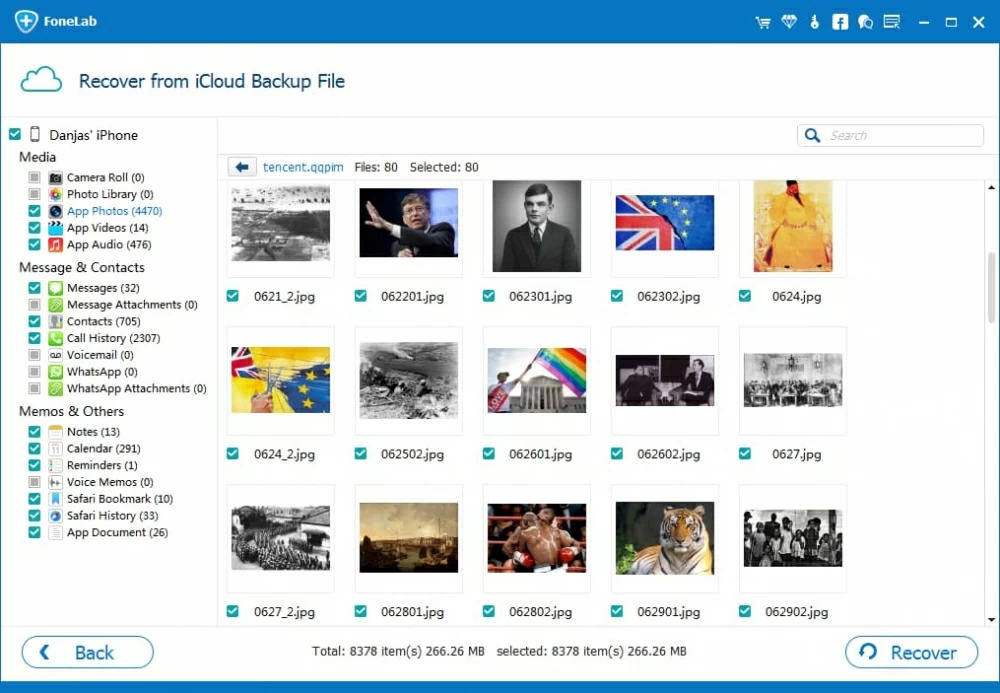
Step 3: Recover data from iCloud backup
At this point, check the small boxes next to each item on the right pane to select files that you want to extract from the iCloud backup.
Then, press the Recover button at the bottom-right corner, a window will appear. You will then be prompted to select a destination path to save the exported data to.

Once done, hit the Recover button again to begin the extraction and restoration process immediately. All your selected files will be exported to your specified folder on the computer in their native format.
That's it!