
How to Recover Data on iPhone without Backup

Explore simple steps to restore text messages from iCloud, or without iCloud, as well as useful tips to ensure a successful iCloud messages recovery.

No doubt when you accidentally deleted or lost the irreplaceable messages from iPhone, Apple lets you factory reset your iPhone and restore messages from iCloud.
iCloud is a popular iOS backup service that is designed to automatically back up iPhone, iPad, iPod Touch, and Mac, enabling you to use the iCloud backup to retrieve messages, iMessages and other data after a loss. In case you have an iPhone backup, there's high chance that you can restore your text messages from iCloud to the iPhone.
This full guide explains how to retrieve messages from iCloud, with or without resetting iPhone, as well as provides some alternative solutions to help you effectively recovering the messages without using iCloud.

To retrieve messages from iCloud, you'll need to use iCloud backup to restore your iPhone.
Appgeeker iPhone Data Recovery is a simple and powerful tool to recover deleted text messages from iPhone without iCloud backup or without erasing any current data.
Table of Contents
This iCloud message recovery guide applies to all iPhones, including iPhone 16 and later models, iPhone 15, iPhone 14, iPhone 13, iPhone 12, iPhone 11, iPhone SE, iPhone XS (Max), iPhone XR, iPhone X, iPhone 8, iPhone 7, etc.
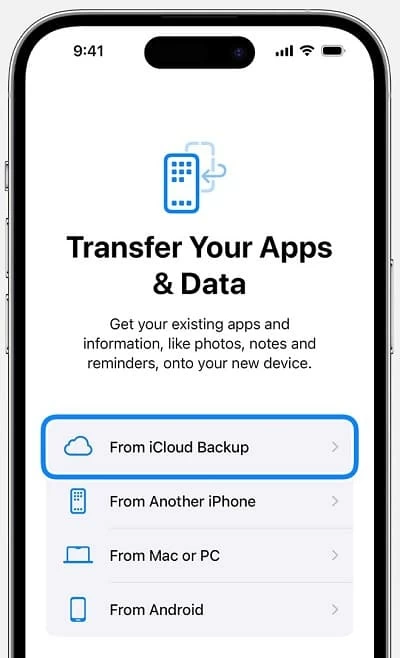
If you've already enabled iCloud Backup in the Settings before you lost the texts, good for you, here's how can iCloud restore messages back to iPhone with the previous backup.
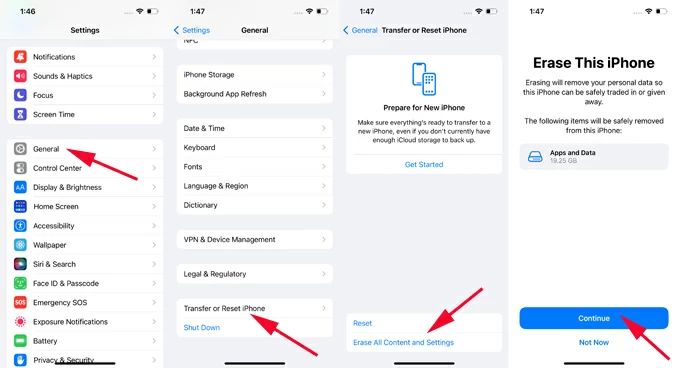
However, restoring iPhone from an iCloud backup to retrieve messages requires you to reset your Apple device to factory settings first. This means that all data will be erased from your iPhone, and be overwritten with the data in the backup. You'll be risk at data loss since the time that your iCloud backup was made. Therefore, you need to be 100% sure the deleted text messages and iMessages are included in iCloud backup.
Read also: How to Restore iMessages from iCloud
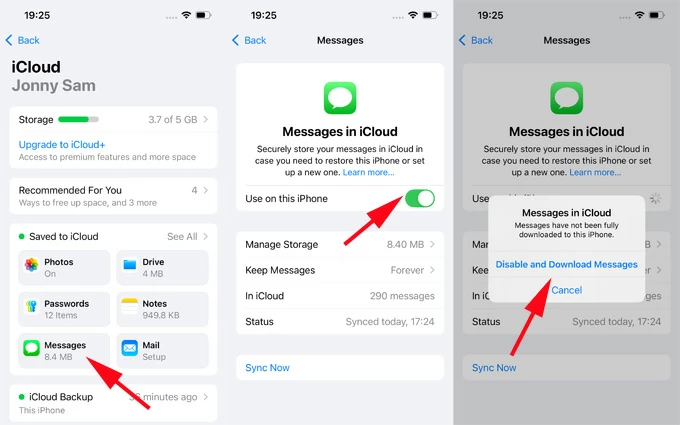
With Messages in iCloud feature, restoring messages from iCloud without resetting iPhone is possible. You just need to download messages from iCloud in a few simple taps.
If you're lucky, the deleted messages will be soon downloaded to your iPhone. Please wait. Note that it's not guaranteed that you can get back the texts via iCloud because you can't see the data on iCloud in advanced.
Note:
If you have trouble of restoring old messages from iCloud - either because you don't keep a backup of the text history, or the messages are deleted from both iPhone and iCloud due to iCloud Messages synchronization, don't worry, you can still retrieve your messages on the iPhone without relying on iCloud.
The easiest way is to access Recently Deleted folder right within the native Messages in iOS 16 or higher, where can see the text messages that were deleted in the past 30 days. Once you find the deleted messages there, restore them and put them back to the message inbox instantly.
Do this to retrieve deleted text messages from iPhone without restoring from iCloud:
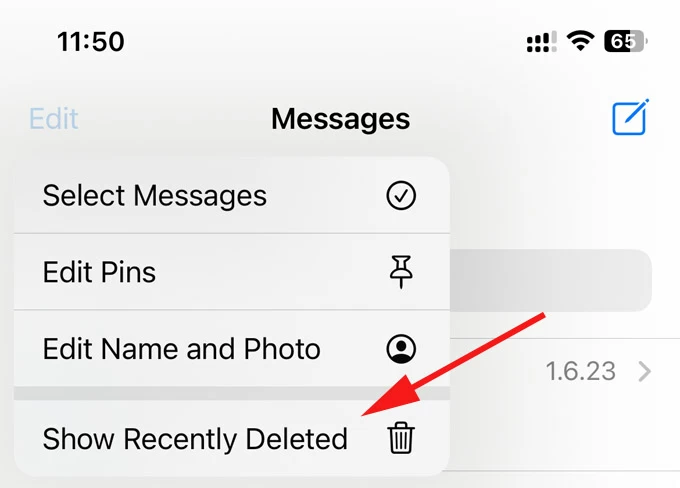
1. Tap to open Messages app on the iPhone that running on iOS 16 or newer iOS version.
2. Tap on Edit in the upper left corner, and choose Show Recently Deleted from its menu. You can also tap Filters > Recently Deleted.
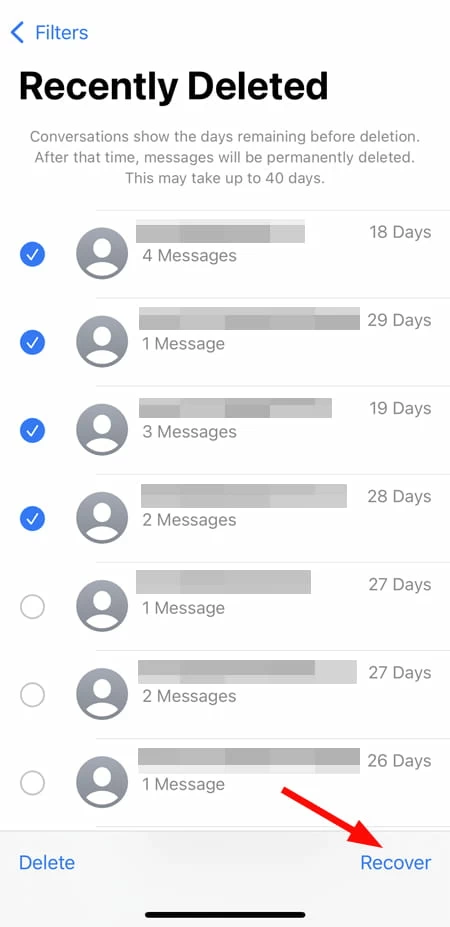
3. A set of conversations you deleted within a month should appear. The bad thing is that you're not allowed to view the actual text messages.
4. Pick the conversations that contains the certain messages you wish to recover.
5. Tap Recover at the bottom.
6. When prompted, tap Recover Messages to get back old text messages from the iPhone at once.
Appgeeker iPhone Data Recovery comes in handy when you need to recover deleted texts from iPhone and get back any important message information & attachments, even you don't have iCloud backup. It's pretty useful when your text messages are not showing up on iPhone nor in iCloud - they're removed from Recently Deleted folder and gone permanently.
The software makes retrieving iPhone messages without iCloud incredibly simple: from being to scan the internal storage of iOS device, to access deleted text messages for preview, and offer flexibility to recover a single text, entire conversation, or all messages in one click, it makes everything simple.
Just click the download link and set up iPhone Data Recovery on your PC or Mac. Here's how to retrieve messages without restoring from iCloud.
Step 1- Launch iPhone Data Recovery, and choose Recover from iOS Device mode.
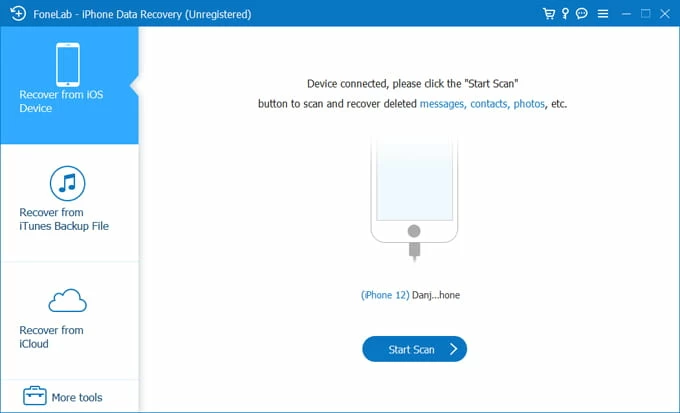
Step 2- Connect your iphone to your computer via a USB cable. Make sure to unlock your device and tap Trust to allow access.
Step 3- Click Start button to perform a full scan of your iPhone's memory in order to find any accidentally deleted messages you want to get back.
Step 4. When that's done, click "Messages" from the side bar, and preview the old text messages.
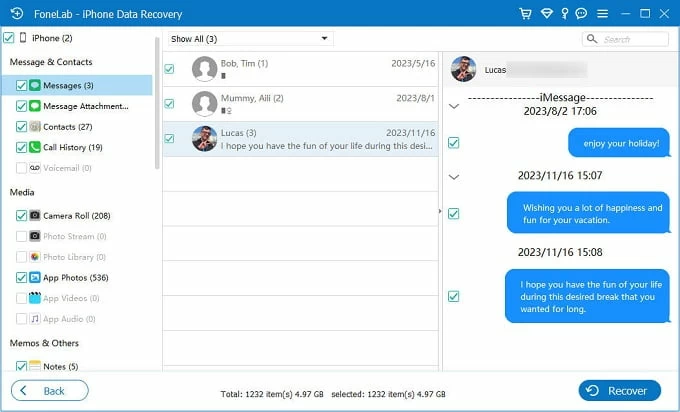
Step 5. Locate and select the deleted messages, then click Recover button at the lower right corner of the interface.
Step 6. Specify a path for saving the texts once recovered, and finally, hit the Recover button to initiate iPhone SMS recovery process. Your text messages will be back in a couple of minutes.

When text messages lost from iPhone, you often pray that you can recover the messages from iCloud to your iOS device. If you have no iCloud backups, things will get complicated but there're still methods to recover the messages you accidentally deleted from iPhone with ease.
To facilitate the process of how to restore messages from iCloud, you'll need to take some measures. Here are the tips for ensuring a seamless iCloud text message recovery.
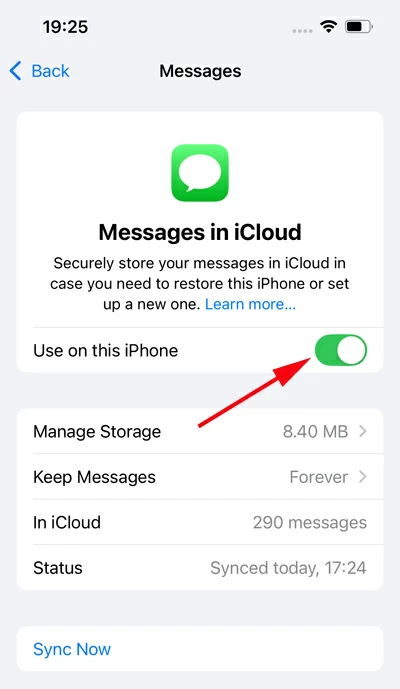
Tip 1. Enable Messages in iCloud
Messages in iCloud allows you to store all your messages, conversations, and attachments to your iCloud server, and to sync across your Apple devices. Hence you can access and restore messages from iCloud.
To enable Messages in iCloud, go to Settings > [your name] > iCloud > Messages, then turn on the toggle next to Use on this iPhone.
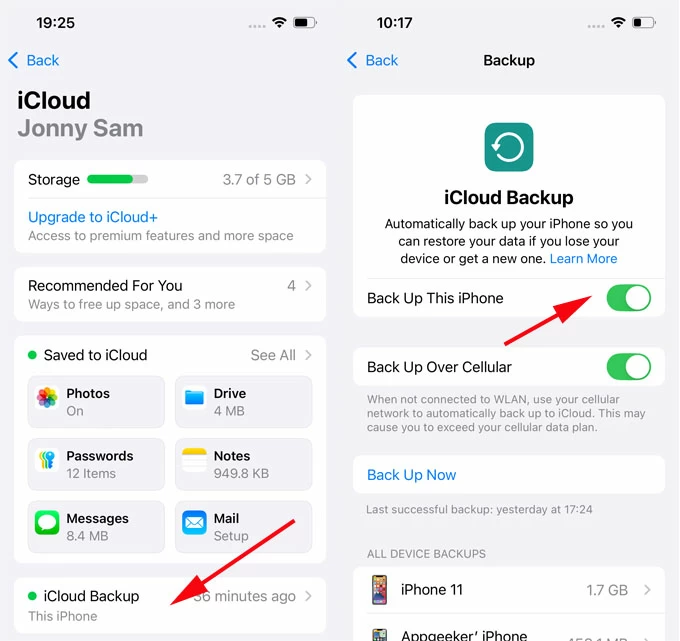
Tip 2. Turn on iCloud Backup
An iCloud backup should be in place to restore the text messages when deleted, lost or disappeared. You can keep an automatic backup or a manual backup onto iCloud beforehand.
Open Settings app, tap [your name], choose iCloud, tap iCloud Backup, and then switch on the toggle for Back Up This iPhone to set iCloud to automatically back up your iPhone on a regular basis. For triggering a manual backup, you just tap on Back Up Now.
Tip 3. Manage iCloud storage
Having enough storage space in iCloud ensures that any message on iPhone is backed up over to iCloud server. iCloud only offers 5GB storage space for free. If there're more and more data on your iPhone, its free space maybe is not enough to back up your messages and other data.
Therefore, you should always check the remaining space on the iCloud. Just tap Settings > [your name] > iCloud. Next to "Storage", you can see how much space is used. Should you need more space, you can upgrade your iCloud storage plan.
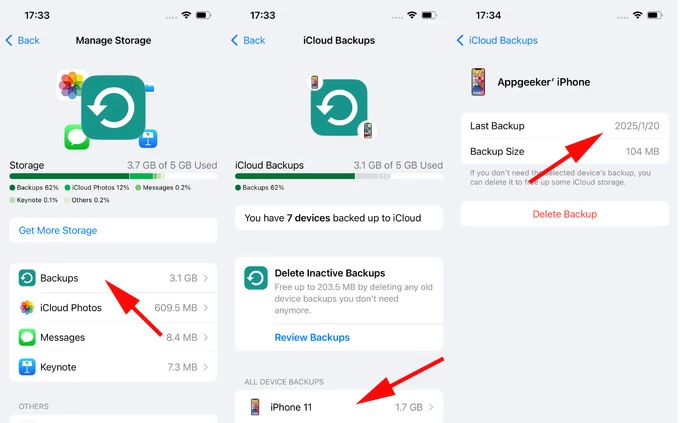
Tip 4. Deleted inactive iCloud backups
iCloud always keeps the updated messages in the server, allowing you to restore the messages from iCloud without any hassle. Do not leave the older device backup clogged up your iCloud storage to back up the most recent text messages.
You can delete old, inactive iCloud backups for the device you're currently using, or older devices you might not use anymore - in order to free up storage.
Navigate to Settings > [your name] > iCloud > iCloud Backup, tap on the device name with the backup you want to delete, then choose Turn off and Delete from iCloud.

Q1- How do I restore messages from iCloud?
To restore messages or iMessages from iCloud, you will need your previously made iCloud backup to restore your iPhone. You'll lose anything on your phone that is not in iCloud.
Q2- How to restore messages from iCloud without resetting?
Restoring messages from an iCloud backup requires you to reset your iPhone, which erases all of your content and settings. If you're using iCloud Messages for synchronization, and the messages that are not on the iPhone are on iCloud, it's likely that you're able to restore your messages without reset, by just downloading messages from iCloud.
Q3- How to view text messages on iCloud?
There's no way to view text messages or iMessages in iCloud using www.icloud.com via the internet. No Messages app is provided on iCloud web interface.
Fortunately, if Messages in iCloud is activated, iCloud service syncs your messages across all your devices sharing the same Apple ID. You can easily access the messages in iCloud on an iPhone, iPad, Mac, or Windows PC that is signing into the same Apple ID. We've covered a separate guide on how to view iPhone messages on a PC or Mac computer.
Q4- Can I retrieve deleted text messages on iPhone without backup?
Yes. If there's no backup to recover the deleted messages from iPhone, you can try checking the Recently Deleted folder within Messages app (iOS 16 or later) to restore text conversations you deleted for up to 30 days, or using AppGeeker iPhone Data Recovery software to retrieve permanently deleted text messages directly from iDevice memory without iCloud backup or iTunes backup.
Use Recently Deleted folder to retrieve deleted iPhone messages without a backup:


