How to Move Photos from iPhone to iCloud

Looking to personalize your iPhone with a custom ringtone but want to avoid the hassle of using iTunes? Follow this guide to explore how to set a ringtone on iPhone without iTunes!

Tired of the limited selection of default ringtones on your iPhone? Want to personalize your device by setting a custom ringtone? The good news is, you can easily add a ringtone to your iPhone without the need for iTunes. Whether it's a catchy song snippet, a funny sound effect, or a personalized recording, this guide will walk you through the simple steps to create, add and set a custom ringtone on iPhone without the iTunes hassle.
When you need to add ringtones to iPhone without iTunes efficiently, there're several approaches to help you.
In the following section, we'll show you how to set a song as a ringtone on iPhone without iTunes or computer, using GarageBand. Additionally, we'll explore a robust iPhone ringtone maker embedded within the Appgeeker iPhone Data Transfer software, which enables you to extract a ringtone from any sound file and seamlessly add the ringtone to your iPhone with just a few clicks.
Let's dive into the steps on how to add a ringtone to iPhone without iTunes:
Yes! For Apple users, directly customizing a ringtone on iPhone might seem less straightforward, especially if you don't already have a custom ringtone in Music Library or Files app. However, fear not! There are alternative methods if you want to add a custom ringtone on your iPhone that is not purchased from Apple Music or the iTunes Store.
Before exploring the Part 2 for adding ringtone to iPhone without iTunes, it's worth noting that you can still follow the traditional steps using iTunes to set a custom ringtone on iPhone.
Note that iTunes will only recognize and add a ringtone file that is in .m4r format and less than 40 seconds. Here's a guide on how to convert an MP3 or another music file into iOS-compatible ringtone and add it to your iPhone using iTunes:
1. Select or create a custom ringtone.
You may download an online ringtone, extract a snippet from your favorite song, or even record music from YouTube. Make sure to keep the ringtone under 40 seconds.
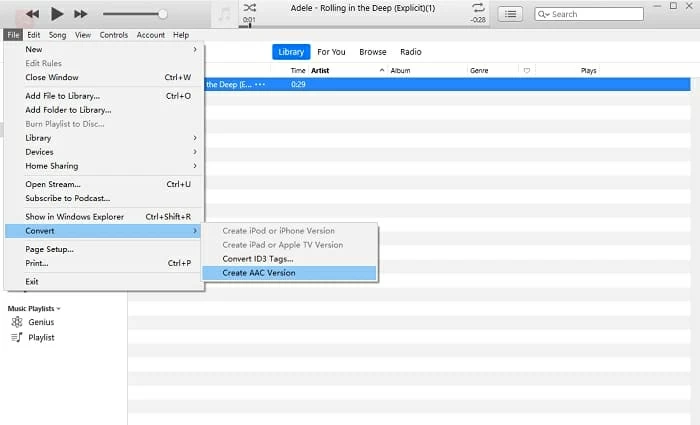
2. Launch iTunes and convert the ringtone file to .m4r format.
If your chosen sound file is in MP3 or other formats, convert it to .m4r file first.
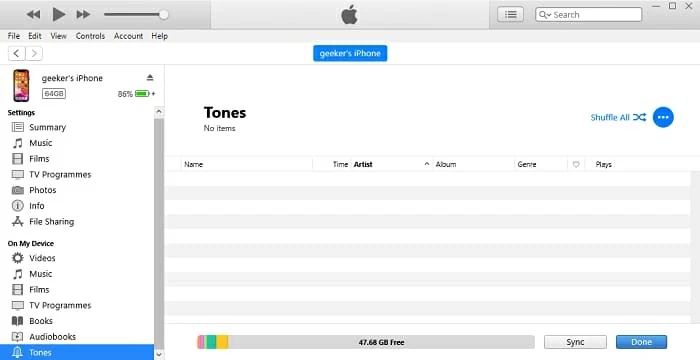
3. Add the ringtone to your iPhone from iTunes library.
Connect your iPhone via a USB cable, then click the device icon from the top-left corner. Choose Tones tab from the left sidebar, you can then drag and drop the .m4r ringtone to iTunes window and sync it to your iPhone.
4. Set the iTunes song as your ringtone on iPhone.
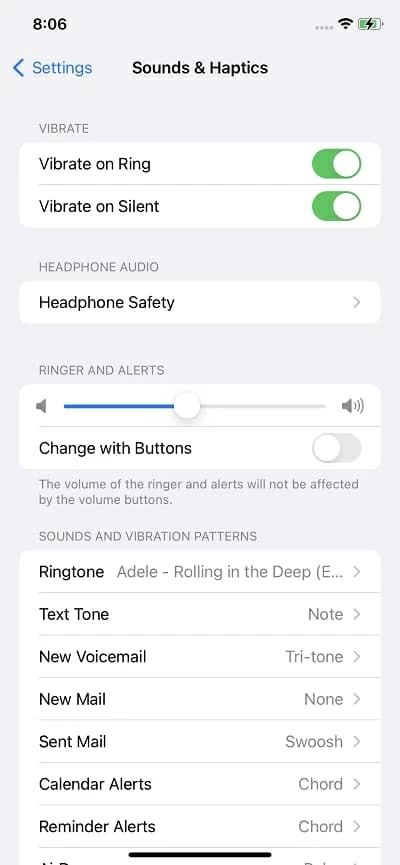
Set your ringtone on iPhone through Settings > Sounds & Haptics > Ringtone. You will view all available ringtones; simply select the sound added from iTunes and set it as new your ringtone.
Although you can add a ringtone from iTunes library, the process can be complex. Hence, you might prefer a simpler, direct method to create and add a ringtone to iPhone without iTunes.
If your iPhone is operating on iOS 14 or a later version, GarageBand, supported by Apple, is an ideal choice to make custom ringtones on iPhone without iTunes or computer. It is accessible to all iOS users and facilitates the process of turning any song into your iPhone ringtone.
To begin, download and install GarageBand on your iPhone from Apple Store. And ensure that the song you wish to set as your iPhone ringtone is locally saved in your Music Library or Apple Files app. Once prepared, follow the steps below to create a custom ringtone on iPhone:
Step 1. Install and open GarageBand app from Apple Store on your iPhone.
Step 2. Swipe to find Audio Recorder and tap Voice.
Step 3. Tap on View at the top left-hand corner of the screen.

You'll enter the editing section, then tap the triangle icon next to the red circle to make it blue.

Step 4. Tap the Loop icon > Choose music from Files or Music. If the music you want to set as a ringtone is from Files, tap Browse items from the Files app to add the song to a track.

Step 5. Drag the vertical bar to the starting point of your custom ringtone. Then tap the song twice and select Split. You'll see a scissor icon appear at the point, drag the scissor down to cut the song at this starting point. The same way can be used to choose the ending point.
Step 6. Double-tap the unwanted part of the song and choose Delete.
Step 7. Tap the down-arrow icon in the upper left corner > Hit My Songs.

Step 8. Hit and hold the custom music file, and then select Share > Ringtone on the screen.
Step 9. Tap Continue, and then change the name of the ringtone. Once done, tap Export at the top right corner. When the exporting process is finished, hit OK.
Note:
If you have your favorite songs or tracks on your computer that you wish to set it as a ringtone on your iPhone, the all-in-one solution Appgeeker iPhone Data Transfer software comes in handy. It brings iPhone ringtone maker and file-transferring features in one place, allowing you to make any sound file as a custom ringtone and add it to iPhone directly, without needing iTunes or GarageBand.
Moreover, this tool automatically converts the incompatible audio file to iOS-compatible format, enabling seamless playback with iPhone/iPad. It also allows you to preview all ringtones and music before adding them to iPhone, as well as other data files like photos, videos and more. Here are several reasons why users prefer to add a ringtone to iPhone without iTunes by using iPhone Data Transfer:
Get the software on computer, and follow the steps to add ringtone to iPhone without iTunes:
Step 1. Launch iPhone Data Transfer and connect your iPhone using a USB cable.
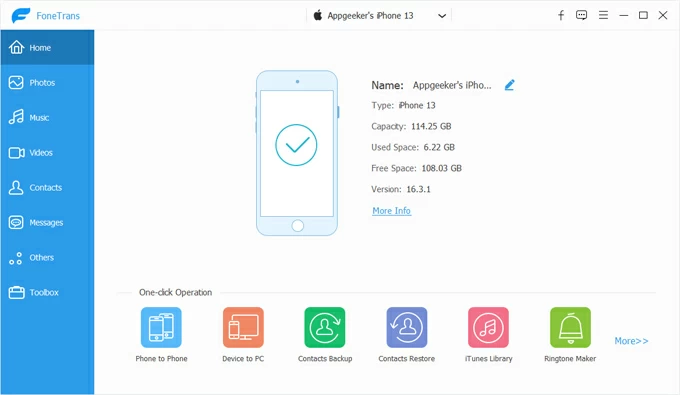
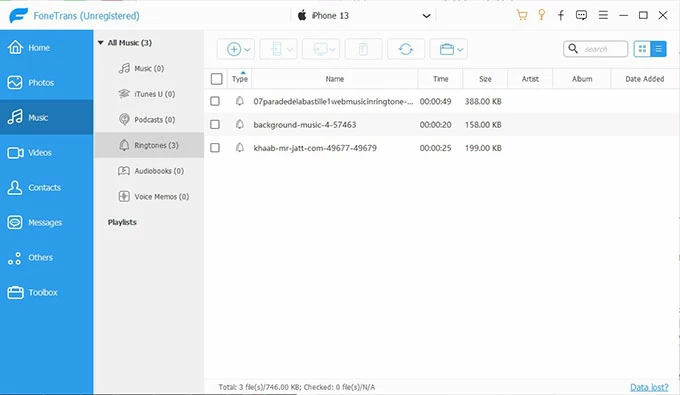
Step 2. Click on Music tab from the left-side menu and select Ringtones in the expanded options. From here, you're able to view and manage all available ringtones on your iPhone.
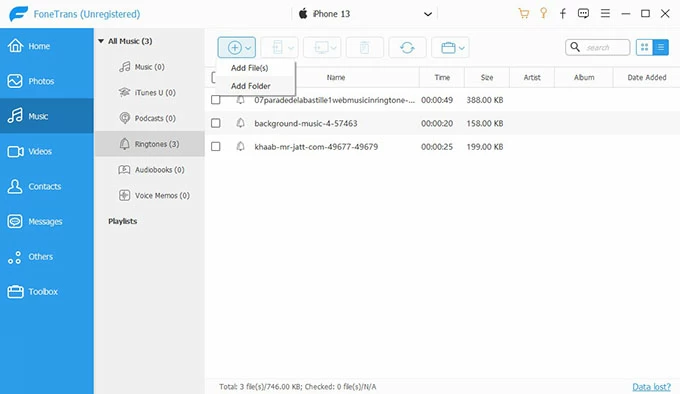
Step 3. Click the Add + button at the top and choose Add File(s) or Add Folder, depending on whether you want to add an individual ringtone or an entire folder full of ringtones.
Step 4. Add ringtones to your iPhone. A local folder will appear, and you're allowed to choose any audio file from your computer and add the music file to your iPhone without iTunes.
The newly added ringtone will automatically appear in your iPhone's Settings > Sounds & Haptics > Ringtone. From this menu, you can set the added sound as your new ringtone.
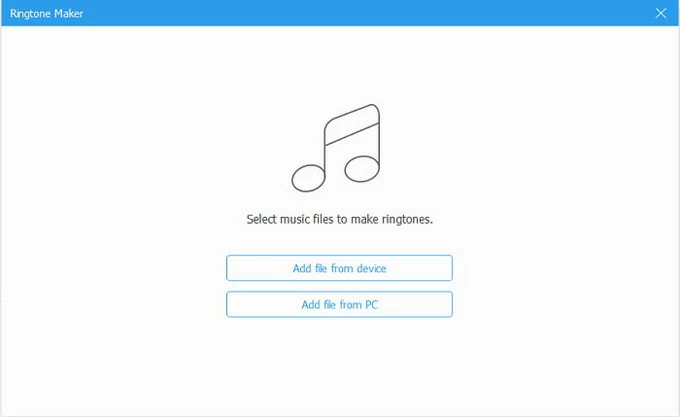
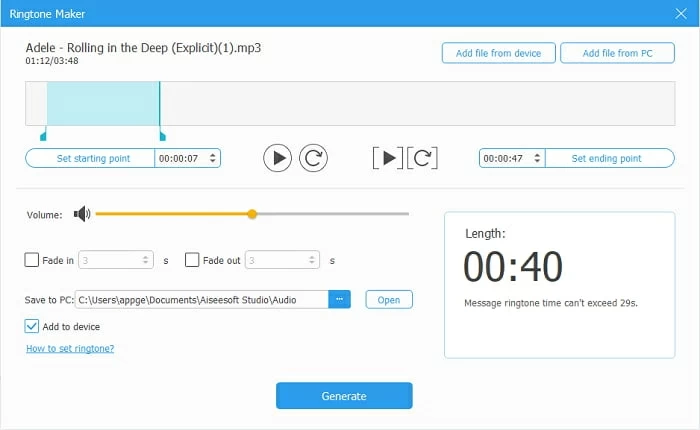
If you're seeking to customize your iPhone ringtone, the iPhone Data Transfer software offers a convenient built-in Ringtone Maker for iOS users to create personalized ringtones without the need for iTunes. You can easily trim any sound file and select your desired portion for a custom ringtone, whether it's an MP3 file, a song, a sound effect, or an audio recording.
Here's how to make a song a ringtone on iPhone without iTunes using Ringtone Maker:

Once completed, try using the data transfer functionality integrated into this tool. It will seamlessly put the custom ringtone onto your iPhone without the need for iTunes.
After successfully adding the ringtone to your iPhone, follow these steps to set a custom ringtone in your iPhone Settings:
It's possible to assign a custom ringtone to a specific contact on your iPhone. To get started:
Setting an MP3 as a ringtone on your iPhone requires using iTunes and converting the MP3 file into a more compatible ringtone in .m4r format for iOS.
If you already have your custom ringtones on your iPhone, it's pretty easy to change your ringtone on iPhone.
To get a custom ringtone on your iPhone without using iTunes, you can rely on third-party software like iPhone Data Transfer, as discussed in Part 2 of this guide. This software facilitates the seamless transfer of any music file from your computer to your iPhone. Moreover, you can also utilize it to directly import MP3 files to your iPhone and designate them as ringtones.