What to Do When iPhone Says Security Lockout

iCloud doesn't always work. Luckily, there're even faster ways to transfer data from your iPhone to Mac without using iCloud services.

Whether you're looking to transfer large photo library, videos, music, etc. or small files like messages, contacts, notes, documents, etc. without iCloud, Appgeeker iPhone Data Transfer offers easy and fast file transfers via a wired connection between iPhone and Mac. You can also drag-n-drop the files from iPhone to Mac directly without erasing your phone data.
If iCloud isn't working for syncing your iPhone data to your Mac, try other file transfer tools for a wired or wireless export.
iCloud is Apple's default solution for syncing data between an iPhone and a Mac—but it's far from perfect, especially with multi-gigabyte files. Limited free storage, slow syncing speeds, privacy concerns, and dependency on a stable internet connection often make users look for ways to transfer data from iPhone to Mac without iCloud.
Fortunately, there're still possible iCloud alternatives for a smooth iPhone file transfer to Mac. Nearly all data can be transferred without needing iCloud Sync or iCloud Drive, including music, photos, videos, TV shows, music videos, movies, text messages, contacts, documents, and more—using solid wired or local wireless methods across iOS to macOS.
In this guide, I'll show you every practical solution of how to move data straight from your iPhone to your Mac without relying on iCloud, whether it's for keeping a local backup, viewing or editing media files on a big screen, or freeing up device's space.
Table of Contents
iCloud makes it easy to sync iPhone with Mac when sharing the same Apple Account and automatically share the content across devices under a wireless connection after turning on iCloud Photos, Messages in iCloud, iCloud Calendar, Notes, Contacts, Health, Reminder, Safari, iCloud Mail, Home, Wallet, and more options. Setting up iCloud Drive can also upload files, documents, projects and more to the online sever and access the information on the Mac machine.
However, big files can push it past its limits. If you've ever tried to use iCloud to sync the camera roll photos & videos, text messages & iMessages, Notes, or any other data that's on the iPhone, only watch the transfer stuck or fail, it's likely that you're experiencing unexpected issues with iCloud synchronization between iPhone and Mac:
No worries. It's possible to bypass the iCloud to import your data from an iOS device to a Mac. Below are five tools you can take to trigger a seamless iPhone to Mac file transfers without touching the Apple cloud.
If you want advanced control, batch transfers, or cross-platform compatibility and avoid iCloud failures, Appgeeker iPhone Data Transfer can help. It's a dedicated, all-in-one file transfer software application that can be used to transfer various types of media files and standard files to and from iPhone, Mac or Windows PC.
The software works with powerful cable-based transfers without internet, making it stable and fast when dealing with a large library of photos, videos, or music, as well as a large collection of documents or personal information such as messages, contacts, notes, calendar, Safari, phone calls, WhatsApp, voice memo, and more. No compression, no data overwrite during the file import from iPhone to Mac computer.
Equipped with a user-friendly interface, you don't need to worry about how to transfer everything from photos, video, music to messages across iPhone to a Mac without ever using iCloud or touching the cloud storage. Learn how to use Appgeeker iPhone Data Transfer tool and perform a smooth data transfer between two Apple gadgets.
Step 1. Launch the software and connect your iPhone to your Mac through a USB-C or USB-lightning cable.
Make sure to unlock your phone, and tap "Trust" if prompted to build a successful connection.
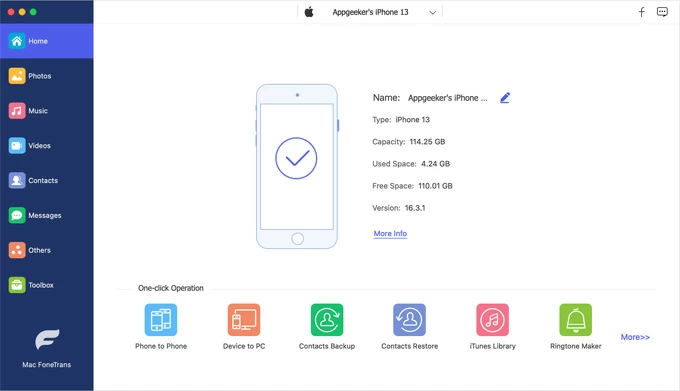
Step 2. Click Photos, Music, Videos, Contacts, Messages or whatever you want to move from the left sidebar. You can then browse your iPhone like an external hard drive, and locate all the items inside.
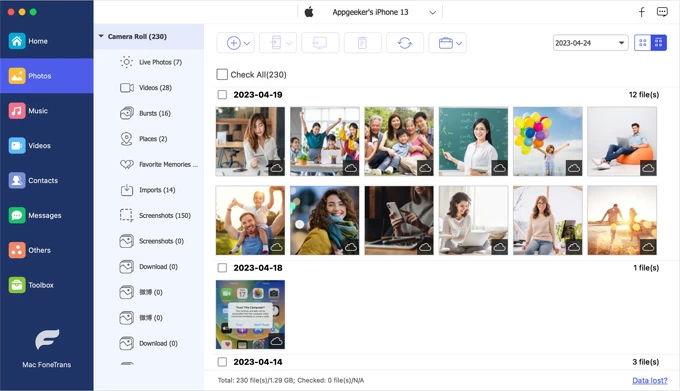
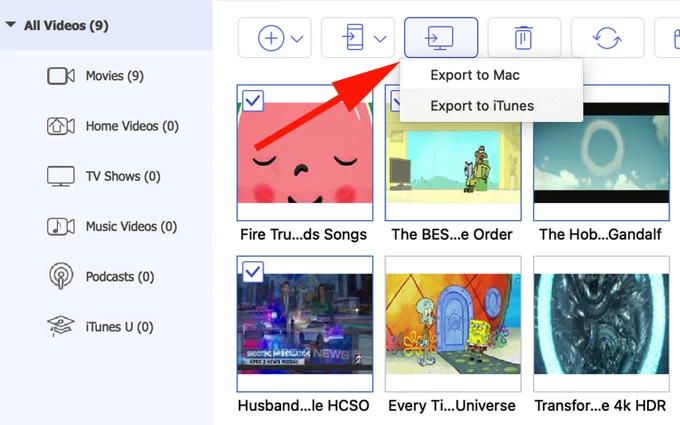
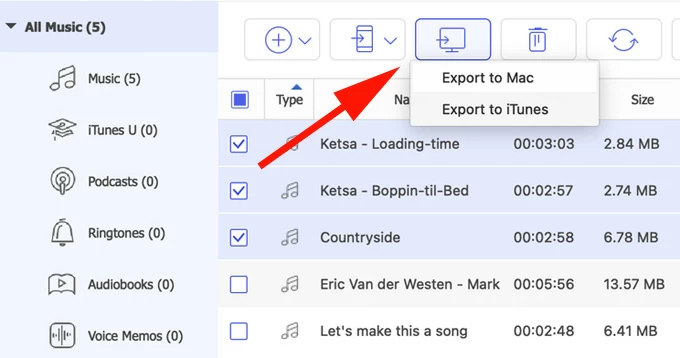
Step 3. Start moving your files from the iPhone to Mac through the wired connection and save locally to any destination of your choice. Simply select the files you desired and click Export to Mac icon at the top toolbar.
Export photos at its original quality:

Export videos (MP4, MOV, MKV) to Mac without compression:
Export music with no quality loss:
Related: How to transfer photos from Windows PC to iPhone
AirDrop allows near-instant, wireless transfer of almost any file type between nearby iPhone and Mac or other Apple devices of yours or anyone. Once enabled, you can send photos, videos, documents (PDFs, Word, Pages), website links, locations, contacts, notes, Passwords/Passkeys, and contents in Files app quickly without involving iCloud syncing or backing up entire device.
Even AirDrop has no specific file size limit, it works best for a quick transfer of small batches of data, not bulk data migration. If you have a few files, photos or a single large video, simply follow these steps to wirelessly get your data to your Mac from iPhone via AirDrop.
1. Enable AirDrop on both iPhone and Mac (or iMac, MacBook Air, MacBook Pro)
2. On your iPhone, navigate to any app that contains the files you want to export to your computer.
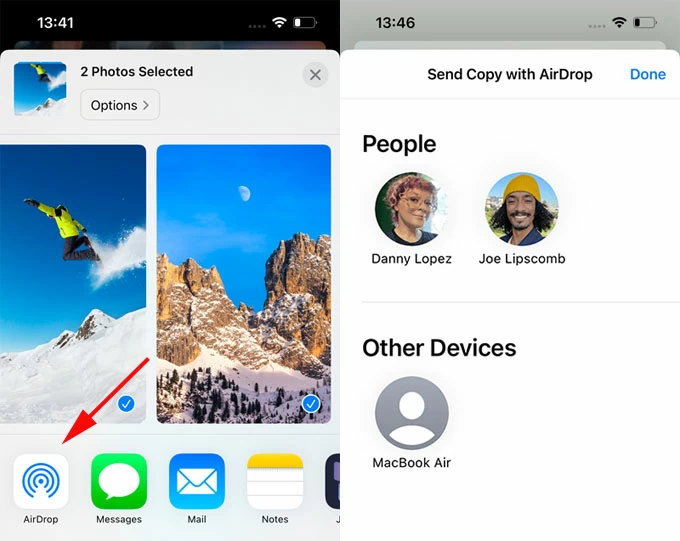
3. Select a single file or files.
4. Tap Share icon, choose AirDrop and then the profile of your Mac.
5. On your Mac, accept the transfer to let your iPhone data send to the Downloads folder instantly. See where to access AirDrop files on Mac, iPhone or iPad
Most often, iCloud Photos could be the king of wireless convenience when it comes to syncing your iPhone photo library to Mac—only if you have enough storage space and a stable Wi-Fi connection.
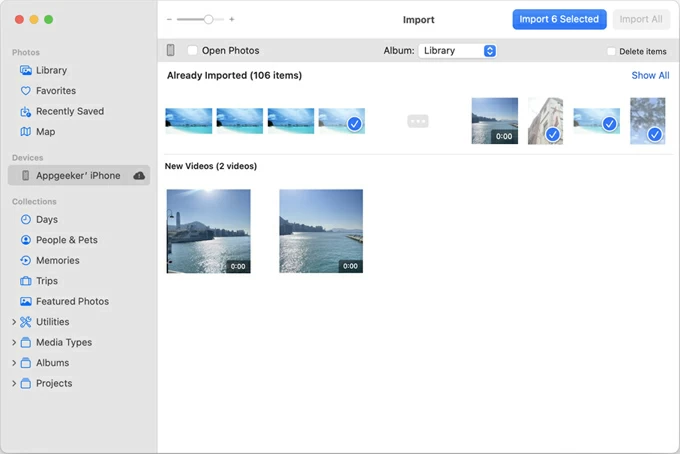
If you want a wired iOS-to-macOS file transfer and simply need to transfer some of photos or videos from the camera roll to your Mac's Photo library, it's wise to use the native Photos app that supports copying really large media files when there's no iCloud storage and preserving the quality.
Tip: To transfer all files from your iPhone media library to Mac, simply click on Import All without selections.
The imported iPhone photos and videos can be accessed within Photos on local Mac computer.
In Finder, there's also a sharing files feature available for exporting some sorts of files over from an iPhone to an app on the Mac machine. Whether it's a document (PDF, Word, Excel), ZIP/RAW archive, or any other file in an app that works File Sharing - like Keynote, iMovie, GarageBand, Numbers, Pages, etc., you can easily copy the content back onto your Mac with having to sync with iCloud.
Starting by opening Finder on your macOS machine. Then, connect your iPhone to the computer with a charging cable. After connection, select the iPhone under Locations in the left column.
Click Files tab. This will display apps that can share files between iDevice and Mac. Next, select the file that you'd like to copy from your iPhone's app, then drag it to the corresponding app folder. Let Finder copies the files or documents and finalize the iPhone to Mac data transfer without relying on iCloud. Done!

If you plan to copy all files that are stored on your iPhone to your Mac for a full backup, then Apple's Finder is your option. By connecting your iPhone to Finder, you can back up almost anything on an iPhone including photo library, video collections, messages & attachments, any app data, settings, Health & Keychain, and home screen layout.
Simple steps on how to import all of your iPhone files to Mac's drive without the need of iCloud - by using Finder to back up your entire device.
This creates a complete offline backup, stored locally on your Mac.

Making a Finder backup enables you to transfer your entire iPhone and put any data onto a Mac in one click - getting past the iCloud syncing or storage trap, but it lacks support for a selective file migration. Plus, it's important to note that data in the backup isn't easily viewable on Mac without restoring iPhone.