
How to transfer music from MacBook to iPhone


You don't need to put much effort into transferring your videos and photos from an iPhone 16 to a computer. Follow these simple tips to handle media transfer tasks.

You're able to move thousands of videos and photos directly from your iPhone 16 to your computer via USB or cloud.
So, you have a large collection of 4K video clips, family memories, or travel vlogs sitting right on the iPhone 16 you carry everywhere, or maybe you just shot a massive 2.1-gigabyte clip that's perfect for your next creative project. But your iCloud storage is screaming that it's full, your phone is running out of space, and you want to get these files onto a spacious computer screen where you can actually edit or archive them safely.
We're here to help. There are plenty of ways to transfer your videos from your iPhone 16 to your PC or Mac computer with wire connection or wirelessly, most of which are relatively fast and easy to accomplish.
For those who're looking for a way that can handle massive video files in a reliable manner, you can't miss Appgeeker iPhone Data Transfer. It treats your iPhone 16 like a true external hard drive, giving you absolute control over your media library, allowing you to transfer videos, photos, and music to and from the phone.
No matter you want to import your photos or videos into your computer from an iPhone 16, you can connect your device to your Mac or Windows machine with a cable and the preinstalled Photos app, File Explorer, Image Capture (macOS), depending on the model and operating system of your computer. You can also use a dedicated third-party file transfer app.
If iCloud is enabled on your iPhone 16, you may open or import these photos or videos to your PC by installing iCloud for Windows, or directly download them from iCloud webpage. There are a lot of popular third-party alternatives to do similar tasks.
Now, let's have a look at how you can copy videos from iPhone 16 to computer through a cable or wirelessly.
Moving large video files from your iPhone 16 to computer with a cable is one of the most reliable ways to free up phone storage without losing quality. The good news is that both Windows and macOS come with the native Photos app to handle this.
Here are the step-by-step instructions for both Windows and Mac using a wired USB connection.
Before you begin, make sure your PC has the native Windows Photos app installed.
1. Grab a compatible USB-C cable and connect the iPhone 16 to your PC.
2. Unlock your iPhone screen using your passcode or Face ID. Your PC cannot discover your media files if the phone is locked.
3. If a pop-up appears on your phone asking to "Trust This Computer?", tap Trust.
4. Open the Start menu on your computer, launch the Photos app.
5. In the top-right corner of the window, click on the Import button.
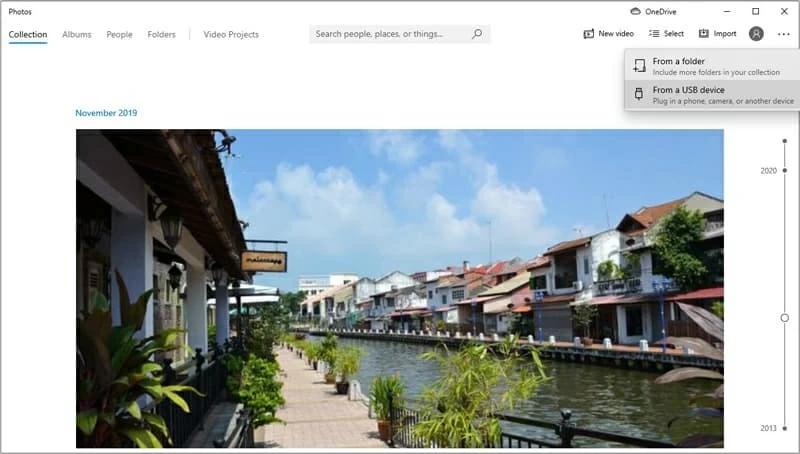
6. From the drop-down menu, select your connected device. It will usually say Apple iPhone or your custom phone name.
7. Wait a moment for the Photos app to scan your phone.
8. Once loaded, you can sort or filter to see just your videos.
9. Check the boxes on the specific video clips you wish to move to computer, or choose Select All Items if you want to download all videos.
10. Click the Add [X] items or Import button.
11. Select a destination folder on your hard drive to save them. Done!
Related: iMessages missing on iPhone
1. Connect your iPhone 16 to your Mac using your USB cable.
2. Open the Photos app and click on your iPhone's name at the left-hand sidebar under the Devices section. The main screen will immediately change to the Import layout, displaying everything currently sitting on your camera roll.
3. In the Album drop-down menu at the top menu, choose to pull these video files into your main library or select a specific album.
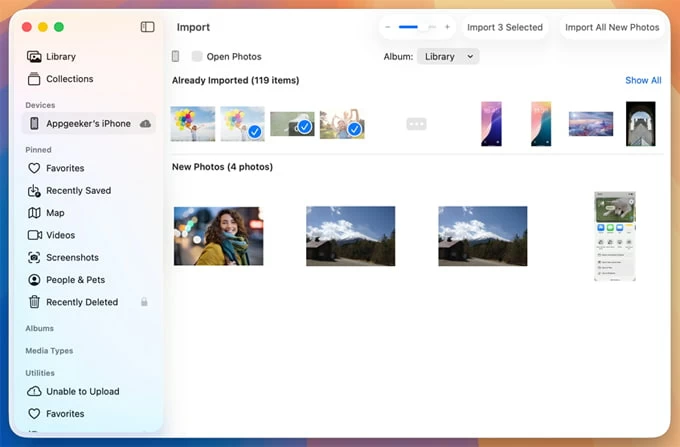
4. Click on the individual videos you want to pull onto your Mac.
5. Click the Import Selected button in the top-right corner. Alternatively, if you want everything off the device, you can click Import All New Videos.
Windows' File Explorer also allows you to download videos from an iPhone 16 into the computer's hard drive without installing extra software. Here are the step-by-step instructions to get your videos moved over.
1. Plug the iPhone 16 into your Windows PC using a compatible USB cable.
2. On your Windows computer, press the Windows Key + E to launch File Explorer. Alternatively, click the yellow folder icon on your taskbar.
3. Look at the left-hand sidebar menu and click on This PC.
4. Double-click on your Apple iPhone there.
5. Go through Internal Storage > DCIM to open the storage folders.
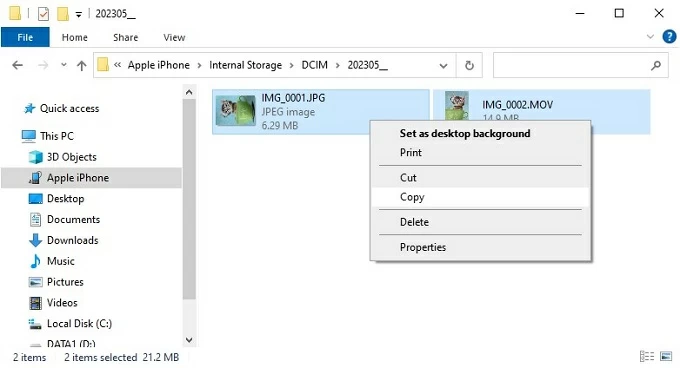
6. To separate videos from photos, right-click any empty space in the folder, choose Sort by, and select Type. Scroll down to find your video formats (usually .MOV or .MP4 files).
7. Select the videos you want to import, right-click and choose Copy.
8. Paste to a specific folder on local hard drive.
If you're tired of fighting with the unpredictable Photos app, third-party media transfer applications like Appgeeker iPhone Data Transfer is the exact alternative you've been looking for. It treats your iPhone and iPad like a digital camera, allowing you to copy media files (videos, photos, music) directly into your computer's local folders without uploading to iCloud.
As one of the most trusted software, Appgeeker iPhone Data Transfer gives you the speed of a local wired transfer combined with an intuitive interface, and comes with a set of tools that lets you manage your media on your device exactly the way you want—create, delete, move, de-duplicate, export, and other specific filters.
Unlike default Windows tools, it doesn't suffer from constant connection drops, it handles massive files smoothly. Here are the step-by-step instructions to move iPhone 16 videos to your Windows PC or Mac.
Step 1: Launch the software and connect your phone
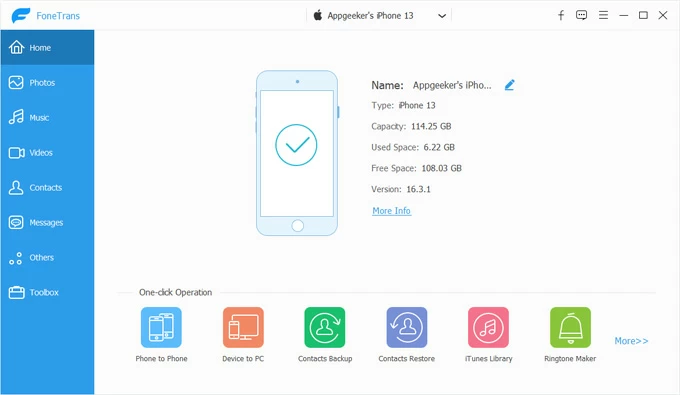
Step 2: Access the Photos library on the device
In the left-hand sidebar of the software, click Videos. It will load your media library database. Once loaded, click on the specific album under All Videos to preview the thumbnails of the clips.
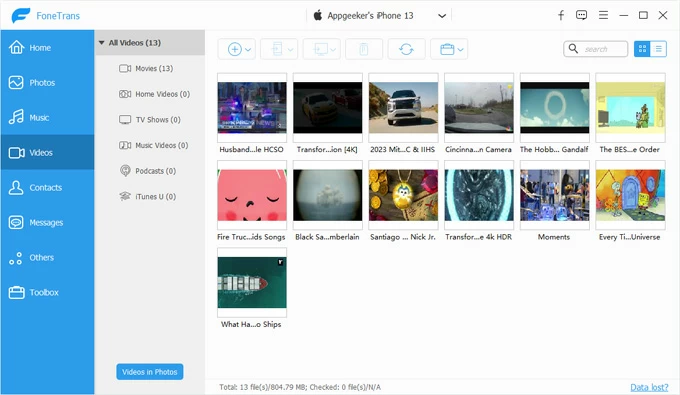
Step 3: Transfer videos to computer
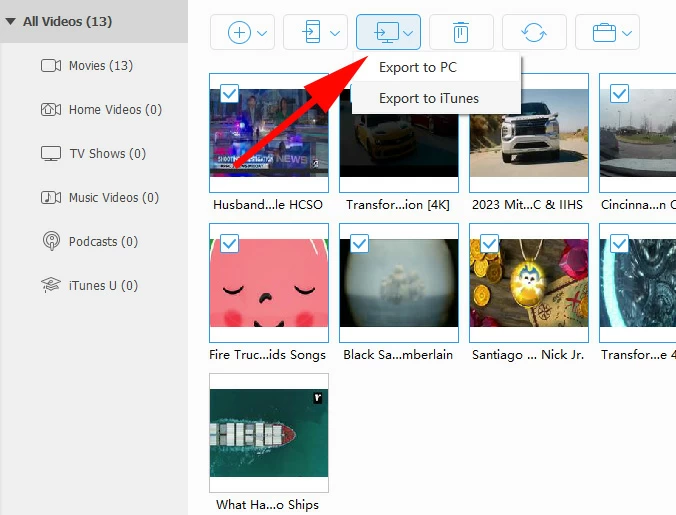
Browse through your video clips. Click the small box at the upper left corner on an individual video to select it. To grab everything in the view, check the box next to Select All at the upper left corner of the list.
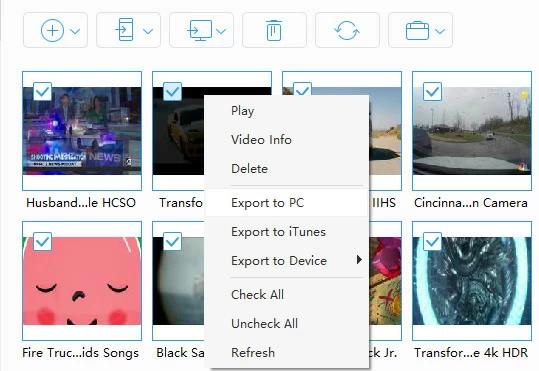
Click the Export to PC button located in the top toolbar. For Mac, here you should see Export to Mac instead.
A standard dialogue box will pop open. Browse to the folder on your PC's hard drive where you want to save the videos and click OK. The Operations Window will display a progress bar until the transfer is finished.
You can also right-click on a specific album, from the context menu, select Export to PC to download all items to your computer.
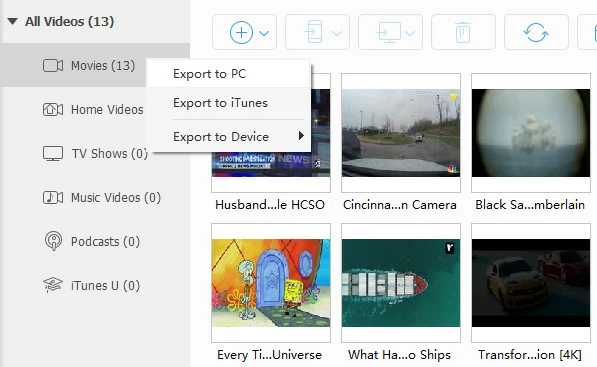
As you see in the right-click context menu when you click on a specific video, you can play it, export to another Apple device (i.e. iPad), save to iTunes library locally, or delete it.
Related: How many attempts to unlock iPhone
Image Capture is a built-in macOS utility that completely bypasses the main Photos app library. It allows you to dump the iPhone 16 raw video files directly into any local folder on your Mac computer (like your Downloads or Desktop) without importing them into a database.
If your goal is to clear out phone storage space, you may take full advantage of the small action button that says "Delete after import" in Image Capture. This will automatically wipe the transferred clips off your iPhone memory once they safely land on your Mac.
To transfer iPhone 16 videos to computer that's running macOS, follow these steps:
1. After connecting your device into the Mac, launch Image Capture from Application folder.
2. Click on your iPhone's name at the left-hand sidebar under the Devices section.
3. At the bottom of the window, locate the Import To drop-down menu. Here, you will want to select a different destination, such as your Desktop, Downloads, or choose Other... to target a specific external hard drive or custom folder.
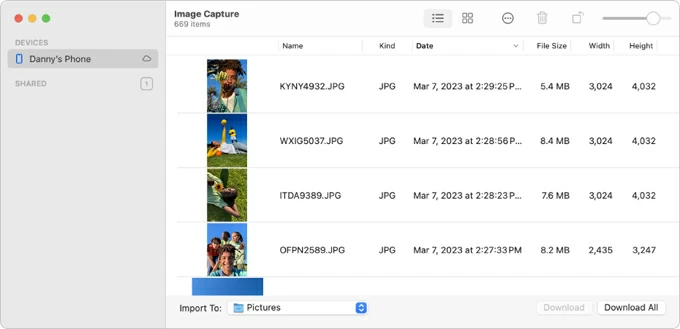
4. Select the individual videos you want to move, click the Download button at the bottom right.
Tip: If Image Capture opens up completely blank or says your device is locked even though it is plugged in, unplug the cable from your Mac, lock and re-unlock your phone.
Related: How to transfer photos from iPhone to external hard drive
Depending on whether you prefer to stick to Apple's native iCloud or use a third-party multi-platform tool, there are several cloud based services (Dropbox, OneDrive, Google Drive, etc.) to choose from.
You'll install the app on your iPhone 16 and enable backup option to let the videos be uploaded to server, then install the client on your computer and wait it to sync. For those who don't want to another client running on the computer, those third-party cloud services let you sign into their websites with your credentials, and then download videos locally.
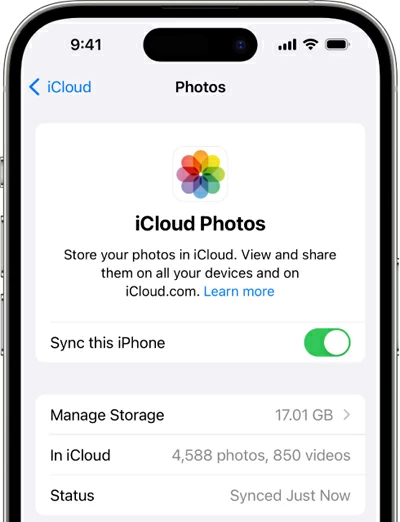
1. Open the Settings app on your iPhone and tap your Apple Account at the very top.
2. Tap iCloud, then select Photos.
3. Toggle on Sync this iPhone. Your videos will now begin uploading to your iCloud storage over Wi-Fi.
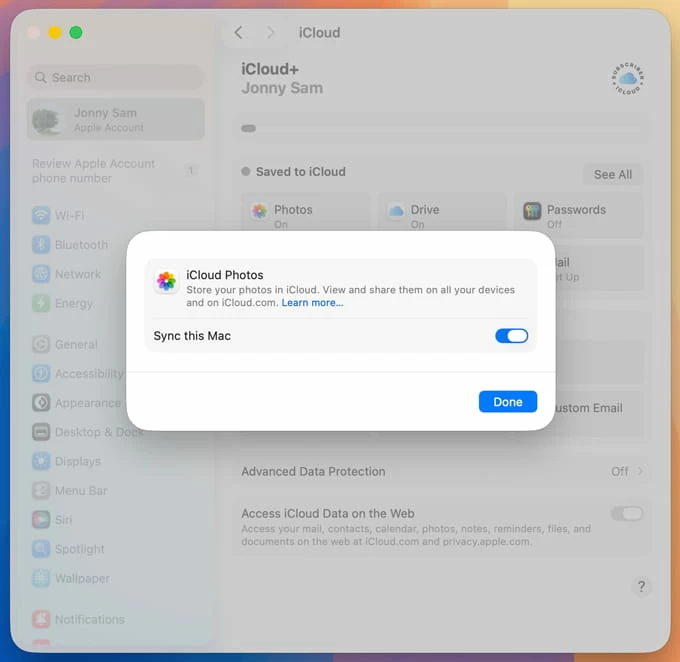
4. On your Mac, open the Photos app.
5. In the menu bar at the top of the screen, click Photos > Settings.
6. Click on the iCloud tab at the top of the settings window.
7. Check the box for Sync this Mac.
1. Install a cloud app you like (e.g., Google Drive or Dropbox) on your iPhone.
2. Tap the + button, then select Upload.
3. Tap Photos and Videos, then select the specific videos you want to transfer.
4. Wait for it to upload your selected videos to cloud.
5. Open your browser, go to the service's website.
6. Sign in with the same ID.
7. Locate the uploaded videos, and choose Download.