How to find and recover deleted photos on iPhone

The new Fusion camera system in iPhone 16 encourages more frequent shooting. but if you want to transfer your iPhone 16 photos to Mac, this guide has you covered.

It's easy to download your photos on iPhone 16 to your Mac using either Apple's paths or third-party solutions.
Ever opened Photos app on your iPhone 16 to view a kid's picture, only to find it alerts you that "Storage is Almost Full?" You're not alone.
With the introduction of the new 48MP Fusion camera and the ability to capture Spatial Photos and Videos for Vision Pro in iPhone 16, your storage can fill up faster than ever. The solution isn't just to buy more iCloud storage, instead, you can transfer your photos from the iPhone 16 to your Mac, which ensures your memories are safe, while also freeing up space on your device.
In this guide, we'll walk you through a few simple ways to transfer iPhone 16 photos to Mac, whether you prefer a wireless sync via iCloud, a direct cable transfer of Photos app, the surgical precision of third-party tools like Appgeeker iPhone Data Transfer (a reputable file transfer and management suite), or Apple ecosystem-exclusive transfer through AirDrop.
If you want to move a large number of photos or entire library quickly, using a USB-C cable is the most reliable method. For those who want to keep things simple without extra software installed, the built-in Photos app on macOS is the direct route to go.
One great thing for iPhone 16 users to transfer pictures to Mac is that you can now make use of a USB 3-compatible cable to get a much faster transfer speeds than older Lightning-based models.
Here are steps to copy photos from iPhone 16 to Mac machine using Photos app.
1. Connect your iPhone 16 to your Mac. If you are using a Pro or Pro Max model, use a cable that supports USB 3 speeds (up to 10Gbps) to get the fastest results.
2. Photos app should open automatically on your Mac. If not, find it in your Applications folder or via Spotlight.
3. On the left side of the app's window, select your device name.
4. Choose to Import All New Photos in the top-right corner to transfer everything, or click Import Selected and then pick individual images you want from the list by click Import.
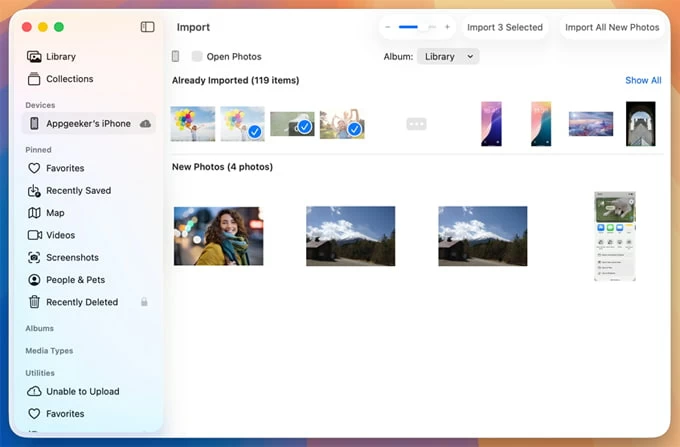
By default, your iPhone 16 pictures will be transferred to Photos app Library. But you can create a specific album to store those photos by clicking Import to at the top of the window.
After importing, you'll be prompted to deleted or keep the photos on your iPhone 16. If you want to free up some of space, you can select Delete Items to wipe them from the device.
If you don't like the way that Apple's native Photos app does, the third-party dedicated file transfer tools like Appgeeker iPhone Data Transfer may do you a favor, which is widely considered the gold standard for independent iOS management.
Unlike the Photos app, which wants to swallow your images and videos into a proprietary database, iPhone Data Transfer allows you to treat your iPhone 16 (or any other iOS/iPadOS device) like an external drive and browse your photo library just like a file explorer in a highly sophisticated interface.
Why use iPhone Data Transfer for the iPhone 16?
Moving your pictures from iPhone 16 to Mac is a straightforward process that only takes a few minutes via Appgeeker iPhone Data Transfer.
Steps to transfer photos from an iPhone 16 to a Mac:
Step 1: Plug your iPhone 16 into your Mac
Open the software on your Mac, then plug your phone.
If you see a prompt asking to "Trust This Computer" on the device screen, tap "Trust" and enter your passcode to unlock it.
![]()
Step 2: Click the Photos icon in the left sidebar
In the left sidebar of the main screen, select Photos icon. It will scan your photo library. This may take a moment if you have thousands of photos and videos.
After loading, on the center pane, you can navigate between:
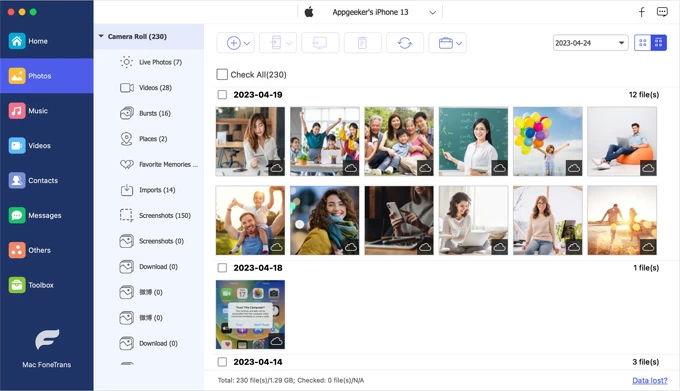
Step 3: Download photos to Mac
Select the photos you want to save onto Mac, then click the Export to Mac on the top toolbar. You'll be given options to choose your destination on your Mac, and the transfer begins.

Since the iPhone 16 has transitioned to USB-C, the physical transfer speed has seen a massive upgrade, especially if you're using a USB 3 compatible cable, making it very convenient to transfer thousands of photos at once.
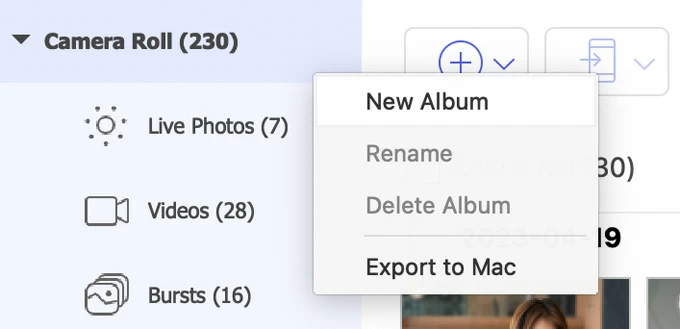
Pro Tip: you can also right-click on a specific media type, album, or Camera Roll to export all items inside it.
See also: How to add ringtones to iPhone
If you don't have a cable nearby and happen to be an iCloud subscriber, iCloud Photos can act as a bridge to sync your iPhone 16 pictures with Mac, ensuring that every time you take a photo on your iPhone 16, it appears on your Mac within seconds..
Make sure you have enough cloud storage in iCloud for uploading your photos.
If everything is okay, follow these steps to send photos from iPhone 16 to Mac via iCloud. To make syncing iPhone 16 photos with Mac work, you must be signed into the same Apple ID on both devices.
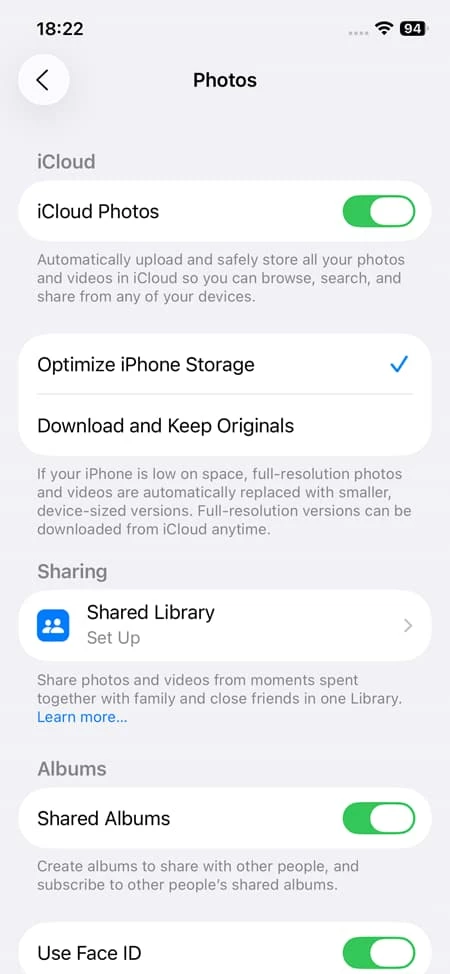
1. On your iPhone: Go to Settings > App > Photos and toggle on iCloud Photos.
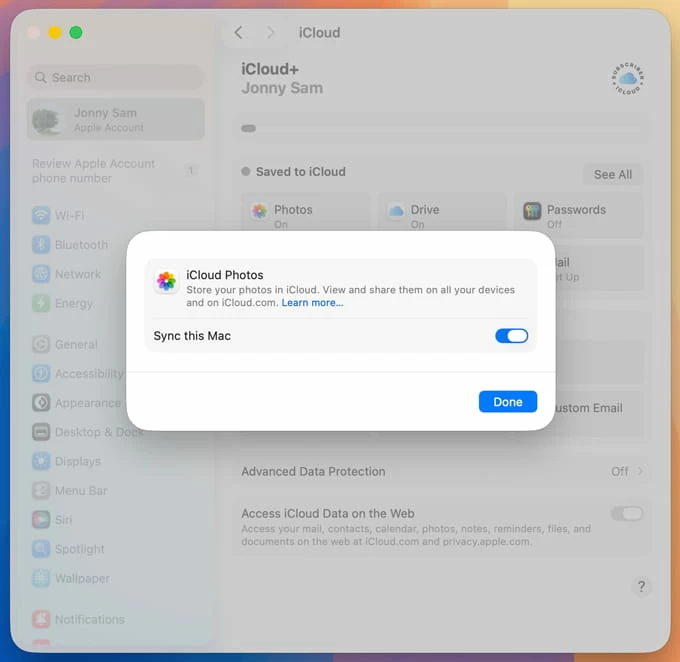
2. On your Mac: Go to System Settings > [Your Name] > iCloud > Photos and ensure Sync this Mac is enabled.
If your iPhone 16 and Mac are connecting to Wi-Fi, your photos will now sync across both devices.
Related: How to get into a locked iPhone
Just need to import a small batch of photos from an iPhone 16 to Mac? You can't miss AirDrop, the fastest wireless transfer option for Apple users. It uses a point-to-point Wi-Fi and Bluetooth connection, and doesn't compress your images.
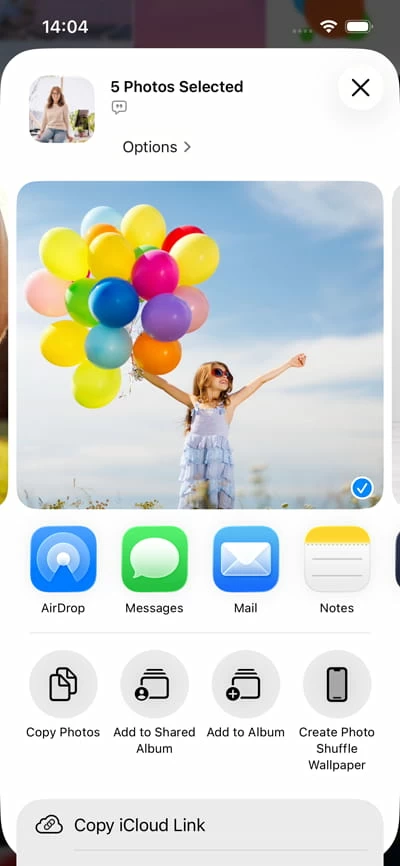
1. Select the pictures in Photos app. It's advisable to choose up to 50 photos.
2. Tap the Share button.
3. Tap AirDrop and select your Mac.
4. On your Mac, click Accept when a notification appears. If both devices are signed into the same Apple ID, the photos will transfer automatically without a prompt.
The selected photos will appear in your Mac's Downloads folder instantly or directly in the Photos app, depending on your choice.
macOS comes with another preinstalled utility - Image Capture that allows you to transfer photos from Apple device, including iPhone 16, to your Mac, and the photos can go directly into a specific folder on your desktop or an external hard drive instead rather than saving in the Mac Photos library.
To transfer pictures on iPhone 16:
1. Connect your device to Mac with a working cable and open Image Capture.
2. Select your iPhone name from the list under the Devices section on the left sidebar.
iPhone 16 not appearing? Try a different USB port or cable. Sometimes a faulty cable will charge the phone but fail to establish a data connection.
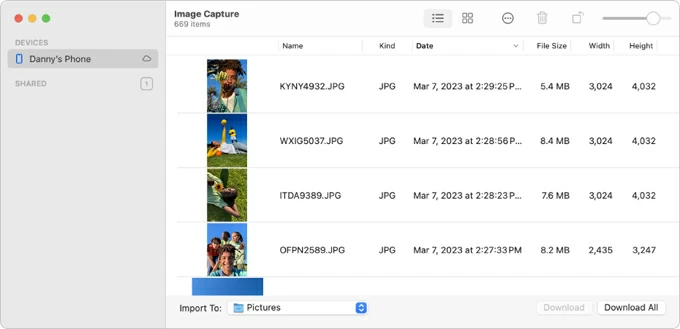
3. In Import to at the bottom of the screen, choose a destination folder where the photos will go.
4. Click Download All to grab all photos from iPhone 16, or select the individual items and then hit Download.
Related: Photos disappeared from iPad
By default, the iPhone 16 captures images in HEIC (High Efficiency Image Container). While this saves space, some older Mac applications or web-based tools might require JPEG.
When you transfer photos to Mac from iPhone 16 via the wired Photos app method, macOS generally keeps them as HEIC. However, if you need to convert them, you can go to File > Export within the Mac Photos app and choose JPEG. If you want your iPhone to always take JPEGs (at the cost of more storage), go to Settings > Camera > Formats and select Most Compatible.
Does transferring photos to Mac via AirDrop reduce the quality?
No. AirDrop transfers the original pictures exactly as it is stored on your iPhone 16.
Can I use Image Capture instead of the Photos app?
Absolutely. Image Capture enables you to drag and drop photos from an iPhone 16 into specific folders on your Mac without importing them into the Photos library.
I don't have enough space on my Mac for all my iPhone 16 photos. What should I do?
If your Mac's internal SSD is full, do not use the Photos app's default settings. Instead, use Image Capture to move the photos directly to a high-capacity external SSD.