
How to transfer music from computer to iPhone 17


With your iPhone 13 storage space quickly running out, now is a great time to transfer your photos to laptop. Here's how to seamlessly back up pictures without losing a single pixel.

If you're looking for a reliable and efficient way for bulk photo transfer between your iPhone and laptop, Appgeeker iPhone Data Transfer should be the way to go. It makes transferring photos from your iPhone to your laptop and vice versa incredibly simple by giving you full control over your entire photo library without having to deal with the slow syncing and restrictions of Apple's route. It even handles your videos, music, and personal information (contacts, texts, notes, etc.)
Click Unlock button to begin the process.
Your iPhone 13 packs an incredibly capable camera system that makes it easy to snap print-quality photos on a whim. But those gorgeous 12-megapixel shots come with a hidden cost: storage space. Before you know it, your device throws the dreaded "Storage Almost Full" warning, choking your apps and stalling system updates. Moving those images off your iPhone 13 to your laptop is the logical next step, but if you haven't subscribe to Apple's expensive cloud service, the process can feel intentionally stubborn.
Whether you are hooking up to a standard Windows machine or trying to get the device to talk nicely to a MacBook, getting your iPhone 13 pictures onto a laptop shouldn't that difficult. Thankfully, you aren't locked into a single method. Depending on whether you prefer a physical cable, a wireless cloud solution, or a quick browser-based drag-and-drop, you can download your photo library in minutes.
Here is exactly how to take your photos out of iPhone 13 and move them safely to your laptop.
Table of Contents
If you are using a standard Windows laptop, the fastest way to pull photos off your iPhone 13 is by using a physical connection. You don't need any special third-party software for this—Windows can treat your iPhone exactly like a thumb drive via File Explorer.
To start, grab your Lightning-to-USB cable and plug your phone into your laptop, then follow these steps to import your photos.
1. Unlock your iPhone 13 screen immediately. If you skip this, Windows will see the device as completely empty for security reasons. A prompt will pop up on your phone screen asking, "Trust This Computer?" Tap Trust and enter your passcode.
2. Open File Explorer on your laptop
3. Look at the left-hand sidebar and click on This PC to expand its list.
4. Under the "Devices and drives" section, your phone will show up as Apple iPhone. Double click it.
5. Dive into the Internal Storage folder, and you will find a folder named DCIM (Digital Camera Images). Inside that, Apple splits your images into various sub-folders labeled 100APPLE, 101APPLE, and so on.
6. Browse your photos and select the ones you want.
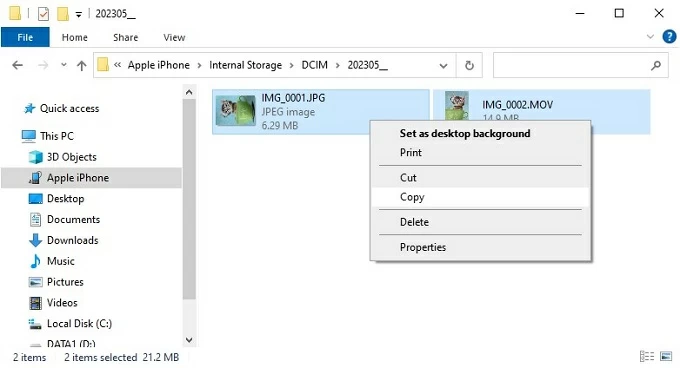
7. Right-click and choose Copy.
8. Navigate to your laptop's local Pictures or any other folder.
9. Right-click an empty space and choose Paste.
That's how you can transfer iPhone 13 pictures to laptop. Never use the Cut command (Ctrl + X) when moving files directly out of the phone's DCIM folder. If the cable wiggles loose or the transfer glitches midway through, the files can corrupt, permanently deleting them from both the phone and the computer. Stick to copying the files first, and manually delete them from your phone later once you verify they open correctly on your laptop.
While native tool get the job done for simple bulk copy of photos from iPhone 13 to laptop, it often fall flat if you want to organize your media during the transfer process. Native File Explorer tends to treat your iPhone 13 as a generic camera storage drive, tossing live photos, slow-mo videos, and nested albums into one chaotic pile. If you want granular control, a dedicated data manager Appgeeker iPhone Data Transfer is a massive upgrade.
It outperforms native Windows tools by effortlessly handling large photo libraries. Unlike File Explorer, which forces you to dig through cryptically named folders (like 100APPLE) and often chokes on Apple's native .HEIC formats, Appgeeker iPhone Data Transfer mirrors your exact phone albums, preserves all metadata, and offers seamless, automatic conversion to standard .JPEG files. Furthermore, it treats your media with precision—keeping Live Photos intact instead of splitting them into separate files, extracting full Burst shots, and giving you direct access to original, unedited photos even if they were cropped or filtered on your device.
Even better, it support bidirectional transfer, allowing you to import photos, videos, and music back to your iPhone from computer without touching anything existing on the device.
To import pictures from an iPhone 13 to a laptop using Appgeeker, follow these steps:
1. Download and open the tool on your laptop, then connect your iPhone 13 via a USB cable.
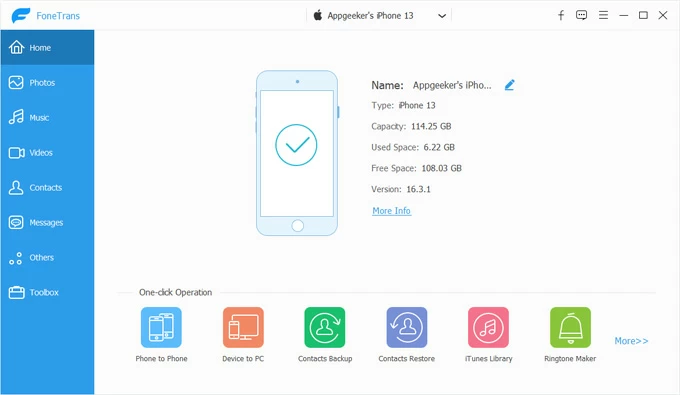
2. Click on the Photos tab on the left sidebar to load your phone's media library. All items in your iPhone 13 are sorted and stored in its original album automatically, including Live Photos, Videos, Bursts, Places, Screenshots, etc.
You can browse your photos sorted by your exact iPhone structures.
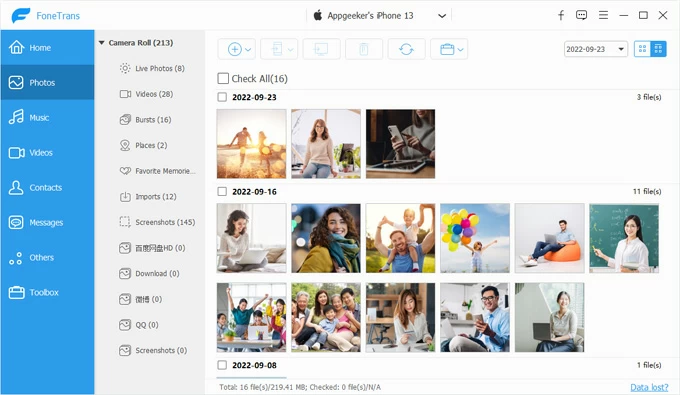
3. Select the individual images or entire albums you want to move, click the Export To PC or Export to Mac button at the top toolbar, and choose your destination folder when prompted.
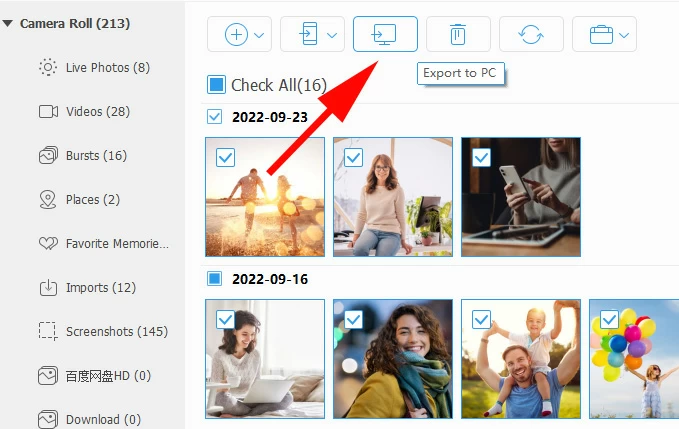
4. Wait for the tool to finish downloading your photos from your iPhone 13 to your laptop.
One of the biggest headaches when moving modern iPhone photos to older laptops is Apple's high-efficiency file format, known as HEIC. Many laptops cannot open HEIC files natively without installing custom codecs. Appgeeker features a built-in conversion setting that can automatically convert these HEIC files into universal JPEGs during the transfer process, saving you from a secondary batch conversion step later on.
If digging through nested folders inside the DCIM directory feels too messy, or you are prefer not to install third-party software, Microsoft builds a dedicated import wizard right into its native Photos app. Microsoft designed this utility specifically to import photos from external devices, including iPhone 13, but it can be finicky if your settings aren't adjusted perfectly.
To initiate a native iPhone 13 photos to Windows laptop transfer:
1. Plug your iPhone 13 into your laptop using a lightning cable.
2. Open the Photos app from your Windows Start menu.
3. Click the Import button in the upper-right corner of the window and select From a connected device.
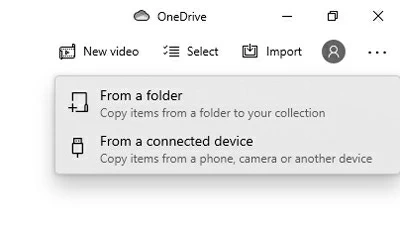
4. The system will scan your iPhone 13 for media files, such as videos, images.
5. Once the scan finishes, Windows gives you a choice: you can either import all new items since your last transfer (ideal if you want a complete backup of everything on your camera roll), or manually check individual images.
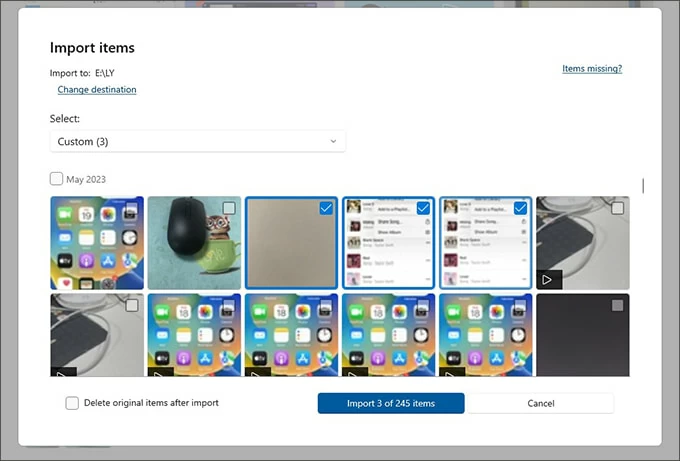
6. keep the iPhone 13 plugged in until the progress bar hits 100%, and your photos will be neatly cataloged on your laptop.
If your transfer suddenly crashes midway through with an error stating "The device is unreachable," your iPhone is likely choked up trying to convert files on the fly. To fix this, open your iPhone's Settings, scroll down to Photos, scroll to the very bottom, and change the "Transfer to Mac or PC" setting from Automatic to Keep Originals. This forces the phone to transfer the raw files directly without burning through processing power, preventing connection dropouts.
Cables are fast, but they are also a hassle to carry around. If you want your iPhone 13 photos to simply show up on your laptop without ever taking the phone out of your pocket, Apple's official iCloud for Windows app is your best bet.
By enabling iCloud Photos, every picture you shoot on the iPhone 13 is instantly uploaded to the cloud and made available in your laptop.
To activate wireless cloud syncing:
1. On your iPhone, navigate to Settings > [Your Name] > iCloud > Photos.
2. Toggle on the switch for Sync this iPhone.
3. On a Windows laptop, download iCloud for Windows from the Microsoft Store, log in with your Apple ID. During the initial setup wizard, look for the Photos checkbox. Click the Options button right next to it, ensure that iCloud Photos is checked, and click Apply.
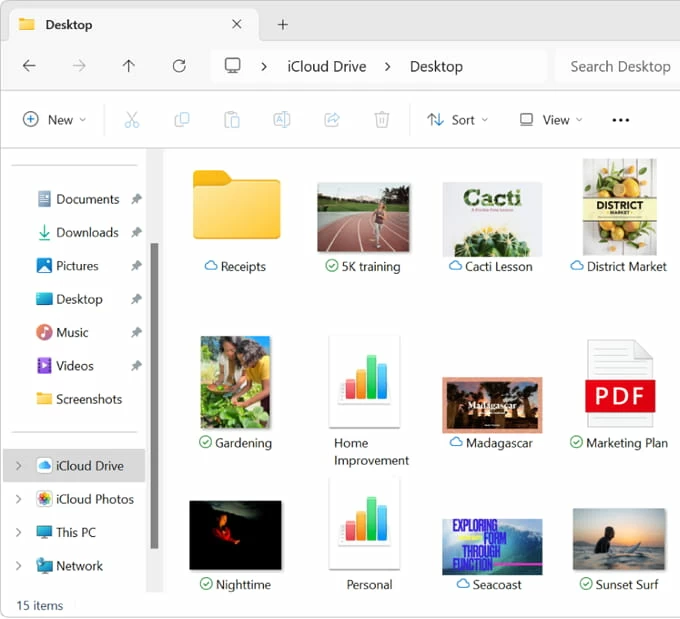
This creates a dedicated directory on your laptop. Open File Explorer, you may find the iCloud Photos folder in the left sidebar. Now, every time your iPhone 13 connects to home Wi-Fi, it uploads your new pictures to the cloud, and the iCloud for Windows app quietly downloads them to your laptop in the background.
4. On a Mac laptop, open the system Photos app, enter its settings menu, and check the box for iCloud Photos. Your iPhone 13 pictures should appear in your laptop's Photos app soon.
Keep in mind that Apple only provides a meager 5GB of free iCloud storage space. A large photo library will fill that quota quickly. If you run out of space, the automated syncing will halt entirely until you either pay for an iCloud+ monthly tier or clear out space in the cloud.
If your laptop happens to be a MacBook rather than a Windows machine,, Apple's ecosystem makes things much simpler via local wireless file transfers: AirDrop.
Before you start sending photos to laptop Mac from iPhone 13, make sure both your phone and your MacBook have Bluetooth and Wi-Fi toggled on. They don't even need to be connected to an active router; the radios will talk directly to one another.
And on your MacBook, open a Finder window and click AirDrop in the sidebar. At the bottom of the screen, set your visibility to Everyone or Contacts Only so your phone can discover the computer.
Next, unlock your iPhone 13 and open the native Photos app:
1. Tap Select in the upper right-hand corner and choose the images you want to transfer.
2. Tap the Share icon in the bottom-left corner (the square with an arrow pointing up).
3. Select AirDrop from the row of share options.
4. Tap the icon representing your Mac laptop.
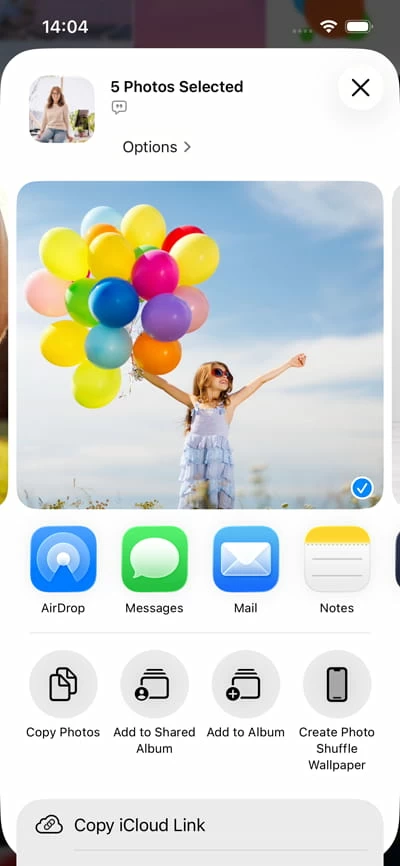
A notification will pop up on your laptop screen accompanied by a distinctive chime. Click Accept, and the pictures will transfer over the air in a flash, saving themselves directly into your Mac's Downloads folder.
If you are borrowing someone else's laptop, or you just need to grab three or four specific photos without installing software or configuring sync setups, you can access your camera roll through any web browser.
Transferring photos on iPhone 13 to laptop through iCloud.com:
1. Fire up Chrome, Edge, or Safari on the laptop and go to iCloud.com.
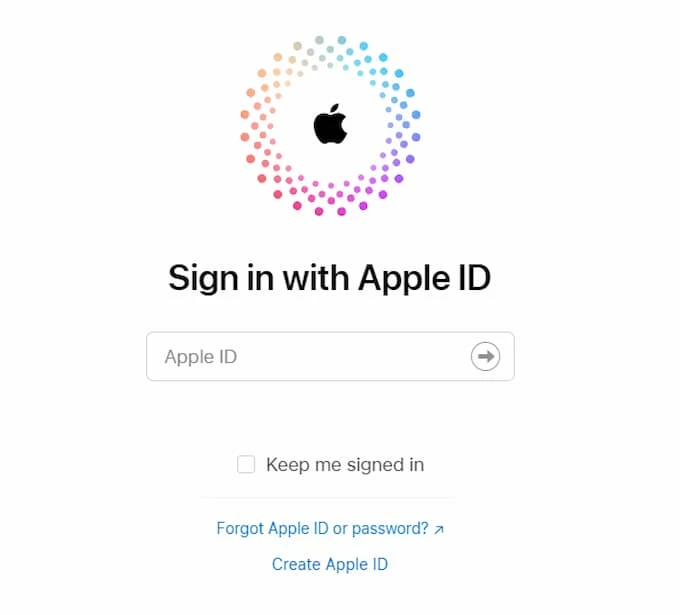
2. Log in with your Apple ID and complete the two-factor authentication prompt that pops up on your iPhone 13 screen.
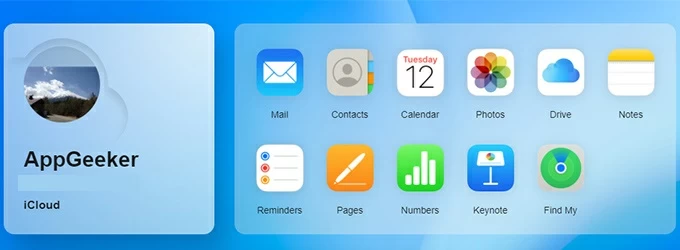
3. Once logged in to the main web dashboard, click on the Photos icon. You will be greeted with a web-accessible clone of your phone's camera roll.
4. Hold down the Ctrl key (or Cmd on a Mac) to click and select specific images.
5. When you have what you need, click the Download icon along the top menu bar (it looks like a cloud with an arrow pointing down).
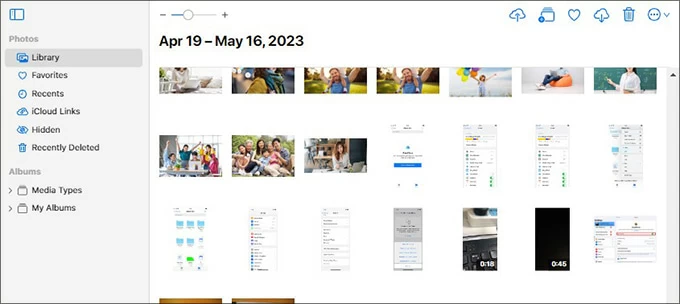
6. The browser will package your selected media into a neat .zip file and save it straight to your laptop's local drive