
Copy Photos from iPhone to PC

Want to share memorable videos with friends but only to find they are on your computer instead of your phone? It's time to get them on your phone now!

People capture memorable moments through videos. Sometimes, people edit videos on computers and then transfer them to their iPhones. This way, they can easily access their videos and share them with their family members and friends whenever they want.
In addition, content creators also edit their videos using iPhone applications. Thus, they often need to transfer videos from computer to iPhone or vice versa. So transferring of videos to iPhone is often needed. Therefore, in this article, we will tell you how to put videos on iPhone using various tools and share different methods and highlight their pros so that you can easily select the best one according to your needs.
Putting videos on iPhone lets you access and share them anytime you want.
If you're searching for a quick way to sync movies to your iPhone, the most common way suggested by Apple is to use iTunes on your computer. With a suitable USB or lightning cable, it can help you sync videos and also other files from your Windows PC or Mac (macOS 10.14 and the earlier) to your iPhone directly.
1. Open the iTunes on your computer.
2. At the top of the window, go to 'File' > 'Add to Library'.
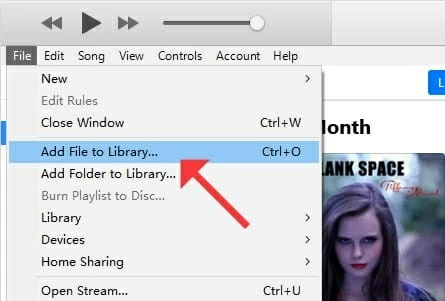
3. Select your desired movies and import them from computer to iTunes library.
4. Connect your iOS device. And if ask, unlock your device as required.
5. Click the phone icon from the tool bar in the upper-left corner.
6. Choose 'Movies' option from the left menu. Then tick the 'Sync Movies' box.
7. Pick the movies you just added to iTunes. And confirm 'Apply' option at the bottom.

Add the selected movies to your iOS device using iTunes.
Finally, the selected items will be synced to your iPhone quickly. You can go and check the videos on your device now. But, remember, iTunes can only handle a few video formats, so it happens sometimes that the movies on your computer won't be recognized successfully.
Another quick solution and also one of the best data transfer tools on the list is Appgeeker iPhone Data Transfer, a desktop firmware that can help you transfer your videos and other files like a breeze. It can handle massive amounts of data and transfer it to your iPhone with no delay.
And the best part is that it is beginner-friendly, and anyone can use it without any hassle.
Besides, it is also an amazing data management tool for your Apple devices, helping you delete, edit, remove duplicate files and organize the content on your device. In addition, it handles almost any type of files like videos, photos, songs, playlists, texts, and more, making it a fantastic alternative to the iTunes app since it has a lot more to offer.
Download and install iPhone Data Transfer on your Mac or Windows PC, and prepare a USB or lightning cable. Then you can put videos on your iPhone in 2 steps.
Step 1: Launch iPhone Data Transfer and connect your device.
Use the USB or lightning cable to connect your device to the computer. Once there's a connection, you will see the device and its name on the window.
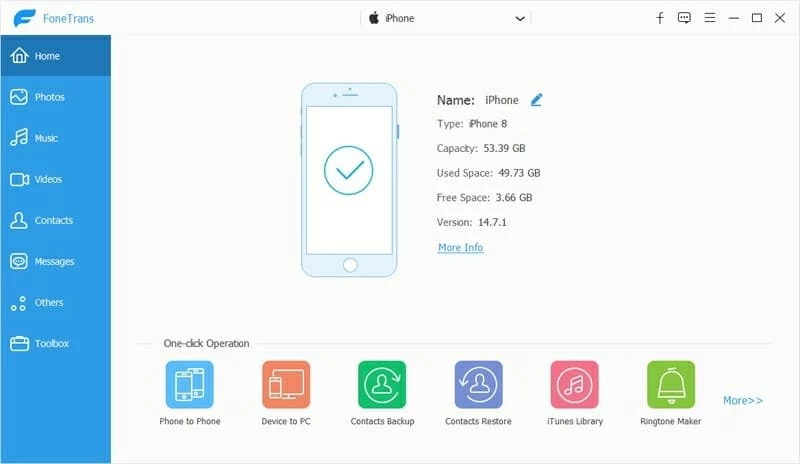
It may require your screen passcode to get your computer trusted by your iOS device.
Step 2: Add videos to your iPhone
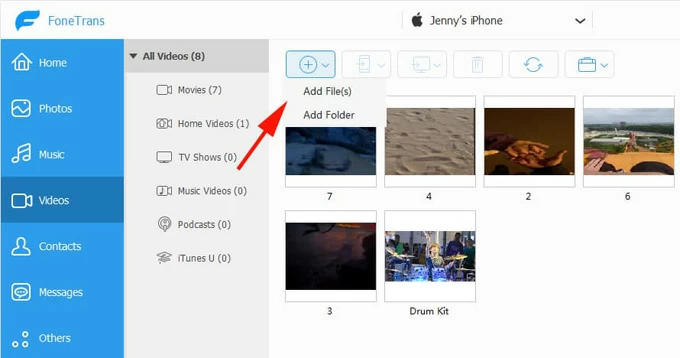
You can also drag and drop the videos you want to it.
After that, your videos will be added to your iPhone efficiently. And you'll be able to see the added files from the video library here or check the videos on your device.
As you can see, it only takes two steps to put videos on your iPhone, which proves that iPhone Data Transfer is an excellent application for data management and transfer between iPhone and other devices. Surprisingly, it supports almost every video format like movies, music videos, TV shows and more, and it can also help you create a backup of your iPhone videos on your computer.
While iTunes and iPhone Data Transfer put videos to iPhone with a wired connection, iCloud offers you a wireless way to sync your data automatically. It basically works like you upload movies from one side, and download what you want from another side.
Before you start, enable iCloud Drive on your Apple device by going to 'Setting' > 'Your name' > 'iCloud' > 'iCloud Drive'. Toggle it on and you can put your videos on iCloud and then save them to your phone from it.
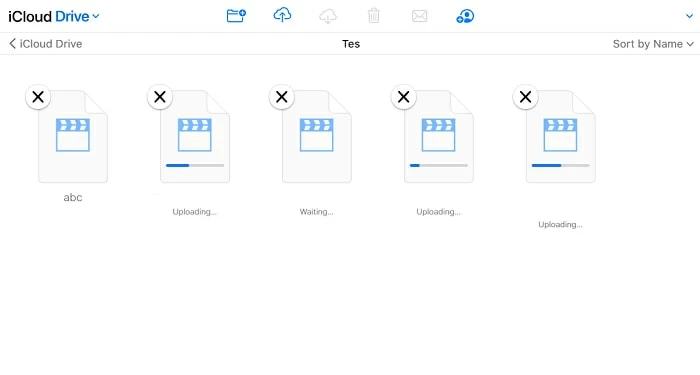
Upload movies to iCloud Drive and download the videos to your device.
After uploading, grab your phone and go to Files. Tap on iCloud Drive. Then you can have all the videos after saving them to your iPhone.
Sending videos with iCloud seems simple, but the movies take too much time to upload and download. It is not very feasible if you have massive data. On the other hand, iCloud offers only 5GB storage for free, so if you have more data, you either need to buy the premium service or delete some of your precious videos.
Putting videos on your iPhone is much easier than before. We have explained how to put videos on your device using different tools and methods for your ease. You can select any of them by looking at their pros and cons. Select a method and transfer your videos to your iPhone without any hassle.


