
How to Record YouTube Live Stream on Windows

Looking to take a picture from an interesting video on Windows 10? This article provides the simplest methods to do it with offline and online screencast apps.

The option to take screenshots from video on Windows 10 has long been a popular request since it's such a useful skill. Still frames captured from a video file can be used to make the perfect movie thumbnail or to share funny moments on social media. And luckily, taking a still from a video Windows 10 is an easy task with several types of screencast software.

There are a few different options to take still images from video on Windows 10.
Below, we'll show you how to get a picture from a video on Windows 10 computer using the built-in Snipping Tool, the Windows 10 Photos App, Appgeeker Screen Recorder, and VLC Media Player. And if you want to know how to take a video on Windows 10, read our article on how to screen record desktop on Windows 10.
Table of Contents:
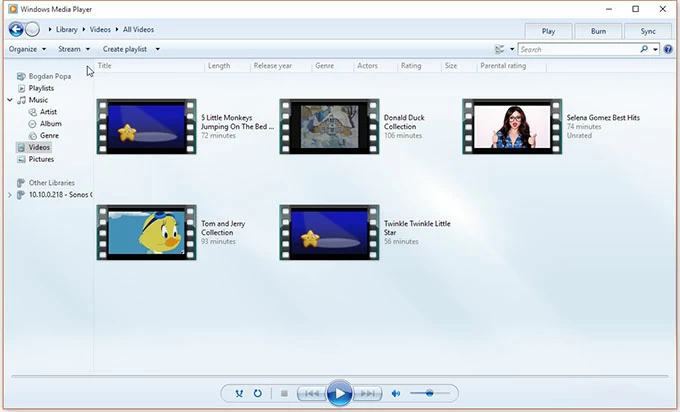
Windows Media Player is a built-in multimedia player and media library application for Windows users. You can easily play a wide range of audio and video files, as well as display images. Besides, it allows you to create playlists, and edit metadata, so that you can easily find and play your favorite songs or videos.
Read more: How to play MP4 files on Windows Media Player
Capturing a still image from video Windows Media Player is easy to do. But, the downsides are that Windows Media Player doesn't have features allowing Windows 10 users to choose a customizable recording area or annotate the image while taking a screenshot.
Here're steps to take a picture from video:
Step 1. Open the video you'd like to take pictures from in Windows Media Player 10.
Step 2. Click on "Tools > Options" in the menu bar. Then choose "Performance" in the pop-up Options window.
Step 3. Click the "Advanced" button in Performance to open the "Video Acceleration Settings" window. Then you can disable the overlays by unchecking the box next to the "Use Overlays" option. When it's done, click "OK."
Step 4. To apply your new settings, click "Apply" and "Yes." After that, click on "OK" in the Options.
Step 5. Pause the video at the frame you'd like to capture. You can check frames from the video by dragging the slider from left to right. Make sure the video is in full-screen mode.
Step 6. Press the "Print Screen" key to take a screenshot from video.
Windows 10 Photos is a pre-installed photo viewing and editing software that allows users to manage, view, edit, and share their photos and videos. And with the Photos app, you can save photos from video on Windows 10 with no effort thanks to its feature of extracting frames from video imported into it. Before proceeding, ensure that you have imported the video clip into the Photos app.
Here are steps to take pictures from video with Windows Photos:
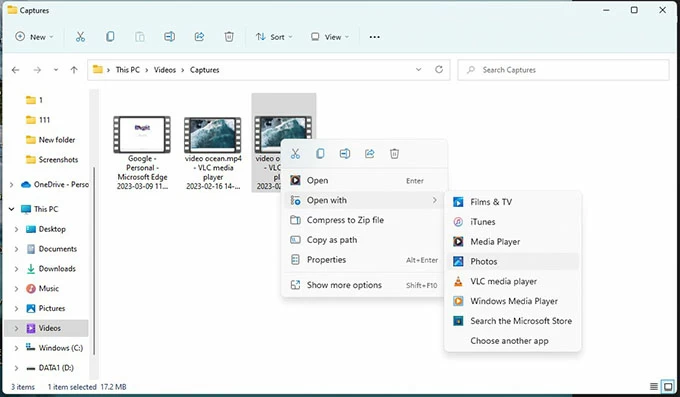
Step 1: Import the video into the Windows Photos app
Right-click the video you want to extract the frame from, then choose "Open with > Photos" to play it in the Photos app.
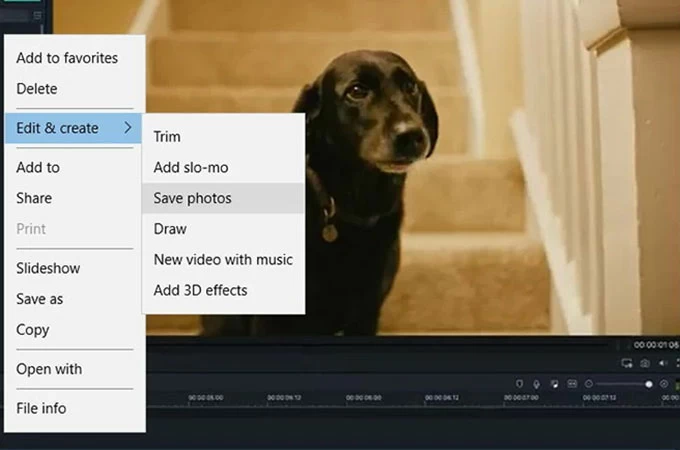
Step 2: Create a living image
Click on the "Edit & Create" button at the top of the window and then select "Save photos" from the dropdown menu. It will open a new window from which you may select a frame.
Step 3: Choose the desired frame of the video
Play the video and pause it at the point where you'd love to take a picture. Then, you can use the left and right arrow keys to navigate to the exact frame that you want to capture.
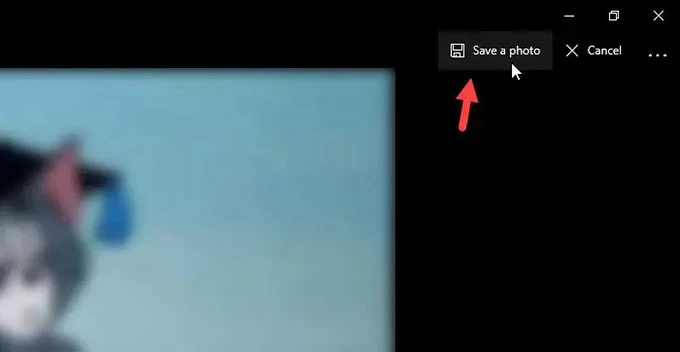
Step 4: Save the still image from video
Click on the "Save a photo" button located in the top-right corner. By default, when you capture a still image from a video in the Photos app, the captured image will be saved to the "Pictures" folder on your Windows 10 computer.
How to reset the Windows 10 Photo app when it's not working?
To reset the Windows 10 Photo app, go to "Settings" and select "Apps". Find the "Photos" app and click on it. Click "Advanced options" and then scroll down to the "Reset" section. Click on the "Reset" button and confirm that you want to reset the app. Wait for the reset process to complete. This will restore the Photos app to its default settings, without affecting your photos and videos.
AppGeeker Screen Recorder is a professional snapshot tool that enables Windows 10 users to capture, edit, annotate, save, and share screenshots. It helps users easily capture still images from video no matter if they want what is displayed on the whole video screen or just partially.
The app has added the functionality of editing and annotating during recording that makes it ideal for those people who want to draw lines, add marks or insert pictures to make the photo more eye-catching and informative.
Here are the steps on how to take a picture from a video on Windows 10:
1. Open the app and select "Video Recorder" on the main screen.

2. Click the "Camera" icon in the top right corner of the app's interface. Then, a crosshair will show up on your computer screen.

3. Press and drag your mouse to draw a box around the area where you wish to snap a screenshot. After selecting the snapshot area, a toolbox will appear beneath it, allowing you to apply special effects such as shapes, arrows, text, and photos to the screenshot.

4. Click "Save", if everything appears to be in order.
Explore more: How to screen record on a Dell laptop
VLC Media Player is a highly popular media player known for its ability to play various formats and its compatibility with different operating systems. It is a free and open-source media player that supports a broad range of audio and video formats, making it a versatile choice for users.
Also see: How to record the desktop using VLC Media Player
In addition, VLC has a built-in feature that allows users to take still images from any point in a video and save them as image files. This feature is very useful and can be easily accessed through the "Video" menu or a keyboard shortcut. Follow these steps, we'll show you how to take a still from a video.
Step 1. Launch VLC Media Player, and then play the video you'd like to capture still image from.
Step 2. Pause the video at the desired frame you want to capture.
Step 3. To save it as a picture from the video, enter the menu bar and select "Video > Snapshot". You can also use the keyboard shortcut "Shift +S."
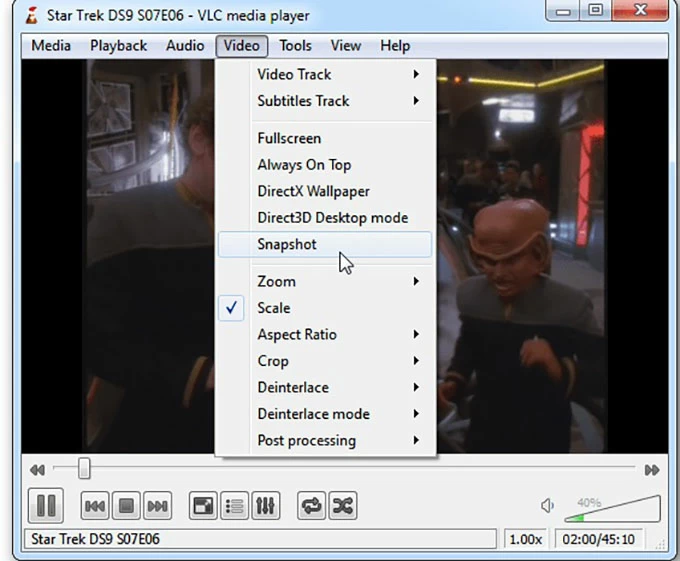
The screenshot will be saved to your computer's default picture folder in the format of "VLC snapshot [date and time].png."
When it comes to taking screenshots from a video via the web, there are several outstanding sites to choose from, like Guru, PineTools, LightShot, PicPick, Snipboard, and more. Here we'll show you how to take screenshots from a video with Snipboard.
Conclusion
Windows 10 users can easily capture still images from a video using different types of screencast software, such as Windows Media Player, Windows 10 Photos App, AppGeeker Screen Recorder, VLC Media Player, or online tools. And among the five screencast tools we mentioned above, you can choose the best one according to your needs.


