How to Record Desktop on Windows 10/11 Computers

All you need is proper knowledge of how to record the desktop via the VLC media player, and you can easily get quick tutorials from this article.

With the assistance of VLC media player, recording desktop for free on Windows and Mac is no more a trouble.
With the development of streaming media, we try to record our computer or desktop screen for either recording gameplay, a video tutorial for YouTube, or a presentation. Each computer has a built-in way to record the screen, but these recorders either aren't useable or lack some features. For instance, the QuickTime Player for Mac can't record the computer's internal audio and the Xbox Game Bar for Windows can only capture one application at a time.
Don't worry. There is a multitude of tools available for this purpose. The OBS Studio and VLC media player are the most common free tools to record the computer desktop. The OBS Studio is more professional for streaming video, while the VLC media player is an all-in-one tool. The VLC media player is generally known as a video player, but it also offers basic screen recording functionalities. Let's discuss the step-by-step procedure of how to record the desktop using VLC.
Table of Contents
The VLC media player is an open-source & free media player released in 2001. It is compatible with Mac and Windows and supports almost all video and audio formats, which means almost all videos can be played on it. Therefore, it is trusted by Mac users who are confronted with the issue that videos can't be played on Mac. Apart from playing your favorite video, you can also convert the video format and capture your desktop via VLC. As a screen recorder, VLC easily records different network streams and discs. Here are the steps to record the desktop via VLC efficiently:
Step 1. (skip this step if VLC is already installed)
First, download the VLC media player. Once you've installed the VLC, open it on your computer.
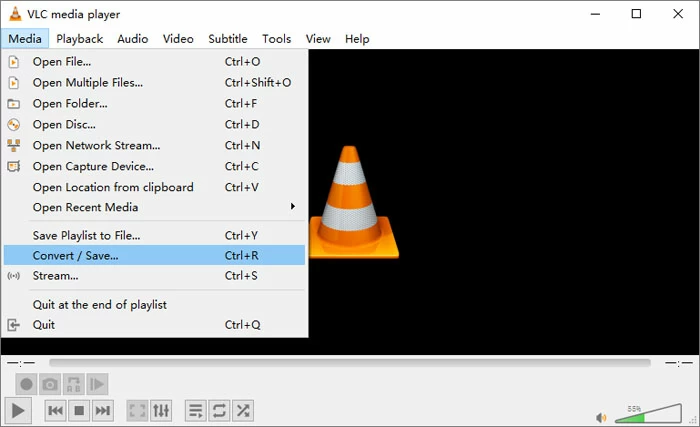
Step 2.
Now that you've opened the VLC media player on your computer, navigate to Media on the left menu at the top of the computer screen. Click on the Media button, and select Convert/Save option. Then the pop-up window for recording settings will show up. Alternatively, you can click on Open Capture Device to open the Capture interface.
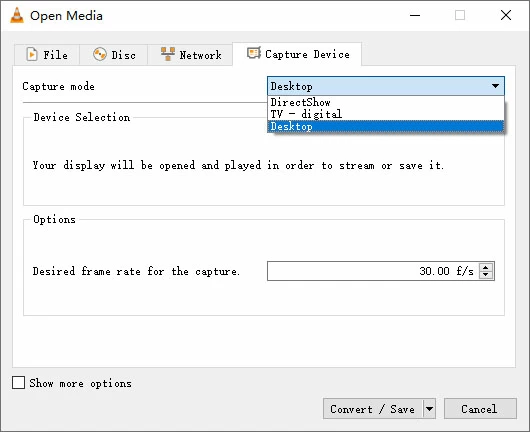
Step 3.
Find and select Desktop option from Capture mode drop-down panel. Then click Convert/Save.
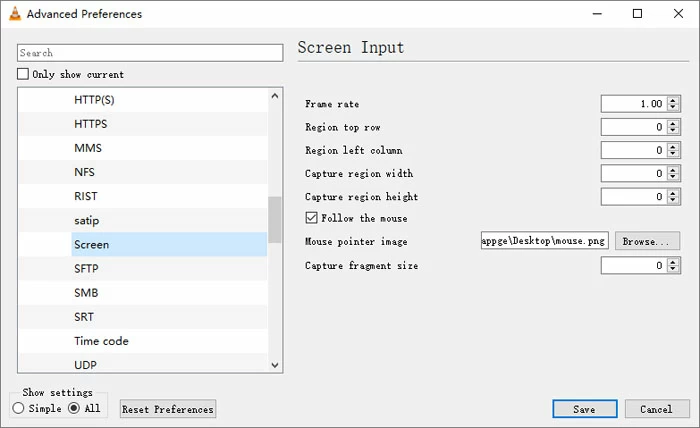
Note:
Step 4.
When the pop-up for Convert appears, you can set the recording format in Profile drop-down menu. Usually users will record the screen in Video - H.265 + MP3(MP4). Then set the destination folder and Start the recording process.

Step 5.
You can capture the things you want and after you are done, and click on the Stop button available in the VLC to end the recording. The video file will be automatically saved to the destined area on your computer.

The steps to record a desktop via the VLC media player have different in a MacBook compared to a Windows PC. Here are the steps for this:
Step 1: If you have the VLC media player installed on your MacBook, open it as it's readily available on the Mac's Launchpad.

Step 2: Once you've opened it, select the File button that's present at the top of the menu bar.
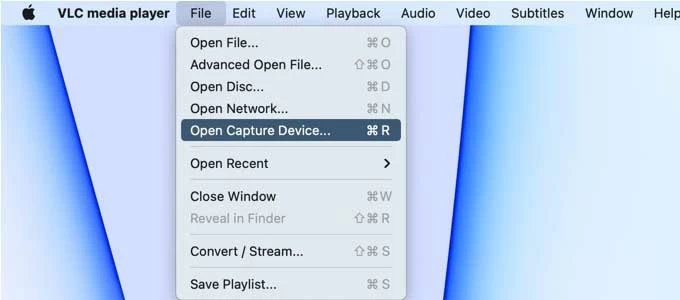
Step 3: Next, you have to click on the "Open Capture Device" option that's available in the drop-down menu of the VLC media player. An Open Source dialog appears on the MacBook screen as soon as you do it.
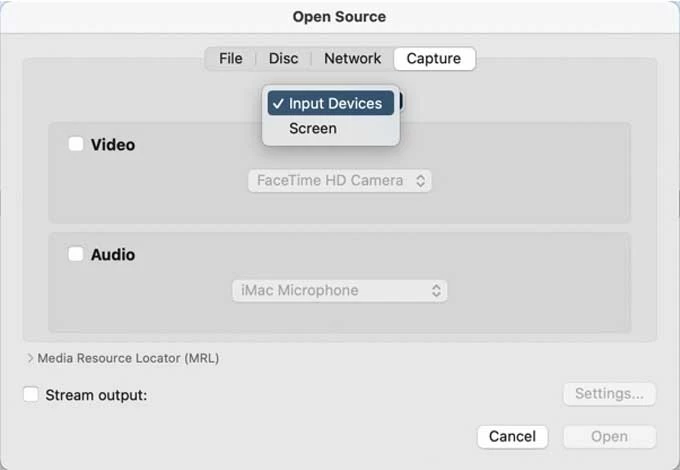
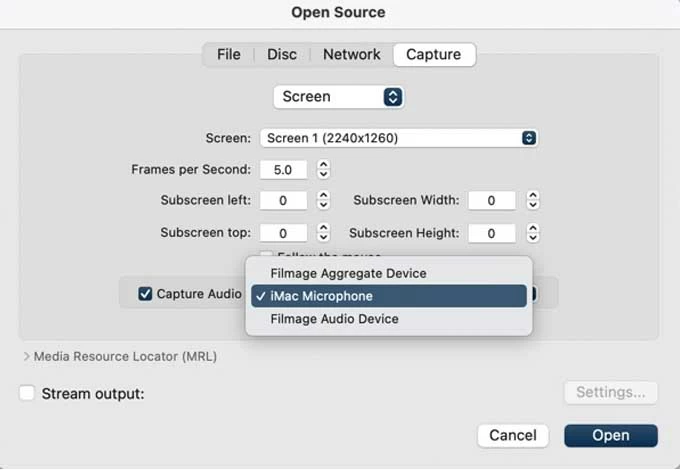
Step 4: Select Capture and choose the recording source as Screen. Check the box in front of Capture Audio and set it as iMac Microphone to record the audio from the microphone. Check Stream output and click on Settings to set the output folder of the recording. Then click Open.
Note:
Step 5: To start the final recording desktop VLC, you need to open the Playback menu from the top bar and click on the Record option to start the recording.
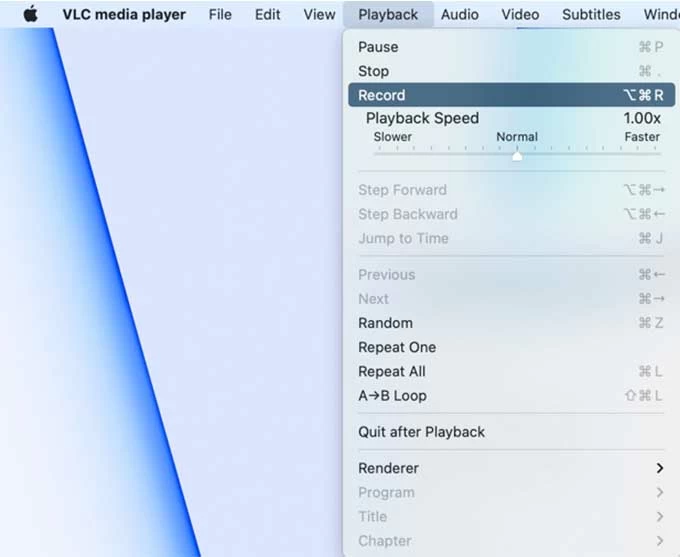
Now play anything on your MacBook that you want to record and once you are done, stop recording. The final recorded video will be saved to the movies section of your MacBook.
Well, sound complex?
The VLC media player is free and works with almost all platforms. You get a chance to play and convert video according to your choice. However, the recording button isn't available by default. You need to perform multiple steps to make it work. Even switching between screens isn't favorable with VLC capture desktop. So, getting things right adds multiple unwanted steps, which make the process further complex and undesirable.
If you want to avoid the aforementioned issues, then Appgeeker Screen Recorder is there to rescue you with its advanced features yet exceptionally easy-to-use process. Here are a few features of Screen Recorder:
Many other features make this tool the ultimate choice for people unsatisfied with desktop recording via the VLC procedure. If you want to explore more about this tool and record the computer desktop without the limitations as using the VLC media player, then download the tool and follow the steps below.
Step 1. Install and open this video capture software on your MacBook/ computer. You get options such as Game Recorder, Audio Recorder, Video Recorder, and Webcam. Select the one that suits your video-capturing needs and proceed further. Here we'll choose Video Recorder.

Step 2. Next, record the whole screen by clicking Full, or adjust the video recording space by clicking Custom. In this step, you can turn on or off the audio buttons to control the audio resource that need to be recorded. If you want to make a tutorial with webcam on at the same time, toggle on the Camera to record the desktop and your face together.
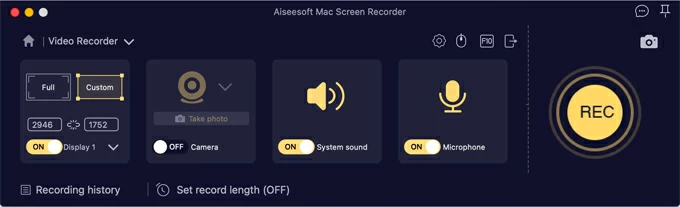
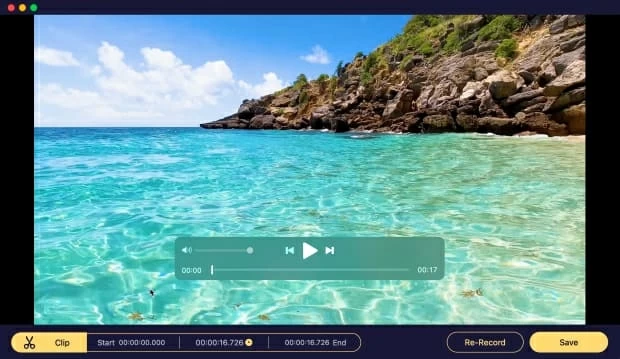
Step 3. Click on the REC button to start the recording procedure, and once you are done, hit the Stop button. Then the recording will be presented automatically. Preview the file before saving it.
Compared to VLC media player, Appgeeker Screen Recorder removes almost all limitations on using VLC media player and offers more simple process. The user-friendly interface makes it more suitable for novices.
How to Convert VLC Recorded Video to MP4?
First, open the VLC on your desired device and then click on the Menu > Convert/Save to Add video source. Then choose the Profile as Video - H.264 + MP3 (TS). Browse the file explorer to set the output folder and Convert. These steps of video converting and capturing desktop VLC may seem tricky. If you want a more straightforward tool to convert recorded video to MP4, please give Appgeeker Video Converter a try.
How to Record the desktop with Audio?
Multiple free software allows you to record your desktop with audio, including a VLC media player, Appgeeker Screen Recorder, etc. To record the desktop with audio, you can follow the steps above and turn on the system audio button.