
4 Best Ways to Screen Record on Windows 10

If you want to record audio from your Windows 10 PC, this guide will show you how to make this task easy with Windows 10's built-in voice recorder and other useful third-party apps.

Sound plays a crucial role in our daily lives whether you're sharing with someone what the professor has said in an important lecture or want to fetch information from a communication, audio recording in Windows 10 is a great way to do it.
Audio recordings allow students, researchers, and professionals to easily access the audio material for later review and analysis. In addition, audio files recorded on Windows 10 computers can be shared with other individuals, offering a convenient way to collaborate on projects.

Voice Recorder is a free audio recording app for Windows 10 to create sound or music files.
Honestly speaking, Windows 10 has a recording feature that is built into the Voice Recorder app and it is very easy to use. It enables you to capture both internal and external audio on Windows 10 devices.
However, Windows 10 Voice Recorder has some limitations, including the fact that its recording duration and file size are limited by the available storage space on your PC. To get rid of the limitation of Voice Recorder, you can use some other apps like AppGeeker Screen Recorder for recording audio on Windows 10.
Also read: How to Screen Record on Windows 10
Table of Contents
The Voice Recorder app simplifies audio recording for Windows 10 users, offering a user-friendly interface for recording various sources such as voice memos, lectures, and interviews.
The app will automatically detect and record audio from the microphone of Windows 10. Users can also connect an external microphone to their device and use the app to record their voice. Alternatively, Voice Recorder allows users to record audio from their Windows 10 devices' built-in speakers, which can be useful for recording conversations or lectures.
Not only that, Voice Recorder enables Windows 10 users to trim recorded audio files, add tags, and share recordings within one app. It also supports background recording and can be used with Cortana for voice commands.
Voice Recorder application is usually pre-installed on computers running Windows 10 operating system. However, there're chances that you accidentally deleted this Voice Recorder app on your Windows 10 laptop or desktop, that's why you couldn't find it in the search box. In this case, just go to the Microsoft Store and click on the Get button to have it downloaded for free.
On the premise of ensuring microphone connectivity and access, you can follow these steps to record sound on Windows 10.
1. Type Voice Recorder into the search bar located on the taskbar.
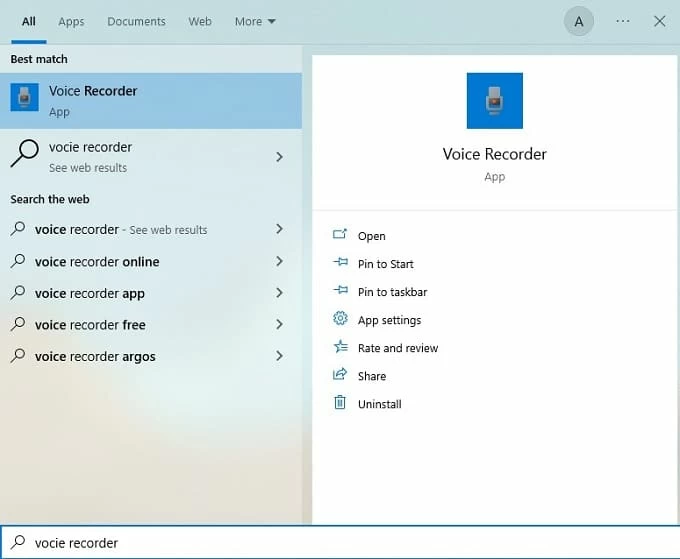
2. Click on the Voice Recorder app under Best match to open it.
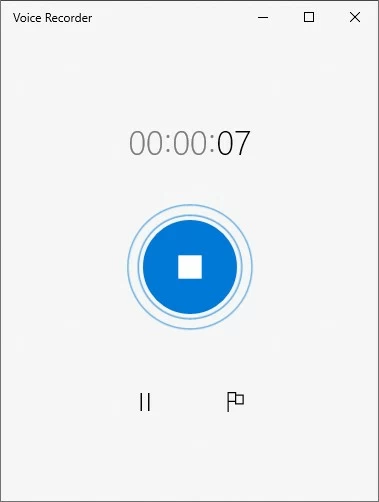
3. Click the blue microphone icon to start recording. Then the interface displays the duration of your audio recording, and buttons to pause, resume, mark specific moments, or stop the process.
4. Click the Stop button in the middle of the screen to end the recording.
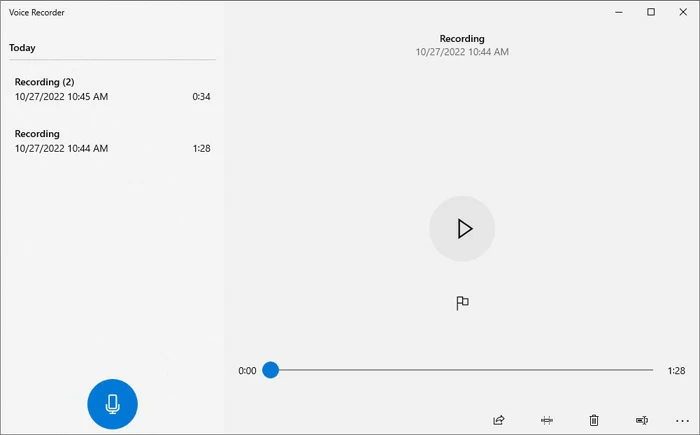
A list of recorded clips will show up on the left side of the interface, then you can do some adjustments like reviewing, adding markers, trimming, sharing, and so on. Audio recordings are saved in Documents > Sound recordings on your Windows 10 PC, and the default recording format is .m4a files.
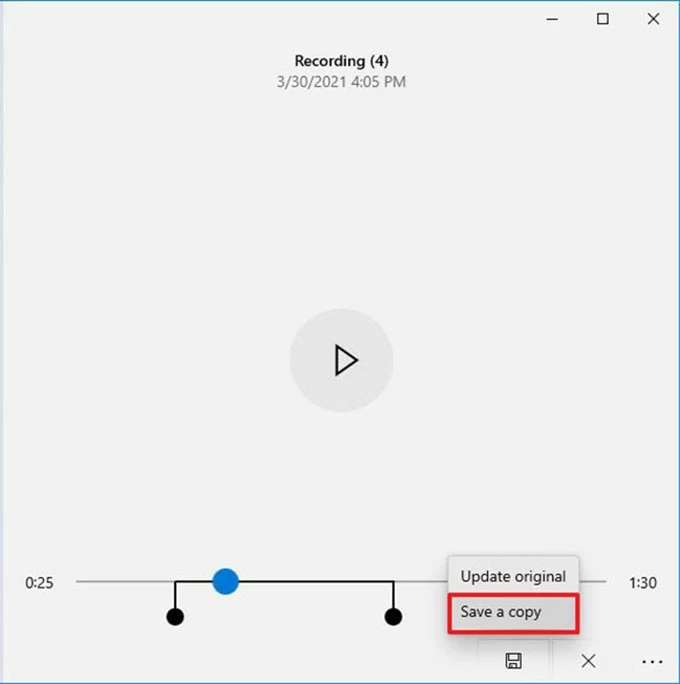
To trim an audio file, first select the desired audio track from the list on the left. Next, click the Trim button located in the bottom right corner of the Voice Recorder app.
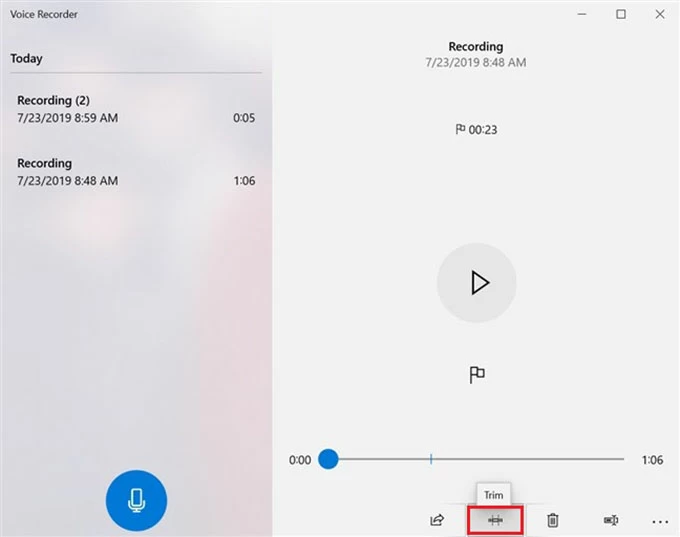
From there, choose the start and end points of the section you want to remove, and then click Save to update the existing file or save it as a new audio file.
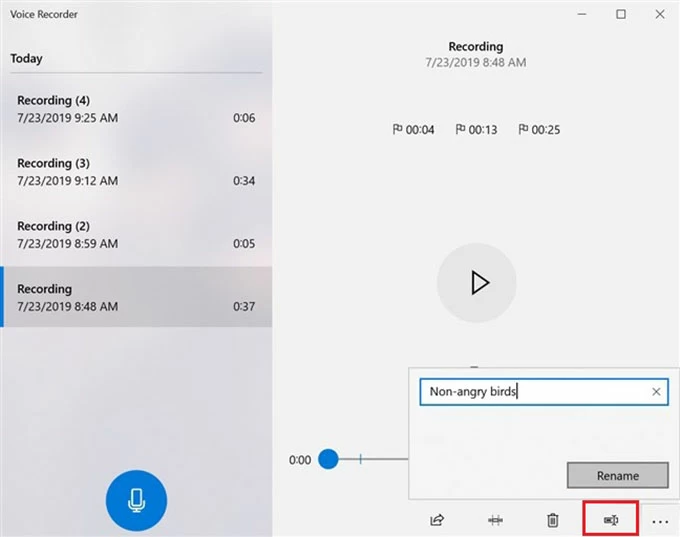
To change the name of a recording, select it and click the Rename button at the bottom right of the screen. You can then enter a new name in the text box and click Rename to save it.
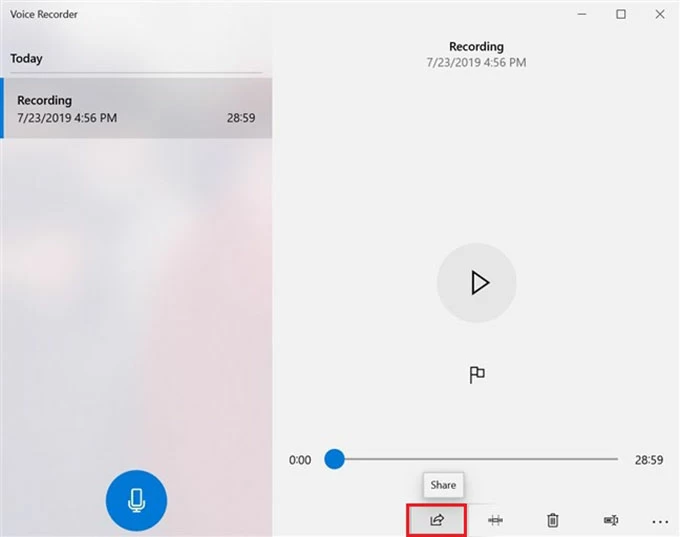
As for sharing a recording, click the Share button and choose a platform like email or social media to send it to others.
AppGeeker Screen Recorder is a powerful audio recording tool for Windows 10 that enables users to record audio from any source. It is capable of capturing both computer sound and microphone input and also allows users to customize the recording settings according to their needs. On Windows 10, this audio recording software is the perfect solution for recording sound for podcasts, voice-overs, or any other audio-related projects.
This app comes equipped with an array of editing tools like cropping, trimming, applying effects, etc. It can output to various audio formats like MP3, WAV, and AAC. Additionally, it enables Windows 10 users to share their recorded audio files on YouTube, Facebook, and Twitter.
To use AppGeeker Screen Recorder for audio recording on Windows 10, follow these steps:
Step 1: Open the software and select the Audio Recorder option.

Step 2: Select the audio source you wish to capture. For example, if you would like to record internal audio track, just turn on the toggle next to System Sound. However, if you want to record your voice and background music together, then switch both System Sound and Microphone to ON position.
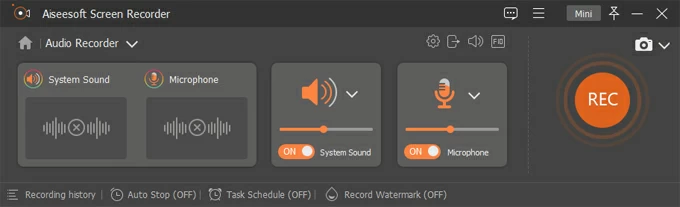
Step 3: Click the circle REC button on the right of the window to start.
Step 4: To stop recording, click the red square Stop button.

Once the audio recording is finished, a window will pop up showing previously captured audio. Then you'll be able to preview and trim the recording before saving it. If you're satisfied with the audio clip, click on Done to save it. By default, the audio files you recorded will be saved in the format of MP3 on your Windows 10 computer.
Audacity is a free, open-source audio recording program that allows Windows 10 users to record, edit and mix audio files. With advanced options like multi-track editing, built-in effects, and support for multiple input devices, it provides audio professionals with the tools they need to produce high-quality audio recordings on Windows 10 PC.
For those who're new to vocal audio recording, Audacity indeed has a bit of a learning curve. But you'll be able to start using the basic features without much difficulty because this sound recorder's interface is designed to be intuitive and user-friendly.
Read more: How to fix if your Audacity won't record audio from Windows
To record sound in Audacity for audio recordings on Windows 10, follow these steps:
1. Download and install Audacity on your Windows computer.
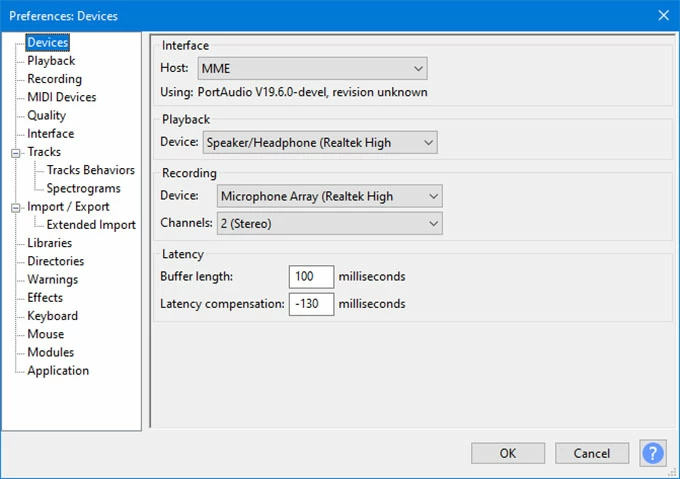
2. Open the app and go to Edit > Preferences > Devices. From the Interface section, set your channels and press OK.
3. Click on the red Record button on top of the Audacity screen. Speak into your microphone to record your audio.
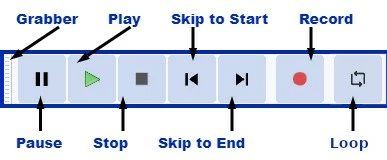
4. Click the black Stop button when you're finished recording. Your recording will now be displayed in the window.
5. Choose File > Export to save your recordings.
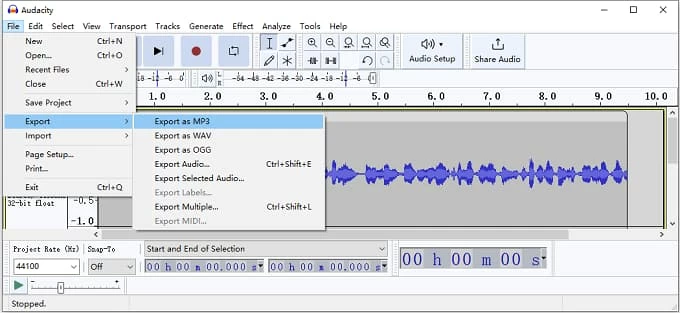
Unlike the Voice Recorder on Windows 10, audio recordings will not be saved immediately as MP3 audio files. When you record audio in Audacity, you will need to manually save the recording as an audio file before it's playable. The audio recorder supports a number of export formats for saved sound recordings, including WAV, MP3, AIFF, FLAC, and OGG.
1. Is there a built-in voice recorder app in Windows 10?
Yes, Windows 10 comes with a built-in audio recorder app called Voice Recorder. The Windows Voice Recorder app is known for producing high-quality recordings, which is important for capturing clear audio for lectures, meetings, or other important events.
2. How do I start a voice recording in Windows 10?
The best way to start a voice recording in Windows 10 is to use the free Voice Recorder app. Here's how you can use it:
Step 1. Open the Start menu and search for Voice Recorder.
Step 2. Click on the Voice Recorder app to launch it.
Step 3. To start a recording, click the Record button. The app will start recording audio from your computer's microphone.
Step 4. Click the Stop button to stop the recording.
3. Can I use Windows Voice Recorder to record phone calls?
No, Windows Voice Recorder is a basic audio recording application that can be used to record various audio sources, including your own voice and sounds from the environment. It is not designed specifically for recording telephone calls.
4. How to fix Voice Recorder microphone problems on Windows 10?
If your Voice Recorder microphone is not working, you'd better ensure the Voice Recorder app can access the microphone. Here are some steps you can try to solve your problem:
After completing these steps, the app should now be able to record audio from the microphone. If you have other problems regarding Microphone issues, such as the microphone being too quiet and others unable to hear the sound, please read Fix microphone problems and hope it's helpful.


