How to Record Audio on Windows 10

Discover the benefits of various wav audio recording applications and get the most suitable tool to record wav files on your Windows 10 pc.

WAV audio recording on Windows 10 nags users because WAV is not popular as MP3.
WAV (Waveform Audio File Format) is a popular audio file format used for storing uncompressed audio data on computers. It was a part of RIFF and widely supported on most players and operating systems like Windows, macOS, and Linux. You may have the necessity to record uncompressed wav audio on Windows 10.
However, uncompressed audio data makes WAV files typically larger than compressed audio like MP3, making it inconvenient to record, save, and transfer. Then how to record wav audio from a Windows computer? This post will introduce several best WAV recorders to you and elaborate on how to record WAV files on Windows 10 with these WAV recording tools.
Table of Contents
Windows 10 computers are bundled with a native WAV audio recorder called "Voice Recorder". This free WAV audio recording tool allows you to record audio from your pc. Below is how to record the computer audio recordings in WAV format:
1. Start recording a WAV file on the desktop by clicking Start.
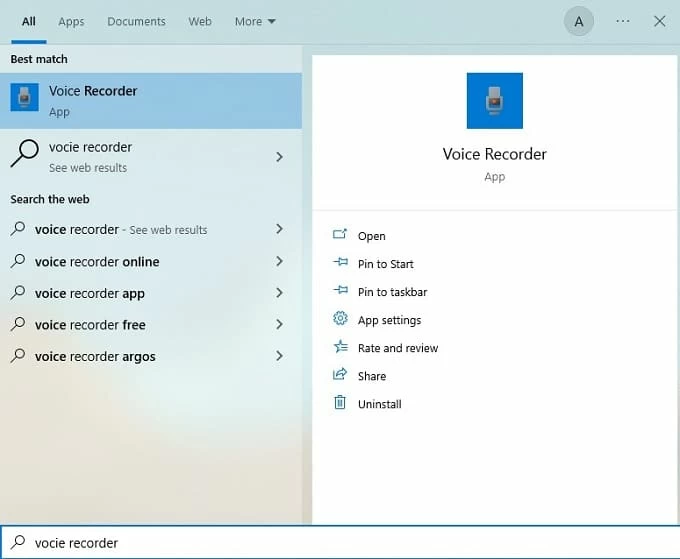
2. Then search Voice Recorder to launch it.
Note
3. Hit the Record button to proceed with wav recording for Windows 10.
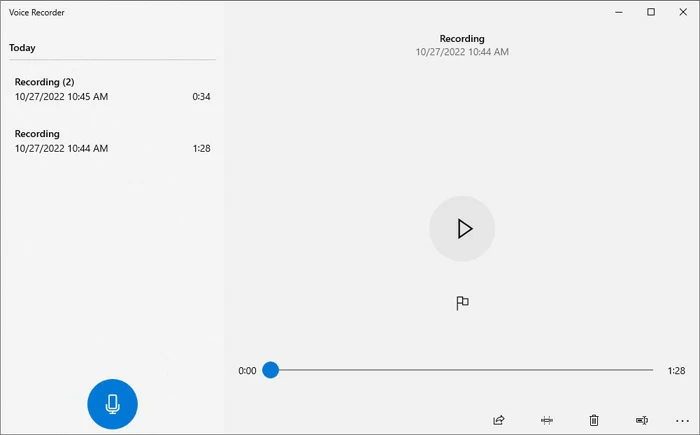
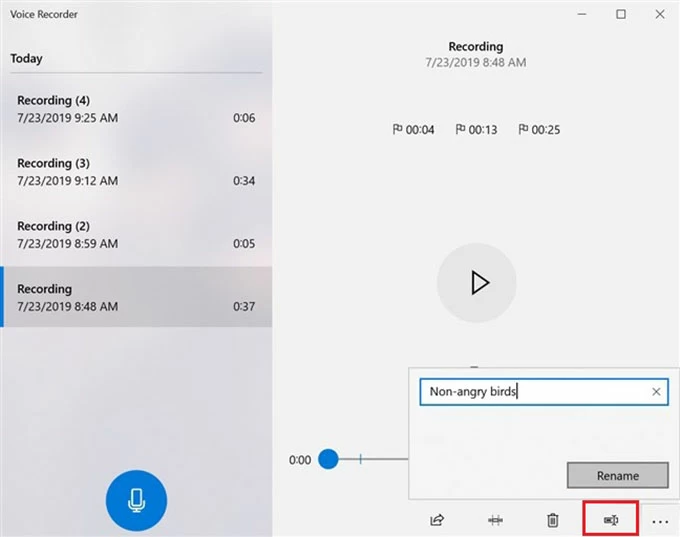
Once the recording is done, you will see a list of recorded audio clips in the main window. Select the WAV recording for playback and renaming. The recorded WAV file is saved in the Computer > Documents > Sound Recordings by default.
However, The Voice Recorder is a basic Windows 10 audio recording tool with limited functionality. It lacks advanced features such as editing tools, noise reduction, and effects. The Voice Recorder app can be useful for basic WAV audio recording tasks but may not be the best option for more advanced or professional-level recording needs.
Alternatively, you can also download and install other third-party wav audio recording apps from the Microsoft Store or other sources on the internet for recording computer audio in .wav format.
In addition to Voice Recorder, there're various wav audio recording programs for Windows 10. Choosing a suitable wav recording application on a Windows computer is important.
Using Audacity to record WAV audio on Windows 10 is not simple as using Voice Recorder. Nevertheless, as a free and open-source audio recorder, Audacity offers basic WAV recording functionality as well as almost all advanced edit settings that users need. It works with Windows, macOS, and Linux. Both internal and external audio can be captured with this tool.
Step 1. Go to download Audacity for Windows 10.
Step 2. Launch Audacity, then play the WAV audio you want to record on your Windows 10.
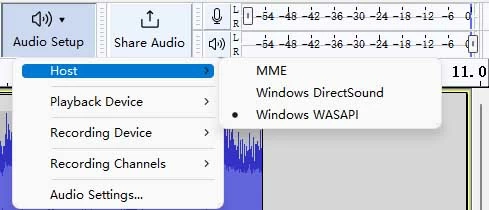
Step 3. Open Audio Setup in Audacity and set the Host as Windows WASAPI.
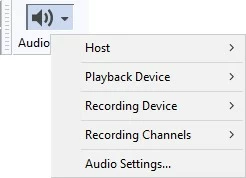
Step 4. Choose a proper Playback Device.
Step 5. Set the Recording Device. In the Recording Device panel, if you want to record the WAV audio playing on the pc, choose the Headphone or the Speaker. If you want to record your voice to WAV, choose the Microphone.
Step 6. Hit the Record button.
Step 7. Once you are satisfied with the WAV audio recording, stop it.
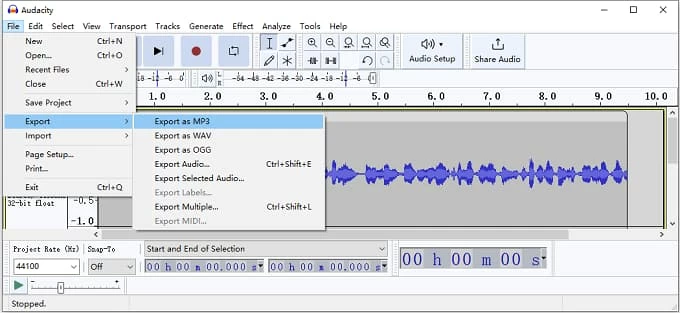
Step 8. Navigate to File > Export > Export as WAV to export the recording to WAV format. Or choose Export as MP3 to convert and save the WAV recording to MP3 format.
According to the steps above, the WAV recording process on Windows 10 is kind of complicated. What's more, the interface of the tool is not user-friendly, which enhances the WAV recording complexity for newcomers.
Among all Windows WAV recorders from the internet, AppGeeker Screen Recorder stands out due to its overwhelming advantages. It is developed for recording video, game clips, and audio on Windows and Mac computers. With AppGeeker Screen Recorder, you are available to record the playing audio in different formats, including WAV.
Unlike Audacity and Voice Recorder, AppGeeker Screen Recorder supports recording both internal and external audio on Windows 10 simultaneously. Whether you want to record the streaming WAV audio from your pc or a .wav file on windows 10, it will flawlessly assist you. Below is how to record a WAV audio file from a computer with this Windows WAV recorder.
Step 1: Launch AppGeeker Screen Recorder and Choose Audio Recorder
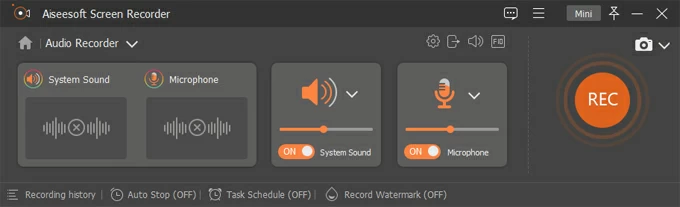
After downloading AppGeeker Screen Recorder, launch it and choose Audio Recorder.

Step 2: Set the Audio Recording Source
Toggle on or off the System Sound and Microphone by your demand.
Step 3: Start Recording
If you want to record the playing WAV audio, open the WAV file and hit REC.
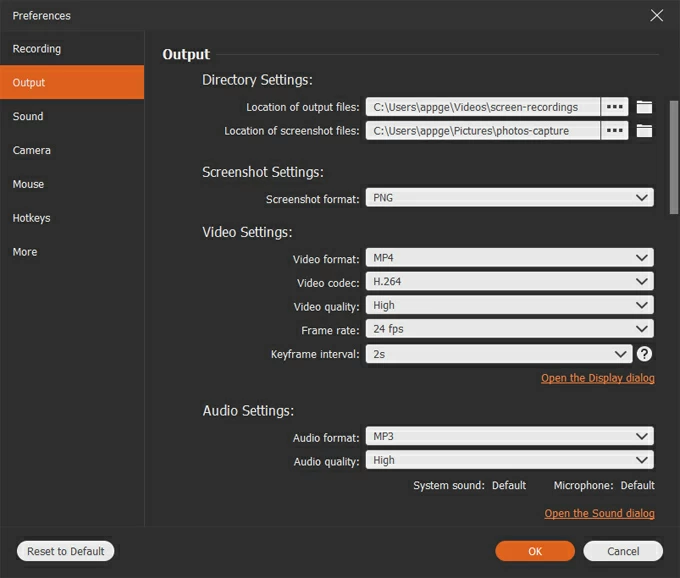
If you want to record the sound and save it in WAV format, click the gear icon and choose Settings to change the output format from mp3 to WAV, then confirm the setting and hit REC.