How to Record YouTube Videos on Mac

Ever wonder how to capture screen video? This guide offers best video recorders for Windows 10 and Windows 11 to video record what's happening on your PC.

Whether you're in your game or an app in a way to show off the gameplay or illustrate how-to guide, there're times when you wish you could screen record video in Windows. If you're eager to record your video in Windows 10 or Windows 11, this seems to be your lucky day.
There're a few ways to take a video of your screen in Windows computer, whether it's a game or an app.
Microsoft has come built in with Windows video recorder for Xbox Game Bar and Snipping Tool you intend to use. For Windows 10 and Windows 11, you can use Xbox Game Bar to capture game videos on your PC, as well as record the video content in just about any Windows app - expect Windows desktop, File Explorer, Start Menu, and some certain apps like Weather and Map, and save the video at MP4 format right onto your computer.
On Windows 11 build 22621.1344 or later, the Snipping Tool adds a video capture option that makes recording a video of an application, or a selected portion of the screen, or the entire desktop possible and effortless. Note that the video recording function does not include audio.
Here's how you can use Xbox Game Bar, Snipping Tool in Windows to record video of screen. You'll also learn how to video record on Windows PC with audio flexibly using the third-party AppGeeker Screen Recorder software and OBS.
4 Best video recording software tools to capture video on Windows 11 or Windows 10:
When Windows Game Bar is activated and displayed, it takes only one click to record computer screen video. When the video recording is in progress, you can toggle the microphone ON to capture your voice and other audio with ease, and finally save the recording to your PC following the "Game clip recorded" alert. Game Bar will then appear allowing you to play and watch the recorded video in the Gallery section.
The Xbox Game Bar video capture tool is a straightforward app built into Windows 10 and Windows 11 by default. You can record videos through the Windows Keyboard Shortcut or the app itself. When you kick off a video screen recording in Game Bar, you will find it can only capture one single app at a time - usually the last window you clicked into, instead of the entire screen on which you may have multiple application windows.
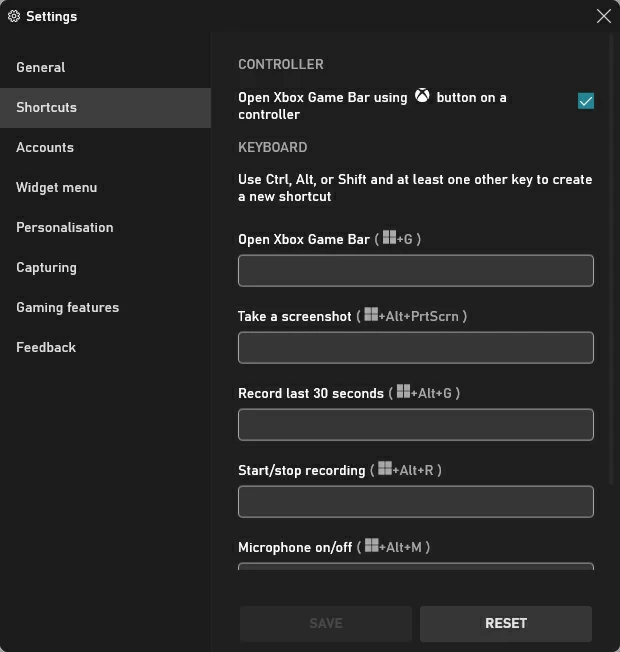
First, use keyboard shortcuts to quickly run a recording without going into the Game Bar. Windows 10 users can manage and control the shortcuts in Settings > Game Bar > Xbox Game Bar, while Windows 11 users need to achieve that in Game Bar app. Below are a few of the useful shortcuts you may want to use:
Here's how to screen record video with the built-in Xbox Game Bar in Windows 10 or Windows 11 PC & laptop.
1. Open the app you want to record.
You can close other applications to avoid a recording on a wrong window. This also helps prevent audio playing across other apps from being captured. Although Xbox screen video recorder restricts itself to record one app at a time, it could still record all of the audio coming out of all applications on the computer and from the mic.
2. Press Windows key + Alt + R to start capturing video.
This should open up a small recording bar with a timer and two recording controls: Microphone, Stop Recording button.
If it doesn't, you need to go and enable Xbox Game Bar Screen Recording via Settings > Gaming > Xbox Game Bar.

3. To record the audio, press Windows key + Alt + M.
If you don't want any sound recorded in your video recording, leave the mic muted there.
4. Perform the screen activity within the app that you wish to capture.
5. Press Windows key + Alt + R again to end screen recording.
Once you complete recording, Xbox Game Bar displays a notification on the right side of your screen indicating that the game clip was recorded. Click on this notification to open Game Bar interface with all its features.

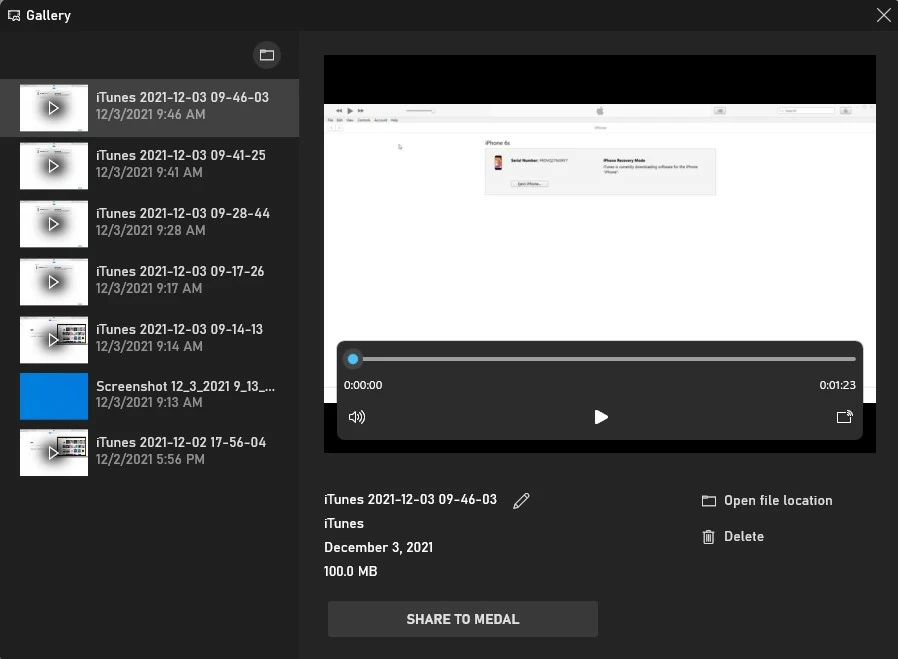
A preview of your screen video recording will be available in the Game Bar, along with the video file name & size, and recording date displaying in the Gallery window. Then, you can:
In addition to using shortcuts for start a video recording from most applications and windows, you can access Xbox screen recording tool and apply its features to screen capture video from Windows screen.
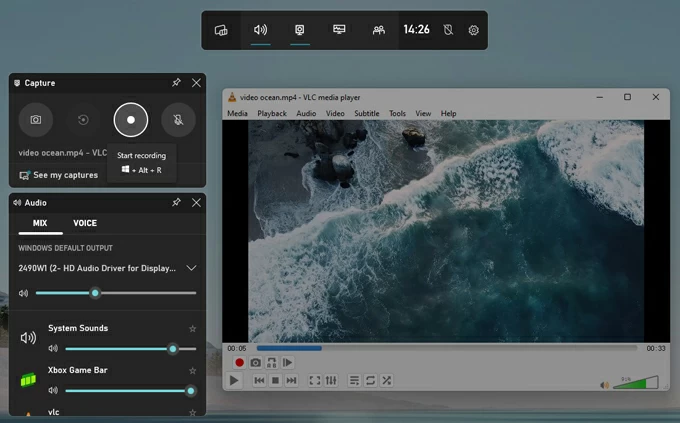
Hit Windows key + G to launch Game Bar. The top bar with several buttons, Capture pane with recording controls, Audio pane, System Sounds pane will opens automatically.
To start recording video of your screen activity, click the Start recording dot from the Capture pane. Then operate any screen activity you want to capture in the recording. You can see the time of the recording from the recording bar which is located anywhere of your screen. If you need to include the audio in your video screen capture, click on the Microphone icon to enable it. To stop the task, click the Stop Recording button. When "Game clip recorded" notification pops up, select it to open Game Bar.
After you complete the steps, the capture will open for playback and viewing. By default, all your recorded video clips are accessible within the path C:\Users\[username]\Videos\Captures. If needed, you could change the default save location for your video recordings by going to Settings > Gaming > Captures.
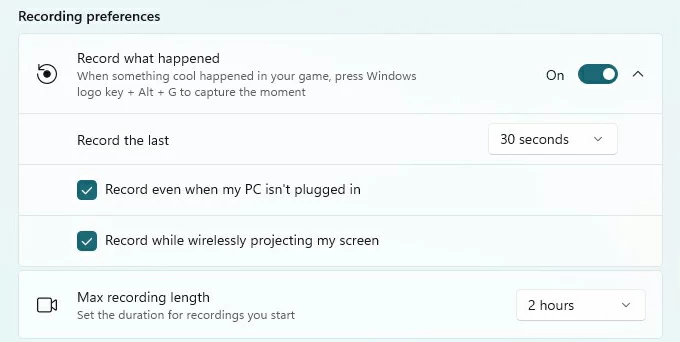
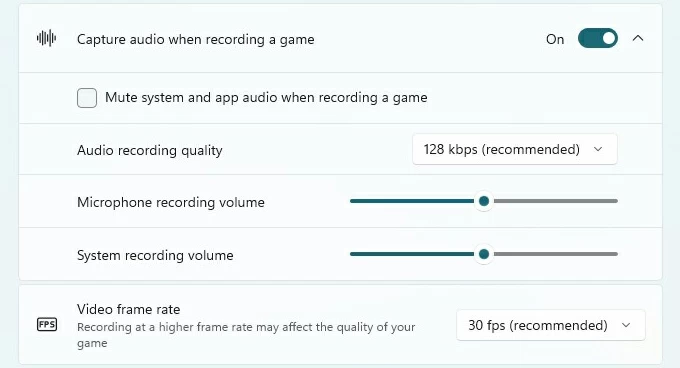
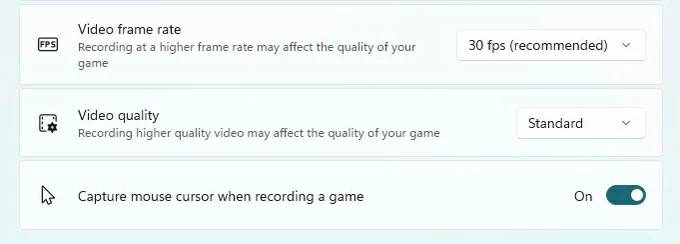
Configure one of the available screen recording options of Game Bar for whatever an app recording or a game recording in Settings > Gaming > Captures, including:
Snipping Tool's video screen recorder only works on Windows 11 build 22621.1344 or later, and features with the ability record video of desktop, File Explorer, Start Menu and Taskbar, entire window of a specific app open on your PC, selected portion of your screen. It allows users to video capture on PC in a freeform way by drawing a box and refining it flexibly.
In case you want to record a webcam video in Windows 11, visit this link.
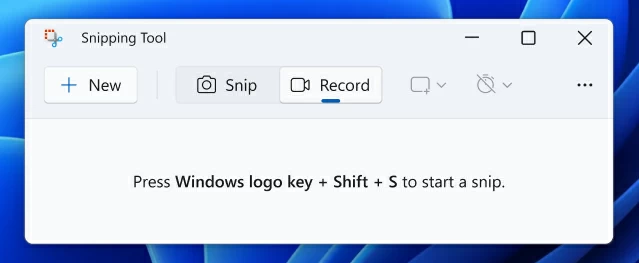
1- Open the built-in Snipping Tool on your Windows 11 computer. Click Start, search for "snipping tool" and then choose the app from the Best match section.
2- Select the Record button.
3- Click the New button.
4- Draw your cursor around the area you'd like to record.
5- Once you have the screen you want to record selected, click the Start recording button at the top. The Snipping Tool counts down from three and begins video capturing.
6- When your screen activities in the selected object have been recorded, click the red Stop button to terminate the recording session.
7- Review your new recording in the viewer of Snipping Tool.
8- To save the recording, click the Save button at the upper right, and then follow the on-screen prompts to save your recording in your preferred location. All captured videos are saved as MP4 files, but with no sound.

You'll find that native and free Windows video-capture solutions usually lack some essential features. Xbox Game Bar does not record video from desktop or entire screen, and Snipping Tool will not work with audio recording which means that the recorded video file has the footage only.
If you want to have more options to record video screen in Windows, what do you think about giving a try to AppGeeker Screen Recorder instead?
This is the go-to video recorder for Windows 10 and Windows 11 that provides a multitube of tools for capturing your activities on the full screen or part of screen. It also comes with sound recording function. This is useful if you intend to capture system and app audio, and microphone audio when recording a game.
As for those of you looking to render video footage into high quality MP4 or other file formats with ease, this PC screen recording application offers the presets in that regard too. Of course, you're able to lower the video quality if you want to save your computer storage space.
How to record a video on Windows 10 or Windows 11:
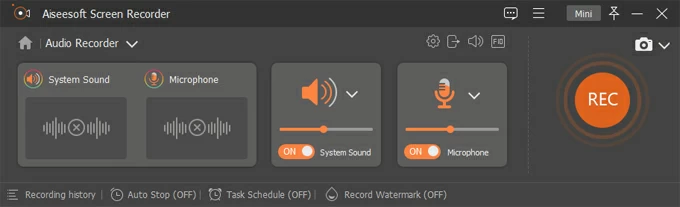
Step 1: Run Screen Recorder on your computer and select Video Recorder mode.

Step 2: Select the entire screen or a small part of screen to record.
You can click "Full" and click anywhere to highlight the entire screen or whole desktop. If you're going to record a video clip on a portion of the screen, choose "Custom" > "Select region/ window" and then drag to draw a free-form shape around your desired area.

Step 3: Enable the toggle for "System Sound" and/ or "Microphone".
Make sure both toggles are switched on if you need to record sound from app or game itself and from your mic.
If you need to configure the video format or video quality, check this quick guide for the details.
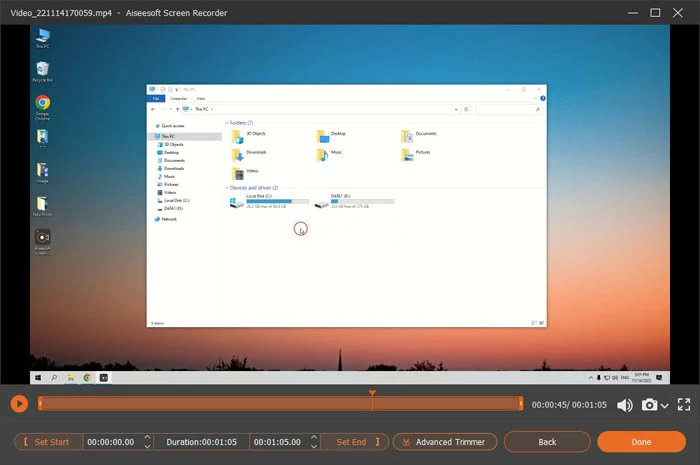
Step 4: When ready, hit REC button to start a screen video capture from the Windows desktop.
You can record multiple apps at a time, and switch between app windows in the video recording session.
![]()
Step 5: Hit Stop button to stop the capture.
Footage and audio will be captured until you finalize the recording. When finished, you can preview and edit your recorded video clip before saving or sharing it with others.
Related: How to Capture Clips on PC
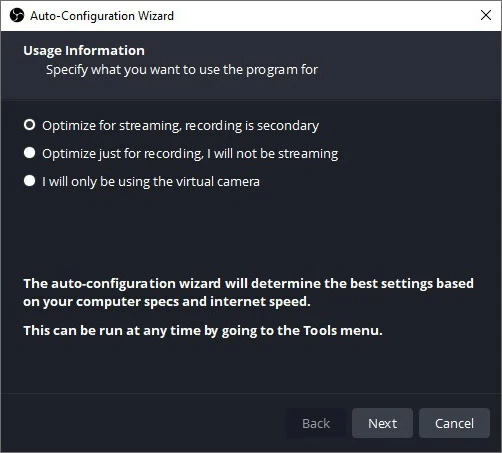
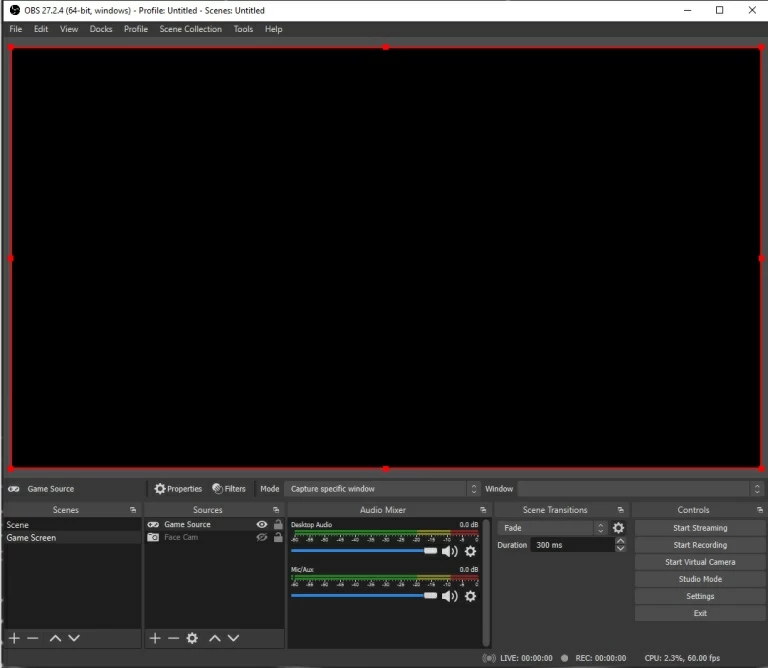
It may take some getting used to, but using OBS free video recording software can fulfill your task of video recording full desktop in Windows. The recorded videos will be output to MKV format by default, so if you need a MP4 file, you need to go to change to MP4 in File > Settings > Output before the capture kicks off. You can also change the output folder there.
Check out how to capture video clips on screen of Windows system:
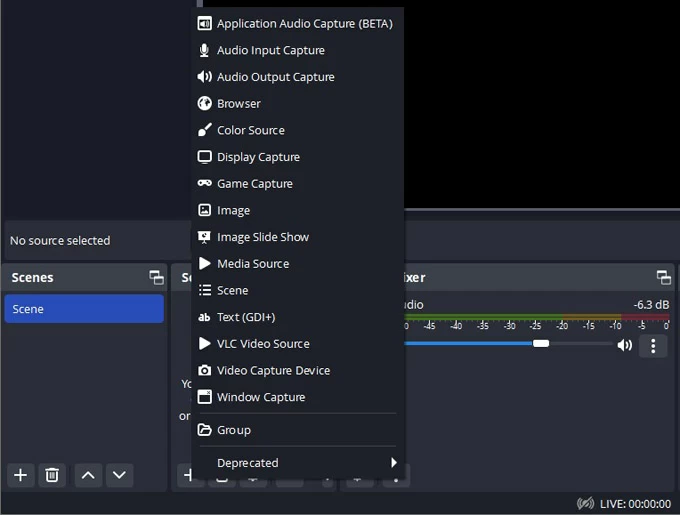
Read Next: How to Record Desktop Audio with OBS in Windows