
How to Record Computer Audio Using QuickTime Player

To record MP3 audio files on Windows 11 computer, you can use the free Sound Recorder tool that comes with Windows 11 and other available audio recording software.

With the release of Windows 11, Microsoft has equipped the operating system with a more powerful set of features and tools that enable users to perform various tasks with ease, including the upgraded default voice recording software-Sound Recorder, which is known as Voice Recorder in Windows 10.
Compared to the Voice Recorder, the most obvious change of Sound Recorder is that it can directly record audio in MP3 format on Windows 11, which is impossible in Windows 10.

You can create MP3 audio files on Windows 11 directly with the native recording tool.
Sound Recorder not only supports recording MP3 files on Windows 11, but is also capable of supporting AAC, WMA, FLAC and WAV audio formats. With its wide range of sound recording capabilities, users can now easily and quickly create MP3 recording files in Windows 11, which is much easier than converting the audio to MP3 after recording.
In this article, we will introduce how to record MP3s in Windows 11 using the built-in recorder or some other available MP3 recording programs. For example, you can use AppGeeker Audio Recorder, an MP3 recorder with advanced features, to capture both internal and external audio and export the recording to MP3 format on your Windows 11 PC.
Also read: How to screen record on your Windows 11
As long as you know exactly what you need, following the instructions in this article to make an MP3 recording on Windows 11 will be a breeze.
Table of Contents
The Sound Recorder pre-installed in Windows 11 is the latest sound recording tool from Microsoft. The software has been designed with the user in mind and is packed with features that make it both easy to use and powerful.
Sound Recorder for Windows 11 makes it easier to record voice from a variety of sources, including microphones, MIDI devices and other sound cards, allowing you to freely choose a microphone from among the multiple audio input devices you plug in. Most importantly, it adds settings for recording format and audio quality, which facilitates the recording of MP3 audio on Windows 11 PCs without the need for conversion.
Sound Recorder in Windows 11 has several features that have been improved over previous versions. To create MP3 clips on a Windows 11 laptop or desktop, you first need to confirm that the recording format is selected as MP3, which you can check and adjust in the Settings.
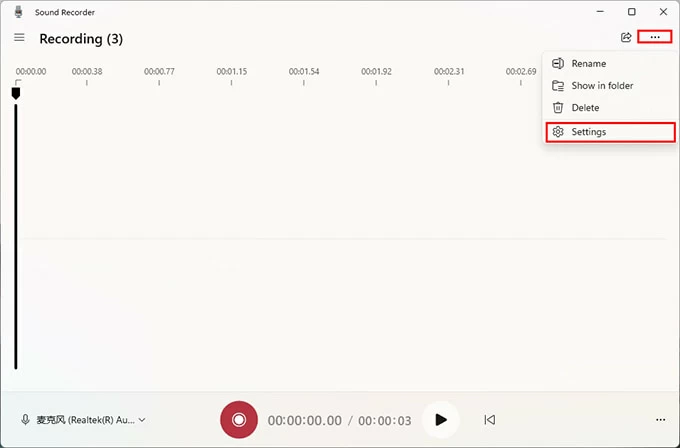
After opening the Sound Recorder app, click on the three dots in the upper right corner of the main page and select Settings, where you can change the recording format and audio quality.
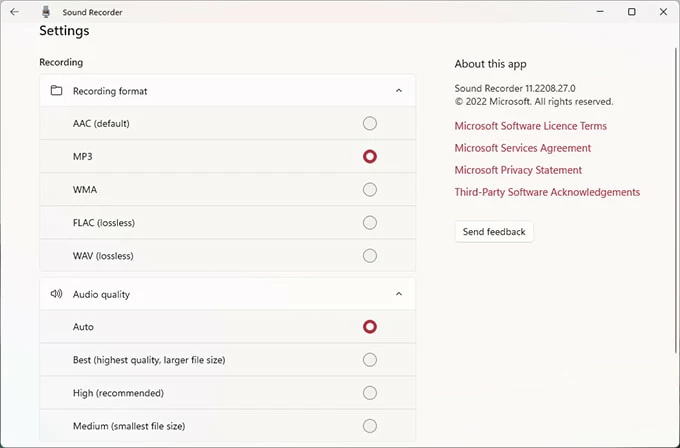
Click on the Recording format dropdown menu and you will be given the options of MP3, AAC, WMA, FLAC and WAV. To record standard MP3 audio on Windows 11, make sure you pick MP3 as your audio format. You can also choose the quality of the audio by selecting Auto, Best (highest quality, larger file size), High (recommended), and Medium (smaller file size), depending on your personal needs.
Note:
Read more: How to record MP3 audio on Windows 10
When you have finished configuring Sound Recorder, you can start recording MP3 files.
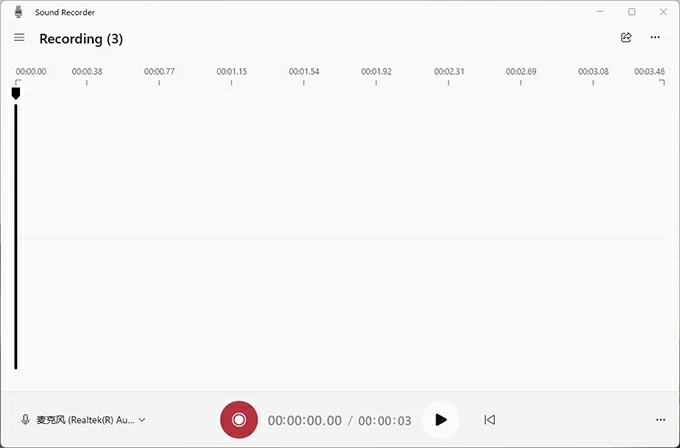
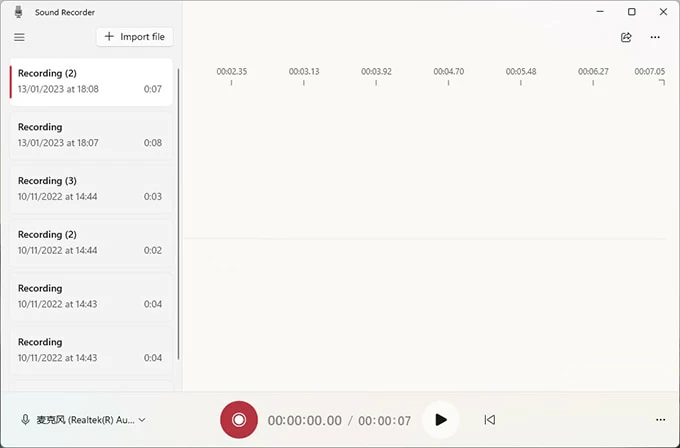
1. Find the Sound Recorder program from your Start menu and run it. If you are already in the Sound Recorder, make sure that your microphone device is connected to the computer.
Tip: The prerequisite for enabling Sound Recorder to record your voice as MP3 file on Win 11 is that you have plugged the microphone into your computer. In the bottom left corner of the recording screen, click on the down arrow next to the microphone icon from which you can select your recording device.
2. Click on the red round Record button at the button or press Control + R once you are prepared to start recording.
Tip: You can speak close to the microphone so that the recorder can capture your voice better; use the Mark function to mark the positions you need during recording.
3. Click on the Pause button to pause the recording, and hit the Pause button again to resume the audio recording.
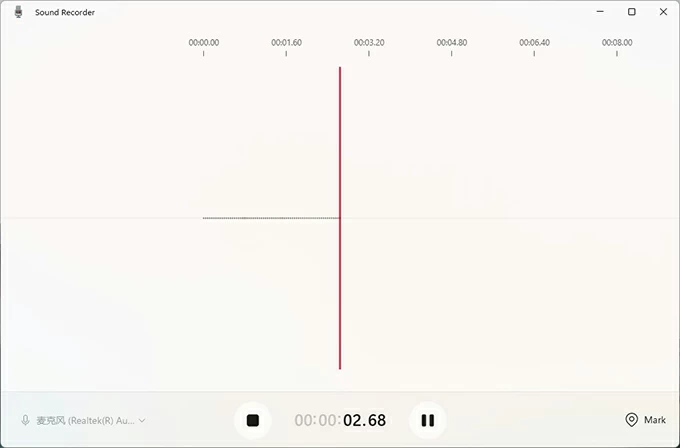
4. Hit the black square Stop button when you are finished. The recorded audio will be stored on your Windows 11 PC in MP3 format, and you can also view your recorded audio in the recording list on the left side of the Sound Recorder, click the Play button to preview.
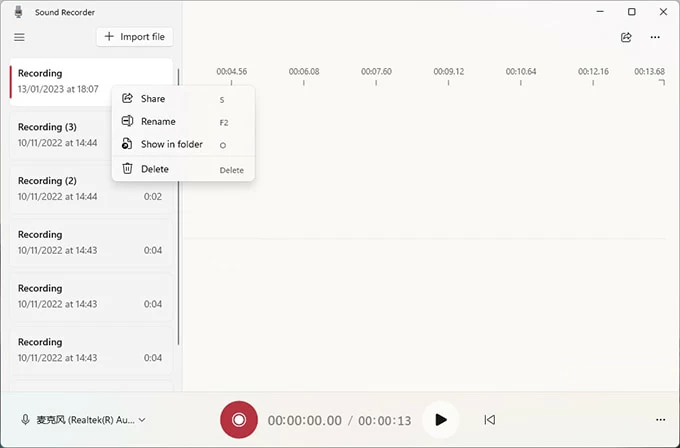
5. Right-click on the recorded audio and you can rename, share, delete, or show your MP3 recording in folder.
That's how to record your own voice as .mp3 files via Sound Recorder in Windows 11, but note that using the microphone to record MP3 audio is not able to capture the system sound from Windows 11, only the sound from the microphone.
Sound Recorder can help you record your voice as an MP3 file, but what if you want to perform an MP3 recording of Windows 11 internal sound? Although Sound Recorder can record internal audio, the prerequisite is to modify the sound settings of Windows 11. To avoid such an unnecessary hassle, your best alternative is to choose AppGeeker Audio Recorder, an all-in-one MP3 recording program that can capture sound from any source on Windows 11 into MP3 files.
The AppGeeker Audio Recorder is a versatile and handy software for recording audio from Windows 11 and the microphone. It can record system sound and microphone simultaneously or separately and output them to .mp3 format. And one of its outstanding features is the ability to reduce microphone noise for cleaner and higher-quality MP3 audio recording.
All in all, AppGeeker Audio Recorder provides a wide range of customization options for your audio recordings, including adjustable recording parameters, allowing you to tailor audio recordings to your specific requirements.
1. Launch the software after it has been downloaded and installed on your Windows 11.
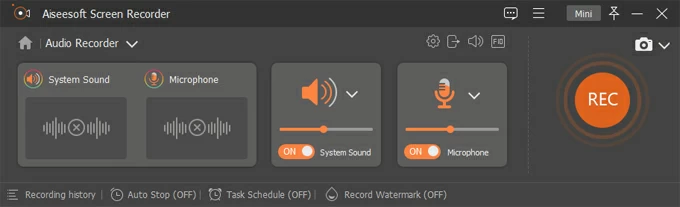
2. Select Audio Recorder from the home page for recording an MP3.

3. Choose an audio input. There are two choices available here: System Sound and Microphone.
Application sounds and multimedia audio played through Windows 11 computer are recorded by System Sound. The Microphone, on the other hand, captures sound from your computer's internal microphone or an external USB microphone. Switch the audio source you need to capture and adjust the volume level.
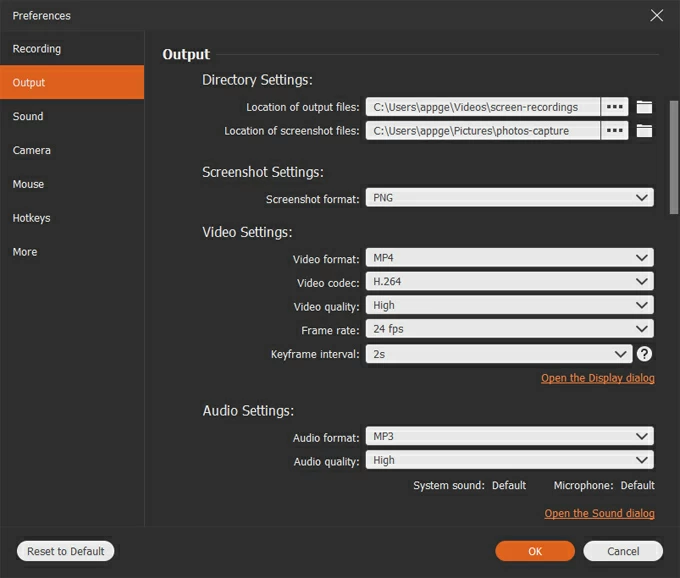
Click on the gear symbol above the microphone icon to enter the Preferences window, from here you can select your preferred output audio format and output destination. Locate Output > Audio Settings, select the MP3 option in "Audio format", while you can also choose to record lossless MP3 audio in the "Audio quality" tab.
4. Hit the REC button on the right to start your MP3 recording. Play your multi-media audio or speak through the microphone, and the software will bring all the recorded sounds together in an MP3 file on your Windows 11 computer.

5. Click the red square Stop button in the float bar to end your recording. Then you can edit and trim your MP3 audio in the preview window to make your recording more professional. The exported MP3 files can be accessed in your Windows 11 multimedia player.
Also see: How to record audio playing on your computer
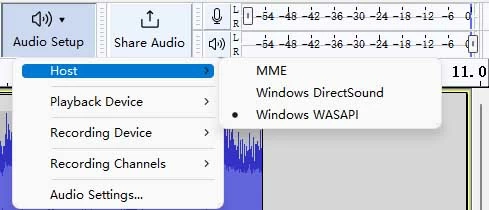
As an open-source, cross-platform digital audio editing and recording application, Audacity has a rich set of advanced recording features that make it possible to record system sounds, microphone sounds, speaker sounds, etc. and support multiple audio output formats on Windows 11. With this free MP3 voice recorder, Windows 11 users can record audio through the microphone and export it to MP3 files, as well as save internal audio recordings as MP3s.
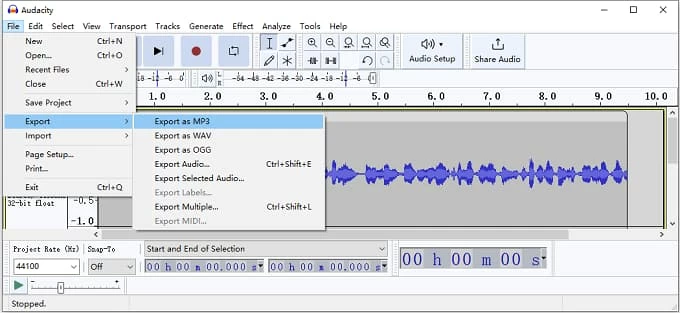
To save your recorded audio as MP3 format on your Windows 11 PC, head to File > Export > Export as MP3 in the top left window.
1. How to record MP3 on Windows 11?
Search for Sound Recorder in the Start menu and open it on Windows 11. Click on the three dots in the top left corner of the screen and select Settings, then select MP3 in the Audio format tab. Return to the recording screen, make sure the microphone device is connected to the computer, and click the red Record button to start recording. When you are done recording, click the Stop button. The recorded audio will be saved in .mp3 file on your Windows 11 desktop or laptop.
2. Does Windows 11 have an audio recorder?
Yes, Windows 11 comes with a recorder that can record audio, called Sound Recorder, which is called Voice Recorder in Windows 10. You can search for this program in the Start menu, and if you accidentally delete it, you can download it back for free from the Microsoft Store.
3. How to record an MP3 on Windows?
Windows has a pre-installed recording tool called Voice Recorder in Windows 10 and Sound Recorder in Windows 11. The biggest upgrade of Sound Recorder is that it allows you to choose the recording format. In the settings of Sound Recorder (Win 11), you can change the output format to MP3. But Voice Recorder (Win 10) can only record M4A audio by default, so you will need to use an additional converter or recorder to convert M4A audio to MP3 file.


