How to Convert MP4 Video to MOV File on a Mac


In a wave of Ultra High Definition era, 4K is regarded as the main development trend of video resolution. It refers to a horizontal resolution on the order of 4,000 pixels and vertical resolution on the order of 2,000 pixels. Owing to its ultra high definition, any detail or feature could be clearly observed through our eyes for its resolution is four times that of 2K projector or high definition TV set.
However, if you have a raw 4K .mov recorded of the event that you captured with your camera, for example, you might run into the problem that how to playback 4K video on your devices. Running stuff at UHD 4K resolutions is taking a serious investment of hardware requirements(CPU, GPU, etc.), let alone the format compatibility issue for your devices. In that case, there is still necessary for you to get the raw 4K video downscaled to 1080p or 720p file on Mac & PC from time to time so that it can be played smoothly.
We've already covered how to convert 4K file to ProRes LT video for editing in Final Cut Pro with a program named Video Converter for Mac. The good news is that you can use it to convert MOV video files from 4K to 1080p or 720p resolution on your Mac as well.
Video Converter for Mac is a great piece of tool that's really attractive and fun to use for both average and experienced users. It's capable of accepting any file from any format as input and offers an alternative way to play any formatted video on Mac - convert it into the format type that you need. Actually, it also holds the video inherent options avaiable to be tweaked for the output file, including resolution, MOV 4K to 1080p (1920*1080) or 720p (1280*720), frame rate (fps), bit rate (kbps) and others. Moreover, you can trim, crop, and retouch your videos with just a few clicks to give your movie a unique, interesting look and feel.
If you're on a PC machine and want to downsize your MOV with 4K to 1080p, please refer to its PC's equivalent Video Converter for Windows to get the task done.
Step 1: Add 4K footage to the program's window
A double-click of this MOV 4K to 1080p converter on your Mac will lead you direct to its starting screen with its introductory guide for making for a smooth learning curve.
Place your mouse cursor on "Add Files" button at the upper-left corner and press it to load your 4K video files that you want to downscale to 1080p/ 720p from local directory on your Mac.
In the center working area of the main window, all imported files will be displayed in thumbnails. Double click any file to preview in the preview window on the right hand side.

Another fancy feature that this utility fits with is undoubtely the basic editting tool. With good use of it, you can crop the black frame, trim the unwanted parts, enhance dark or low-quality video and add text & image watermark in a few clicks. Plus, you can apply artistic effects and make your videos more stunning.
Step 2: Configure the original resolution to 1920*1080 or 1280*720
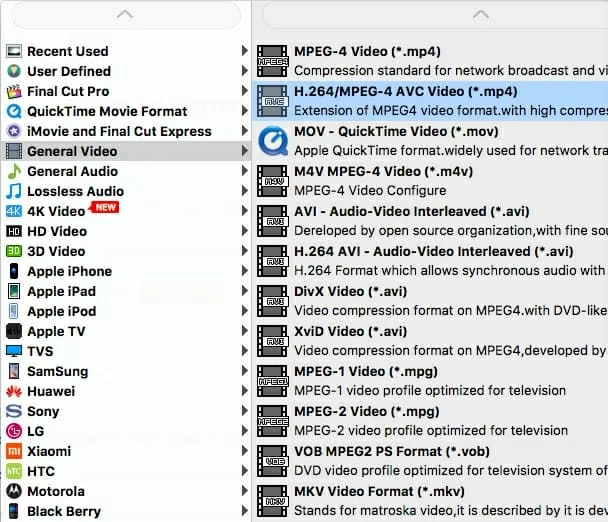
Subsequently, click "Profile" drop down menu to reveal format-selecting panel. For the purpose of this tutorial, we just want to compress the UHD 4K to 1080p/ 720p of MOV file, so here we still keep the original MOV format as the output format.
Click the "General Video" category, and then pick "MOV - QuickTime Video (*.mov)" option from its expanding list.
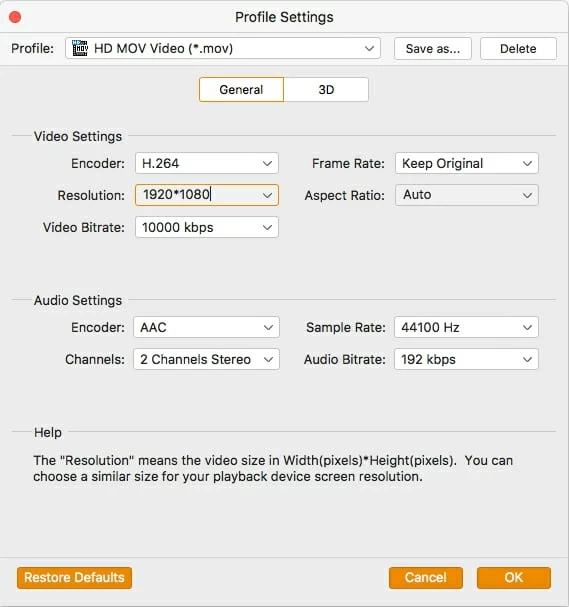
Important! Now you'll have to click the "Settings" button next to "Profile", this will bring you into a window where you can tweak the conversion settings of MOV.
As you can see in the screenshot demonstrated below, you're allowed to fine tune a number of settings including encoder, bitrate, frame rate and aspect ratio according to your preference. You can experiment with all these options if you know exactly what you are doing.
In our case in this example, all we need to do here is click the "Resolution" box and then select 1920*1080 (1080p) or 1280*720 (720p) from the list.
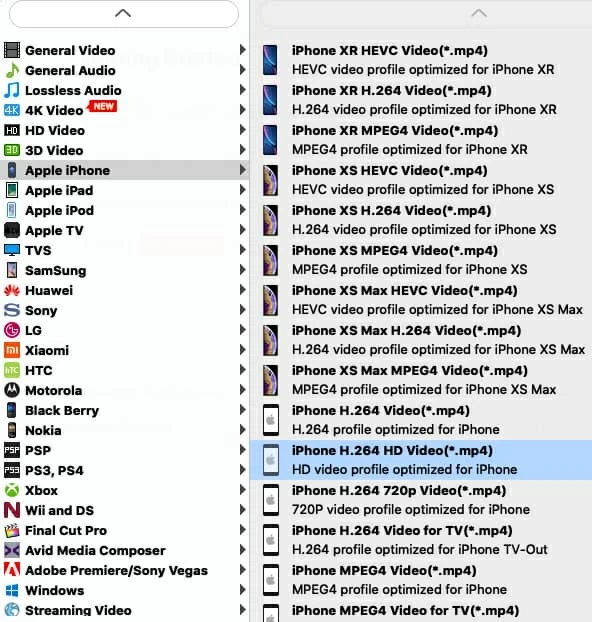
If you convert 4K movies or other files to playback on your Apple iPhone, iPad or other devices, the software can also tailor your conversion for portable multimedia devices, video-sharing sites, TVs, and more with a library of pre-defined profiles. Just choose what you want your file converted to from the preset lists, it takes care of the rest.
After finishing the settings in the above steps, type a path in the "Destination" field (on the left bottom of the interface) or use "Browse" button (underneath "Settings") to select your preferred output directory from your iMac.
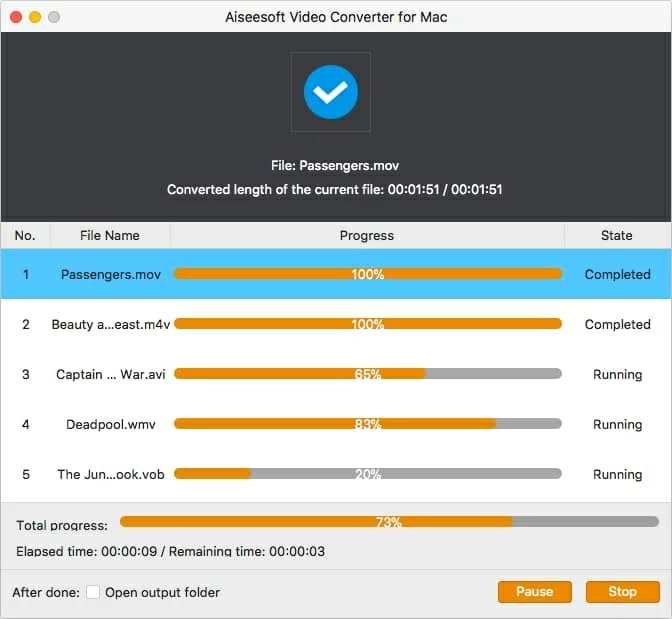
Step 3: Start converting .mov from 4K to 1080p or 720p for Mac
When everything looks good, you then hit the "Convert" button located on the lower right corner of the interface to start the 4K to 1080p/ 720p conversion process on Mac.
When the process is finished, you may check the new generated 1080p & 720p MOV videos and enjoy them on your device with ease and convenience.