How to Play a MKV File on Apple QuickTime Player


1080p movies are already ubiquitous as we enter into an age of High-definition. Probably most of the movies downloaded online are 1080p .mp4 files. We all understand you want to get the best viewing experience, but advantages are always accompanied by disadvantages. 1080p movie demands a high level of CPU and graphic capabilities from your PC. Besides, some outdated computer and handheld devices may not be able to support 1080p MP4 files due to limited storage space.
For easy and smooth playback, it is logical to change the 1080p MP4 video files to 720p. By the way, 720p (1280 * 720) is the minimal standard of HD, which can by and large satisfy your needs for a clear picture. To make your MP4 video downscaled from 1080p to 720p less of a trouble, you'll need a video converting utility.
Video Converter is a great tool for both Windows and Mac platform that's capable of handling just about any video source in your media library. You can downsize your 1080p HD video into 720p without changing the original (MP4) extension. You can convert the current MP4 format to and from any other format in your mind: WMV, MKV, MOV, AVI, MTS, WebM, M4V, etc. The utility is also proud of its capabilities of tweaking output settings like codec, resolution, bitrate, frame rate, sample rate, etc.
The following is a walkthrough on how to render 1080p MP4 files to 720p for Mac so that you can put your videos on your device for playback without much trouble. Just three simple steps are involved: import the full HD MP4 files > adjust the resolution > Output the files. You can also use it to convert files in other file type.
Step 1: Load source 1080p MP4 footage onto the program
Click "Add File" in the top menu bar to open your source .mp4 files and import them to the program.
Drag-and-drop feature is also viable to import your source files.

Step 2: Adjust resolution from 1080p to 720p
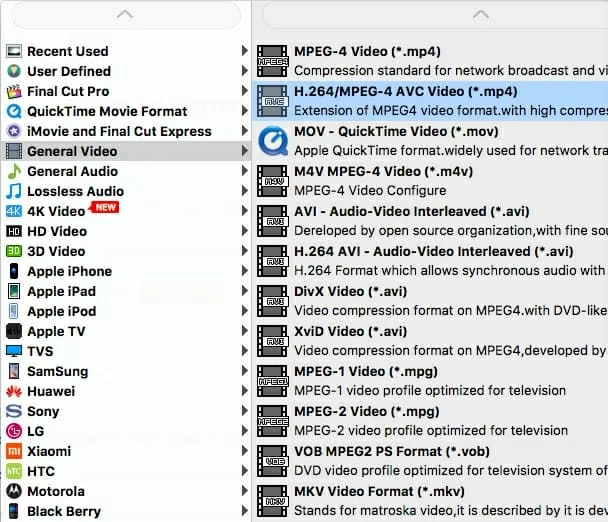
Hit the "Profile" pull-down menu (see bottom left) to open a window where provide you output formats on a full scale. If you insist on the original MP4 extension, you can choose "General Video" > "H.264 / MPEG – 4 AVC Video (*.mp4) " from the dropdown list, or select another format profile from the list as output if you like.
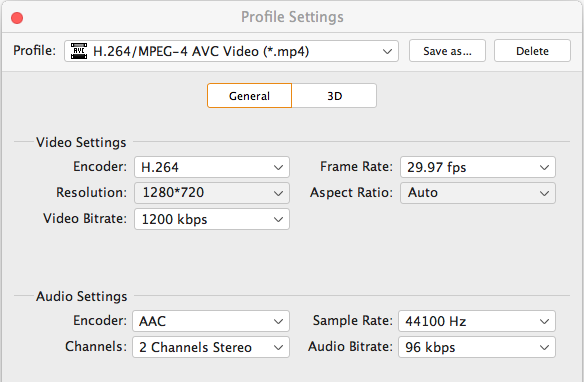
Now the important part: click "Settings" beside "Profile" to open up the Profile Settings window, from where you can fine-tune parameters for video and audio. In our cases, just reset the resolution from 1920*1080 to 1280*720 (720p) in "Resolution" field.
If other parameters are very strange to you, you might leave them alone since incorrect configuration might cause the conversion to fail.
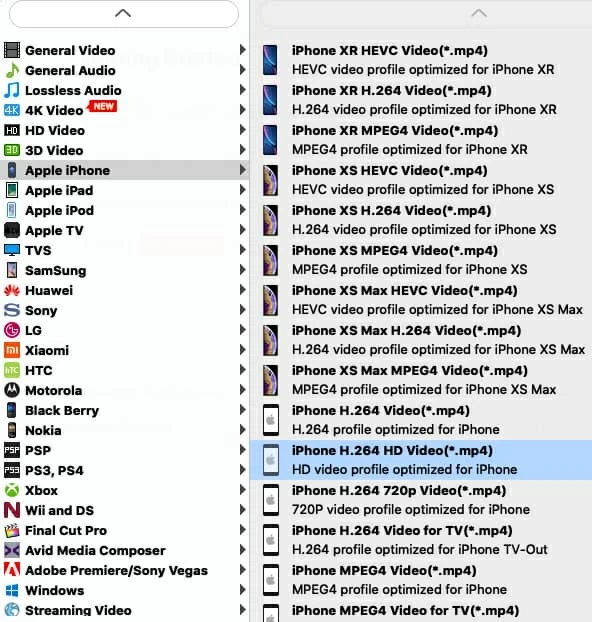
There are a quantity of presets for different devices and apps. For example, if you want to play the output files on newly purchased iPhone 7 Plus, then go "Apple iPhone" > "iPhone 7 Plus/7 H.264 HD Video(*.mp4)".
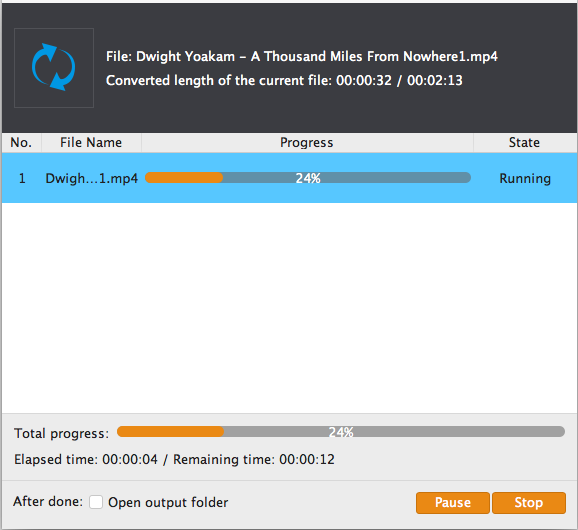
Step 3: Start Converting your 1080p HD videos in .mp4 to 720p
After you are done with your settings, choose a directory where you put your output 720p .mp4 files in "Destination" box beneath "Profile" menu.
Finally, press "Convert" button located in the bottom right side of the program window and let the program do the rest. The time for the mp4 1080p to 720p conversion process to finish on Mac depends on the file size and the speed of your Mac's processor.
In this way, the MP4 files has been converted from 1080p to 720p on your Mac. Now you can put the more accessible 720p files onto your device for playback.