How to Download and Restore Contacts from iCloud Backup


I have stored many pictures, iMessage chats, notes, reminders, movies and more on my iPad mini 4. Sadly, I lost some files due to failed upgrading. I try every means to get them back but in vain. Has anyone experienced similar problems like this? Any recommendations for the recovery of data on iPad?
There's nothing worse than losing data or deleting important files inadvertently in your iPad that you intend to keep? Fortunately, with right iPad data recovery software app and a little time, you'll be able to easily recover your iPad data files without having to bother with starting from scratch.
In this post we'll show you how to recover lost data on iPad (Air, Mini, Pro) with or without backup.
First up, you'll need to open the Recently Deleted folder and see what's in there. Some Apps (i.e. Photos, Notes) on iPad come with Recently Deleted folder that keeps your deleted files for a period of time. To retrieve an iPad file that's already in the album, simply select it and tap Recover.
If you aren't able to find the deleted files in Recently Deleted album, there's a couple of tricky ways to retrieve lost iPad data.
Apple lets you restore lost iPad data from iTunes if you have the backup that's made with iTunes on computer before your files are missing.
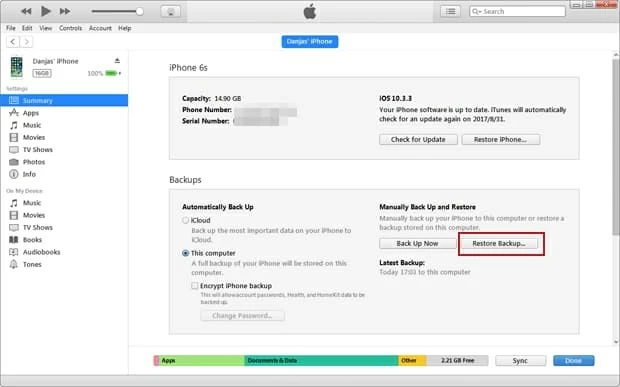
If it doesn't work, you can try the next method.
No iTunes backup? There's no need to panic. Your lost files might still stick around in iPad storage and are waiting to be recovered or overwritten by new added data. We've written a full guide about how to recover data on iPhone before, and used Appgeeker iOS Data Recovery as our go-to program. In this article, we'll still be using this tool to complete the data recovery task for iPad.
It's one of the best iPad data recovery out there and it lets you recover almost everything from personal information to media files on iOS devices, and keeps things as simple as possible to meet most users' needs without any bells and whistles. It includes three recovery modes to get the job done. The rest of the article will focus on getting data back from iPad memory. You can also use it to access and extract data from iCloud, or retrieve data from iTunes.
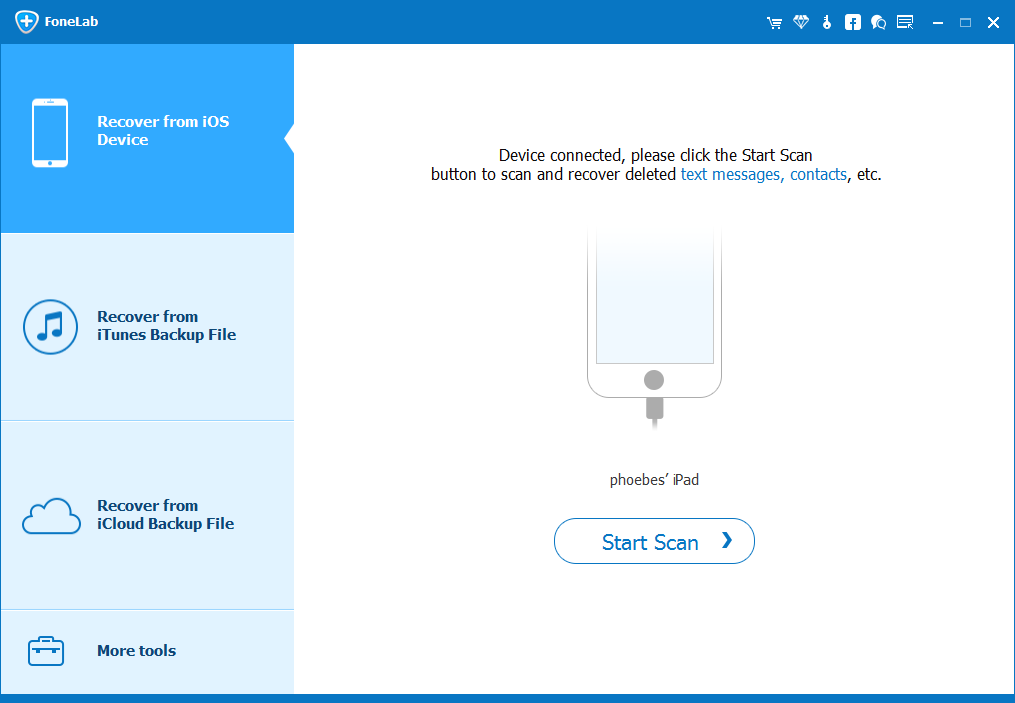
Step 1: Launch iOS Data Recovery application
Fire up the program on your computer after setting up. The interface of it is intuitive and user-friendly that makes the recovery process easy to understand.
From three modes select "Recover from iOS Device". Then, plug the iPad into the computer with USB cable.
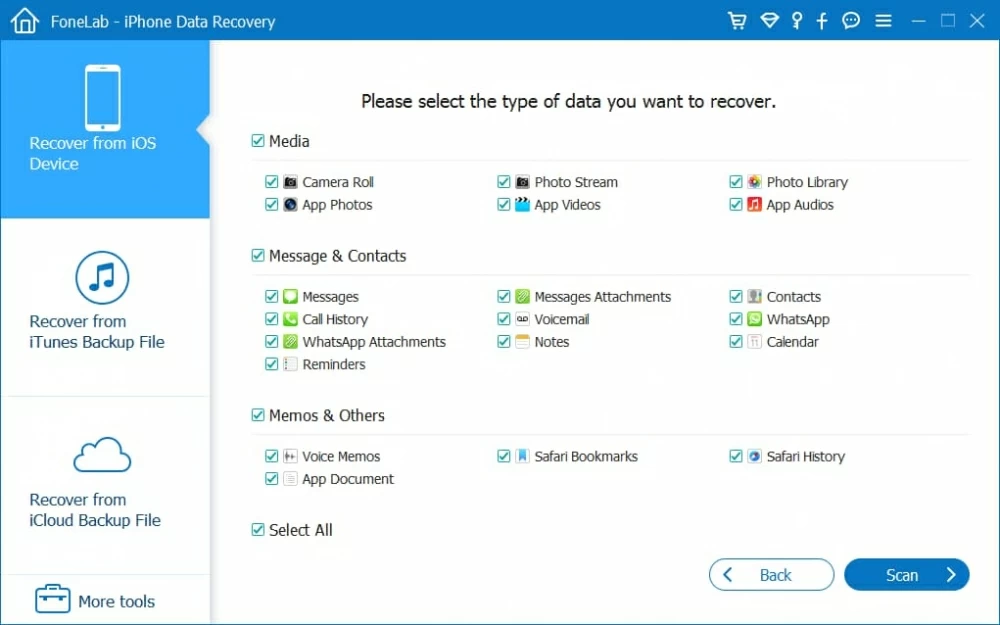
Step 2: Scan iPad for hunting lost data
Go ahead and select what kind of data files you're going to recover, click Scan button to let this iPad data recovery software performs a deep scan on iPad's internal memory.
When the scan is finished, all the files found on your device will be sorted into categories of the same type and displayed on the screen.
Step 3: Preview lost iPad data
At this stage, you can click any category on the left sidebar of the window to preview the items relevant to each file type, such as Camera Roll, Contacts, Notes, Call History, Messages, etc.
One useful feature comes in handy here is the option labeled "Only display the deleted item(s)" on the top center of the screen. You can enable it to filter the files.
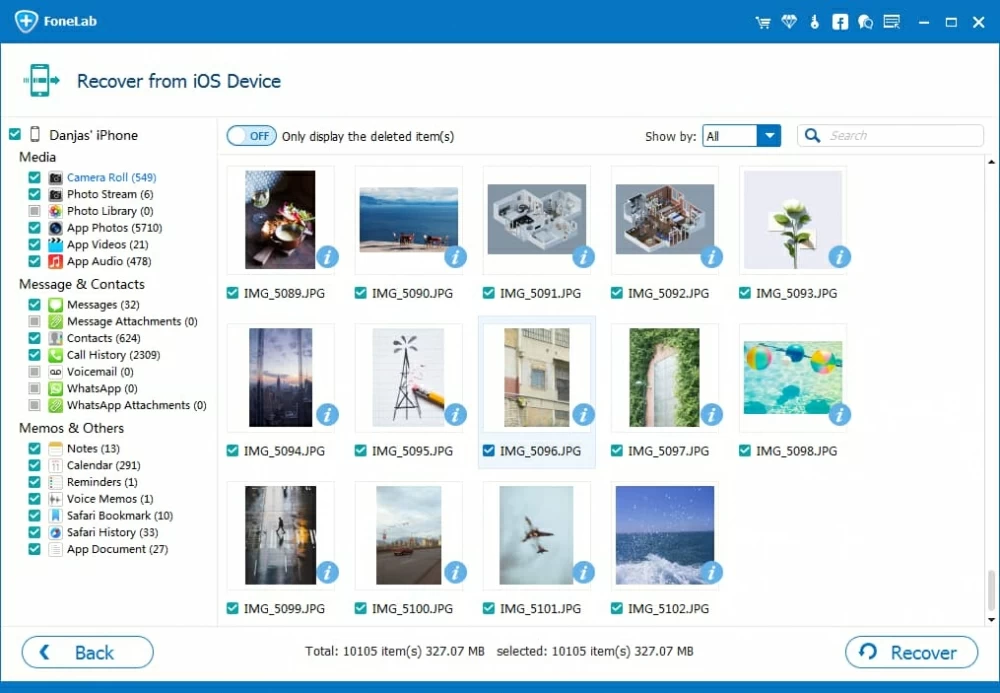
Step 4: Recover data from iPad and save to computer
Now, select files you want to recover. If you want to recover everything, simply place a checkmark in front of the category on the left sidebar, and there's nothing else to do. If you want to recover individual files, check the boxed next to each file on the right pane.
After you confirm your selection, press the Recover button to save them on your computer.
Did you have iCloud enabled on the iPad? If so, it's possible you may have your data files on iPad backed to iCloud and there actually is an iCloud backup. You'll have to go through the process of erasing all your data and settings on the device. Once you do so, you can set up your iPad as a new device and restore from iCloud backup and get data to iPad. It's kind of tedious, but a good way for you to recover deleted files on iPad.
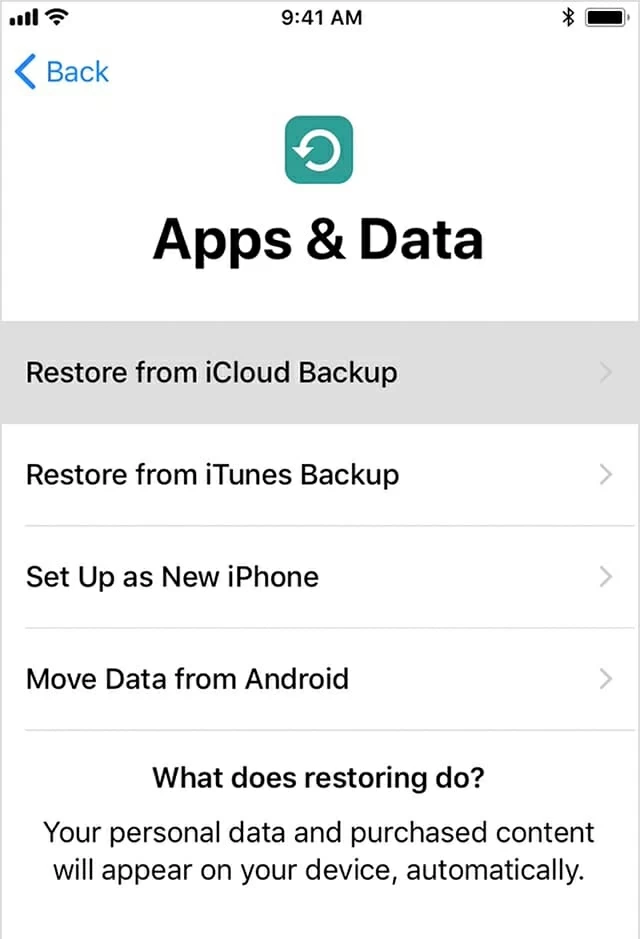
A word of warning, though: this method will erase all your current content before restoring iPad data from iCloud. If you have sensitive and important data on the device, you'd better back up it to somewhere.
Please note that if you want to recover data from disable/ dead iPad, or retrieve data after factory reset, you should try restoring data from backup in iCloud or iTunes.
The Bottom Line
Whether it's a computer, iPad, iPhone or Android device, you should never rely on a single point source for protecting your data files. Be sure to spend the time making an extra backup copy of your data. A little pain now will save you a world of hurt in the future.
iPad Models: iPad (2017), iPad Air, iPad Air 2, iPad Mini 4, iPad Mini 3, iPad Pro (2nd generation), etc.
An Easy Way to Regain iMessages from iPhone 7 (Plus)
How to Add Songs from a Mac Machine to iPhone Seamlessly without iTunes