
How to Recover Videos on iPhone


For years, touch-screen technology has generated an intuitive interaction between you and your iPhone 7 (Plus). However, when every image and text vanish suddenly leaving behind a stuck black screen in iPhone 7 or iPhone 7 Plus which keeps frozen no matter you tap Home button, Volume Up/ Down button and Power button, such convenience has gone out of the window. Instead, letdown sets in instantly: "How to fix an iPhone 7 (Plus) that's stuck on black screen and would no longer respond or turn on?"
Well, help is at hand. Your very step is to ensure that the draining-out battery is not the one giving you grief on the black screen issue. Simply connect your device to the official charger and charge it for an hour or two. Then verify if Apple iPhone 7 (Plus) black screen issue is sorted out. If not, attemping other doable methods in this tips roundup.
[Don't Miss: 6 Troubleshooting Tips to Fix the iPhone Blue Screen of Death]
Out of the tricks outlined for fixing an iPhone 7 (Plus) when the screen is black, the initial step is always to force-restart (or hard reset) the smartphone. This is an Apple's built-in troubleshooter that will try to detect and automatically resolve problems rendering the misbehavior in an iDevice. And it won't delete data or settings on your iPhone.
As iPhone 7 (Plus) features a Home button that powers a Taptic engine rather than a physical one, you will need to force a reboot by carrying out different buttons' combination.

If your iPhone 7 (Plus) is still stuck on a black screen, head over to these advanced fixes:
Tips: Whether your iPhone 7 (Plus) is on but the screen is black or it gets stuck on black screen of death, the below methods are go-tos for getting it back into working order.
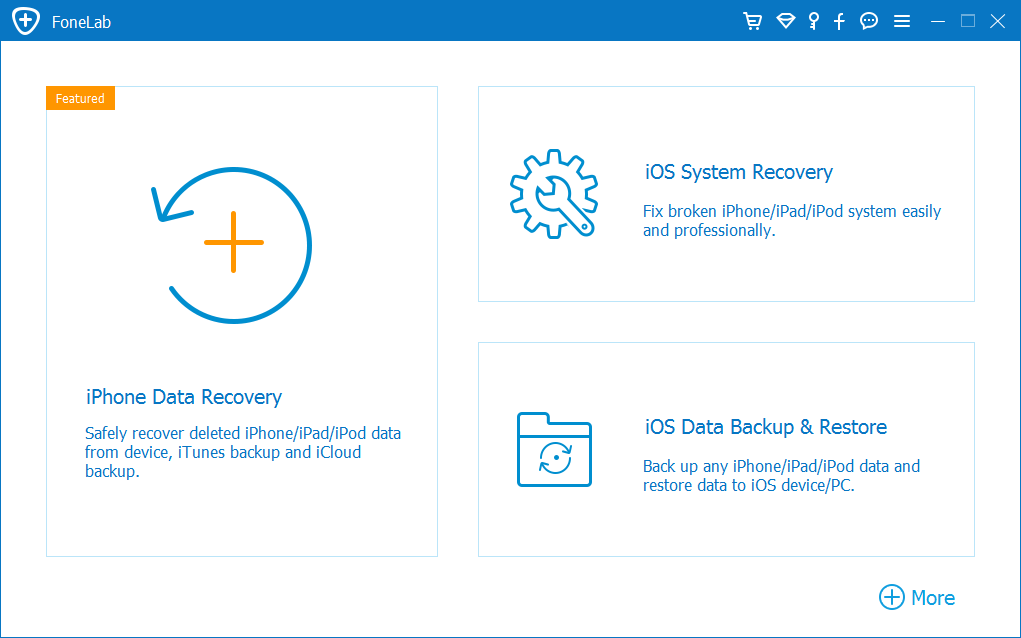
For those who committed to using a third-party iOS system repair tool, here's a review of iOS System Recovery.
This software is in an attempt to offer a straightforward and direct solution to rescue you from over 50+ iOS & iPadOS issues in just one handy download. Each screen comes with a short description introducing what the tool will perform clearly. With this, it only takes you only few minutes to fix a black iPhone 7(Plus) screen, get rid of the stuck Apple logo or address other system malfunction scenarios. Most importantly, the utility itself will automatically execute the detecting and fixing process - requiring almost no effort on the part of users.
Now, download the software by clicking "for Windows" or "for MacOS" according to your computer, followed by the User's Guide to remedy an iPhone 7 (Plus) that has black screen issue.
Extra Tips: This program also packs in other gorgeous features: iOS Data Recovery, iOS Data Backup & Restore, iOS Firmware Upgrade or Downgrade, etc.
Step 1: Connect iPhone 7 (Plus) to the computer with the tool installed
Install the tool and fire it up. Then plug your source device into the computer via a lightning cable.
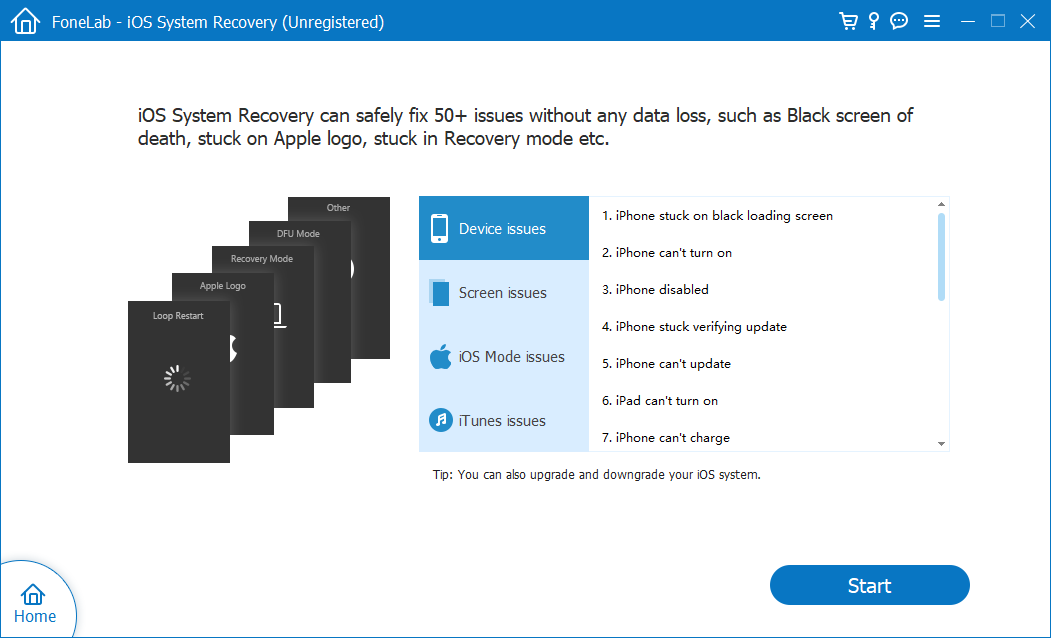
Begin with clicking "More tools" from the bottom left corner. Then choose "iOS System Recovery" mode.
Once you are here, click on Start button.
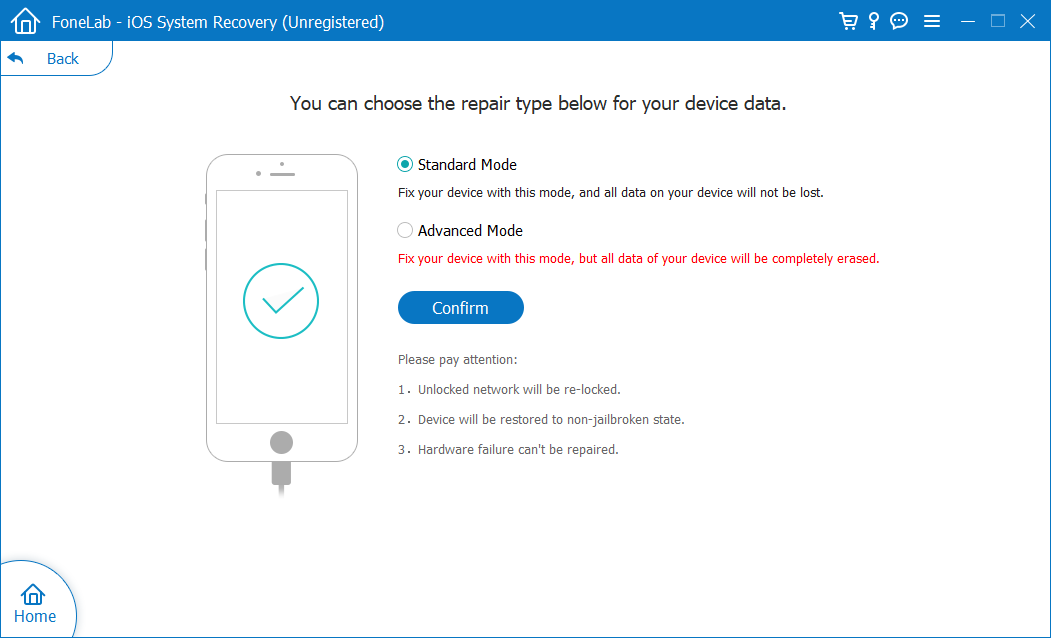
Step 2: Choose "Standard Mode" and confirm it
In the next window that contains information about your iPhone 7 (Plus) model, choose Fix.
Then you should see a window for choosing repair type, just as the image shown below. Make sure "Standard Mode" is highlighted, then click Confirm button.
Read Also: iPhone 7 (Plus) Is Stuck on Headphone Mode. Here's the Fix!
Step 3: Download firmware package
Here, you have several options on the firmware package. Just choose one of them for dealing with Apple iPhone 7 (Plus) black screen problem.
If needed, change the location where you want the firware package saved in the "Firmware Path" field. Then, hit Next button.

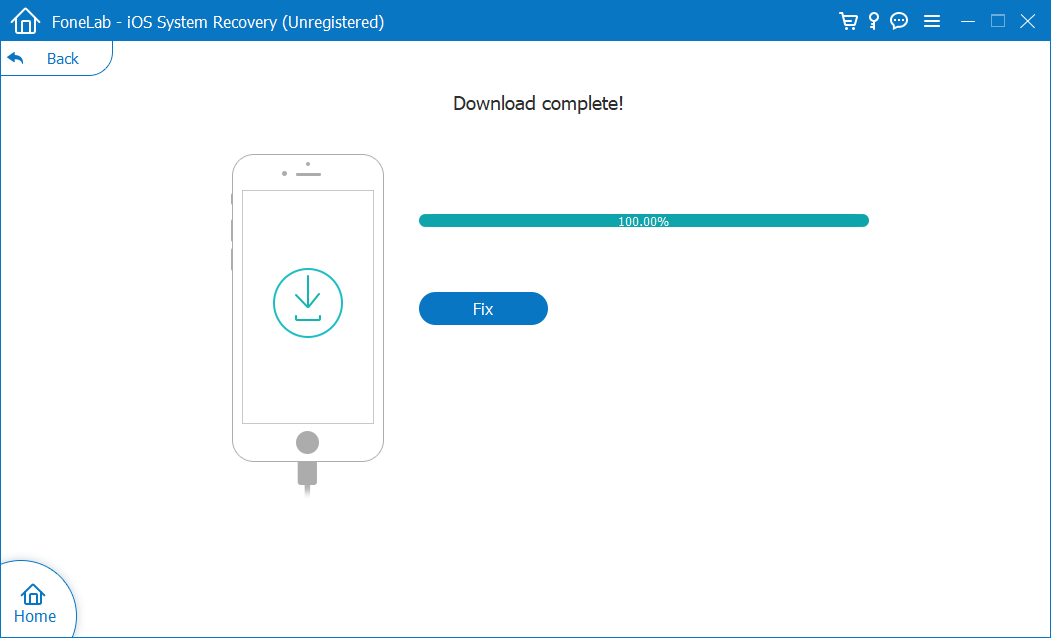
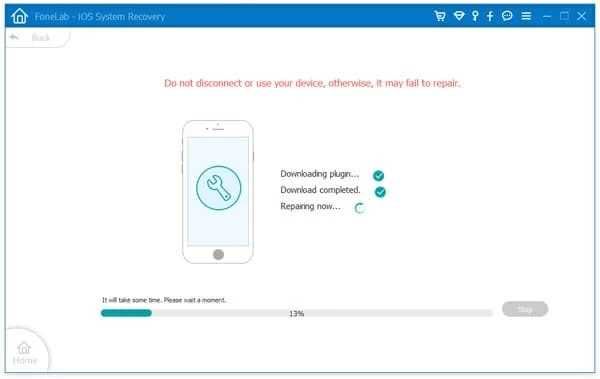
Step 4: Solve black screen issue on Apple iPhone 7 (Plus)
When you have finished downloading the firmware package, this is what you'll see in the screen. Simply click Fix to move on.
The software will now automate fixing a black screen on iPhone 7 (Plus).
Noted: If the black screen issue persists or actually your iPhone 7 (Plus) stuck on black screen death, make copies of your device data for backups and then implement the "Advanced Mode" for further restoration.
If you prefer to be aboard on the Apple's route - put your iPhone 7 (Plus) in Recovery Mode or DFU Mode, back up your device as the first line of defense against risking data loss.
[Also Read: iPhone 8 (Plus) Won't Charge? Fix The Issue Quickly]
Since you're upon here, a single forced restart turns out to fail in fixing an iPhone 7 (Plus) that's stuck on black screen. In recognition of handling complex issues that may be not fixable via a hard resetting, Apple has added a handful of other troubleshooters into the device background settings and one of them is "Recovery Mode". This function lets you do an in-place clearance to replacing the abnormal settings or service for a healthy one and then restore iPhone 7 (Plus) stuck on black screen.
To do so, keep iTunes or Finder updated to the latest version. Then abide by the given instructions:
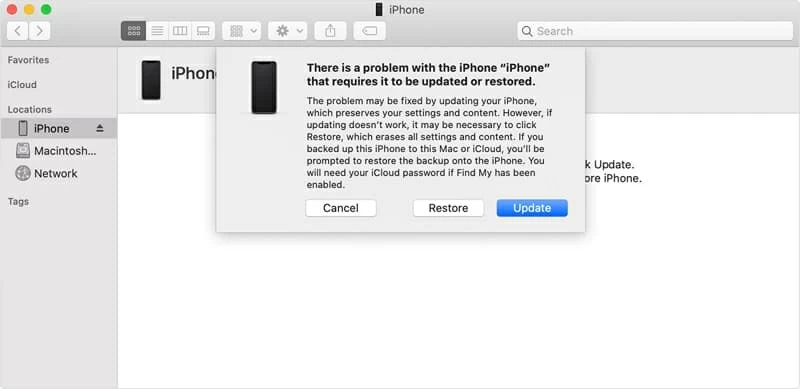
If you performed the previous steps correctly, your iPhone 7 (Plus) will not display as normal in iTunes or Finder when in Recovery Mode. Instead, a dialog prompt should show up on your computer indicating "There is a problem with the iPhone that requires it to be updated or restored." Then restore its original settings from the existing version by clicking Restore.
Related Reading: How to Transfer Call History from iPhone to Android Phone
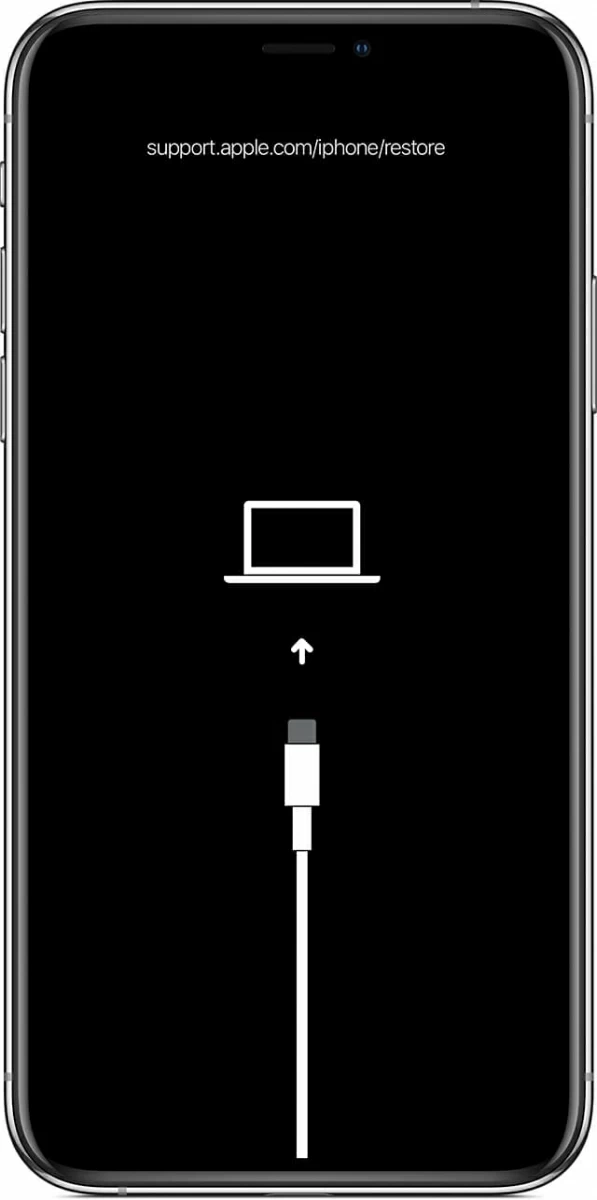
If none of techniques pan out, the final step on Apple's troubleshooting journey is the Device Firmware Update (DFU) mode.
When your iPhone 7 (Plus) stuck on black screen and does not power on or it suffers the black screen of death, interfacing with iTunes or Finder and performing OS restoration will be your only resource. And this is exactly what DFU mode has managed to do. You can activate the DFU mode easily by performing a series of button presses in correct order.
A Note: If you see the Apple logo or the "Plug into iTunes" screen, then you've held button(s) too long and will need to start again.
If your iPhone 7 (Plus) screen turns black completely after being dropped into water or with LCD cable dislodged from the logic board, it's better off hitting up the nearest Apple-certified Repair Center for professional repairs. It'll be free if your device is still within the Apple-provided warranty.