
Factory Reset iPhone without Passcode

If your iPhone flashlight is no longer working for the flashlight icon turns out to be greyed out, try these tips to rectify the issue and turn on the light again.

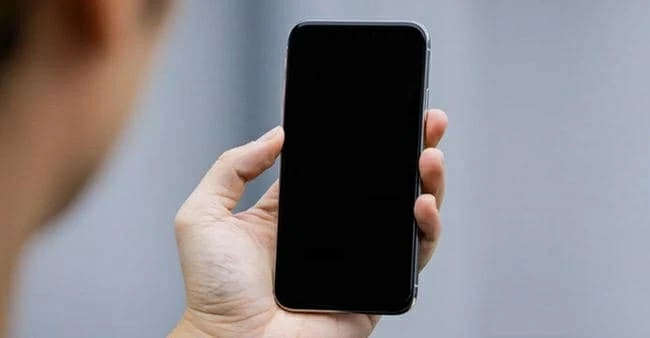
Whether you're taking photos in low light or plumbing your kitchen sink at night, you need a working flashlight in your iPhone. It's quite a useful feature, but sometimes iPhone flashlight does not work as it would. For instance, flashlight button is greyed out or faded in the Control Center of iPhone that you can neither access it nor turn it on to get the light to work.
If you notice problems with iPhone flashlight not working, here includes several techniques to diagnose both software bugs and hardware issues that might cause the flashlight to stop working, and multiple ways to fix the common flashlight issue on any iPhone model.
You can figure out hardware or software issue within iPhone when it appears that the flashlight won't turn on.
A non-working flashlight on iPhone may be due to failed hardware, weird bugs on iOS, or issues with your case or film blocking the flash.
If the flashlight icon is not grayed out (it's on) but actually the iPhone flashlight does not turn on, you may have hardware problem. Or perhaps you've dropped your device and the impact damaged some parts inside the device, you'll have to get your iPhone serviced by contacting Apple or an Apple Authorized Service Provider.
In case flashlight on your iPhone have stopped working since installing the latest iOS update, it might be the software issue. Continue to read and the following basic solutions will help you troubleshoot an iPhone flashlight that won't work.
Once you notice there's a glitch about the flashlight not working—the light button isn't accessible, don't hesitate to restart the device. Rebooting will give a fresh start to run the system and apps.
Restarting an iPhone X, XS, XR, 11, 12, 13 and newer models is a little bit different than earlier iPhones. Make sure to wait for 30 seconds to let the iPhone turn off and the power it on again.
If a restart doesn't work for fix your flashlight problem, time has come to hard reset the iPhone. It's a more complete option to clear out the bugs.
To do a hard reset of iPhone 8 and newer, you need to press and quickly release Volume Up button, press and quickly release Volume Down button, the press and keep holding the Side button until you see the Apple Logo.
On iPhone 7 and 7 Plus, press and hold the Side button along with the Volume Down button until you see the Apple Logo. If you're using an iPhone 6 or earlier version, long-press the Side button and the Home button to initiate the hard reset process.
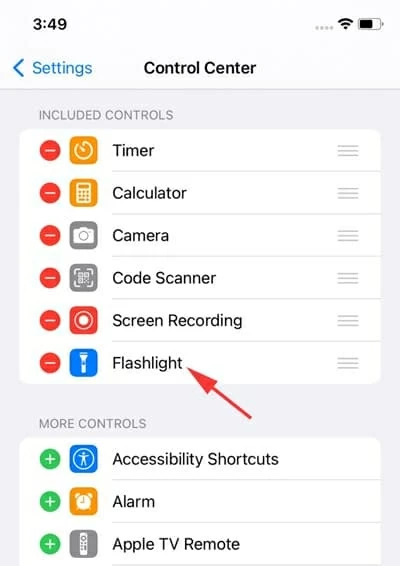
After the hard reset and your iPhone turns back on, head to Control Center to remove the flashlight and add it back.
If you've restarted and reset your iPhone and the flashlight still won't turn on, check if your camera is ON and quit the app.
Usually, when Camera app is running in the background, you can't use the flashlight because Camera's flash and the flashlight apply the same bulb. So if you find you can't use the flashlight or the Flashlight button has been greyed out, try closing the Camera app.
There's a great possibility that the flashlight function is somewhere stuck within the camera app and, therefore, your iPhone flashlight icon is greyed out.
Turning flash on from video mode in Camera app, then turning it off and quitting the app would be an instant fix for some users without having to reboot the iPhone.
Did you make some tweaks on your Camera or flashlight?
When you changed your control center settings, your flashlight may be not work. The Flashlight icon will be enabled, however, there's no light source lighting up. If this is the case, try reset all settings on your iPhone:
1. Go to Settings > General > Transfer or Reset iPhone.
2. Tap Reset and choose Reset All Settings. Doing so will not touch your data, but return iPhone to default settings.
If you've completed the temporary solutions above and nothing seems to work by now, the flashlight problem may lie in a bug with iOS. It's reported that iPhone flashlight not working error occurs with newer iOS updates. Don't panic, we've got you an effective iOS repair program to try.
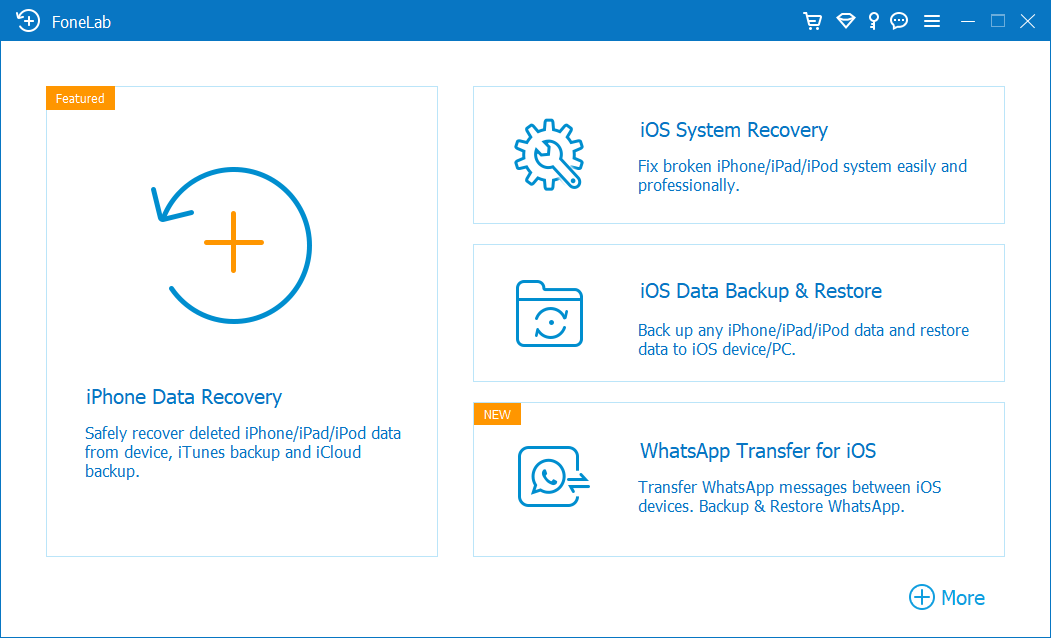
iOS System Recovery is designed to fix various software glitches that cause the iPhone to malfunction. It come with a super smart repair algorithm to identify the system errors, reinstall iOS firmware on iPhone, and make the apps and functions work seamlessly. The software is safe to use that it won't delete your data files or settings. Download the tool here:
iOS System Recovery is available by connecting your iPhone to the computer on which the software is already installed, then do the following to get back your flashlight on the iPhone.
Step 1: Choose "iOS System Recovery"
Run the software. Click on the More Tools options from the left side of the window.
Then select "iOS System Recovery" option, followed by the Start button.
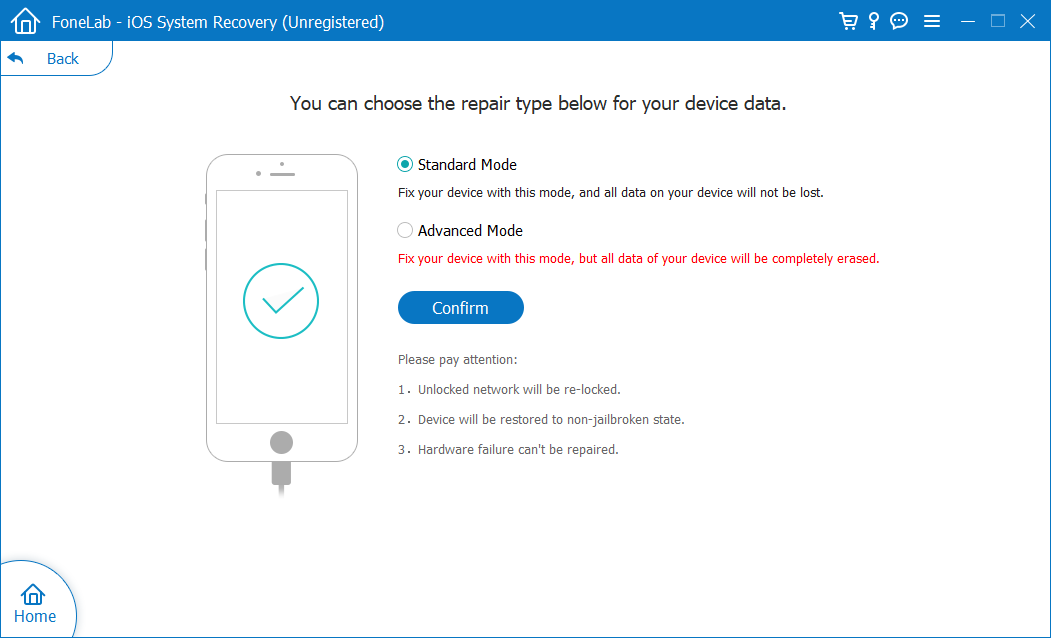
Step 2: Select a repair mode
Make sure your iPhone is connected. On the screen, check the circle next to Standard Mode, and click Confirm button.
If that fails to fix your iPhone flashlight that isn't working, return to this step and choose Advanced Mode to repeat the process. Be warning that this will factory reset your device, so you'd better back up your data before going with this mode.
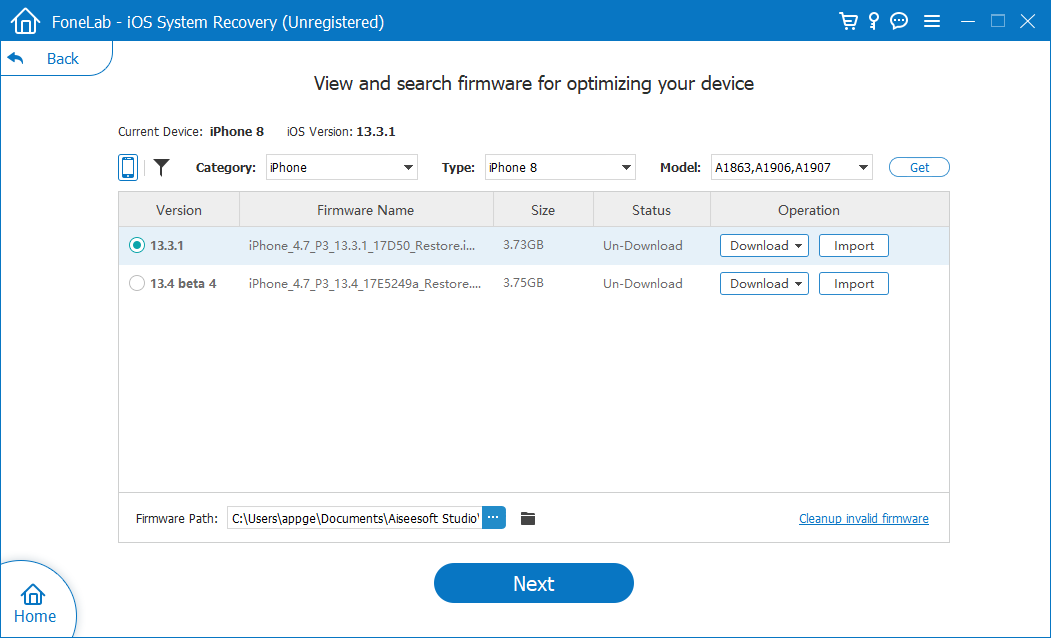
Step 3: Download iOS firmware for your iPhone
At this point, you're allowed to pick a most appropriate version of iOS. Click Download button.
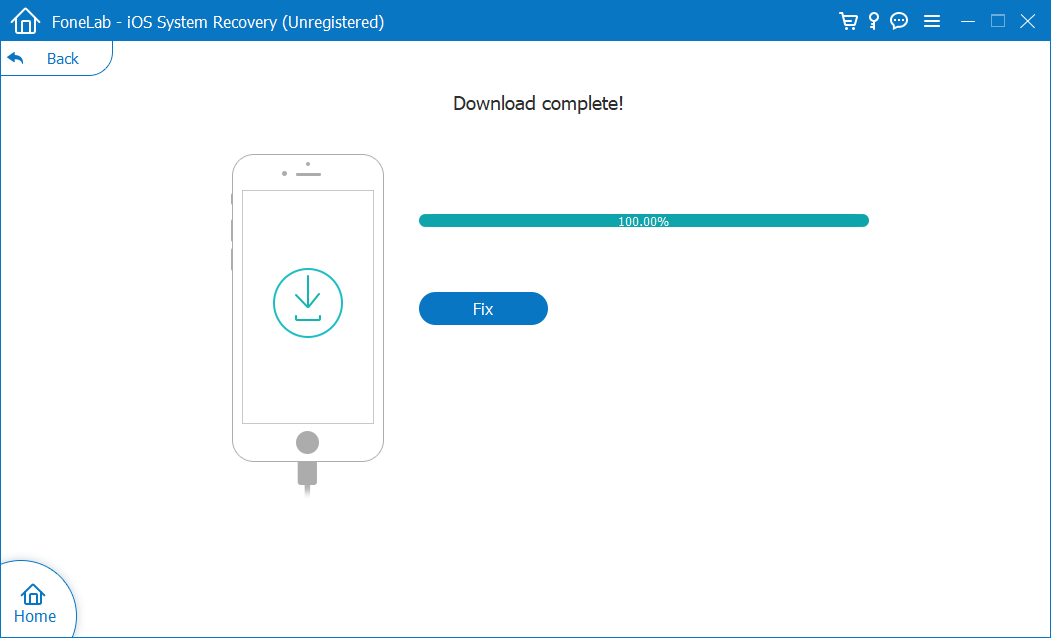
Step 4: Initiate the fix for iPhone flashlight issue
After the software finishing the download, click Fix button to repair the software bugs. It will hardly take 10-15 minutes to complete.
Don't disconnect your phone while the repair is under process.
iOS updates deliver major troubleshooting techniques to revise the corrupted data and enhance the performance of iPhones. If the flashlight isn't working, you can try using your backup to restore your iPhone; it's through this means that the most recent iOS is installed and the core applications and features along with the malfunctioning flashlight are back into working condition.
Before you go through with restoring your iPhone, be sure to back up your content, either to iCloud over the air or onto computer by connecting the device with a USB cable.
This is as simple as the point suggests, restore your iPhone to factory settings. When you can't determine what causes your iPhone flashlight to not work, you can open Settings, tap General, choose Transfer or Reset iPhone, and tap Erase All Content and Settings at the bottom.
Your device will take some time to completely erase its data.
Factory Restore will put your iPhone to a factory-default state - all of your data including contacts, messages, photos, videos, media files, documents, music, and everything will be wipe completely off the device unless you have an iCloud or iTunes backup.
Read Also: How to Recover Deleted Data on iPhone without Backup
If you have tried all the above methods and still the iPhone flashlight is not working, then you should visit the Apple Service Center for a professional inspection. Your faulty flashlight should be related to the issue with the hardware, and would require a replacement.


