How to find old text messages on iPhone


Streaming services dominate the audio landscape, but local music libraries still offer unmatched reliability. Here is how to move your songs from computer to your iPhone 13.

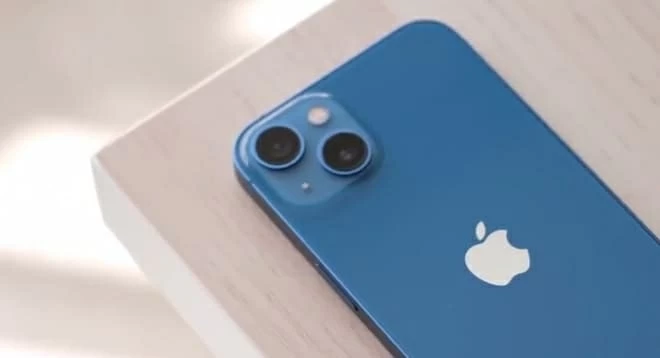
transferring music files to your iPhone 13 from computer is still the best way to enjoy offline listening.
When you tap on Spotify or Apple Music, millions of songs are instantly available over 5G or Wi-Fi. However, relying purely on cloud streaming leaves notable gaps in your listening experience. Streaming platforms regularly lose licensing rights to albums, region-lock specific releases, and omit underground mixtapes, live concert bootlegs, vinyl rips, and personal studio recordings.
Transferring audio files directly from your computer to your iPhone 13 puts you back in complete control of your media collection. Beyond track availability, stored audio files eliminate cellular data usage during commutes, conserve battery life by reducing network radio activity, and enable playback in dead zones like underground transit or remote hiking trails.
Below is a quick breakdown of your options to move music from your PC or Mac to iPhone 13 before we dive into the detailed steps:
To successfully move music to an iPhone 13, it helps to understand how iOS manages audio storage compared to desktop operating systems.
On a computer, you can organize audio files into nested folders across hard drives. iOS, by contrast, uses a sandboxed media library accessible through the native Apple Music app. Audio files added to this system library are indexed by metadata tags—such as Artist, Album, Genre, and Track Number—rather than folder paths.
iOS natively supports the following audio formats within the default Music app:
Note on FLAC: While popular among audiophiles, raw .flac files cannot be synced directly into the native iOS Music app library via standard Apple sync tools. To transfer and play FLAC files on an iPhone 13, you must either convert them to ALAC or use a third-party player like VLC or Foobar2000.
If you want complete control over your iPhone 13's music library without worrying about Apple's strict "one-computer sync rule," Appgeeker iPhone Data Transfer is one of the most powerful third-party iOS management tools available. Unlike iTunes, it allows you to bidirectionally transfer tracks, create custom playlists, and add new audio files to your iPhone 13 without deleting any music that is already stored on the device.
Why choose Appgeeker iPhone Data Transfer:
Step-by-step guide: How to add songs from a computer to an iPhone 13 with Appgeeker iPhone Data Transfer. First of all, download the setup file for Windows or macOS, and complete the installation process.
1. Plug your iPhone 13 into your computer using a Lightning-to-USB cable. Unlock your iPhone screen and tap Trust This Computer when prompted, entering your passcode.
Open the application.
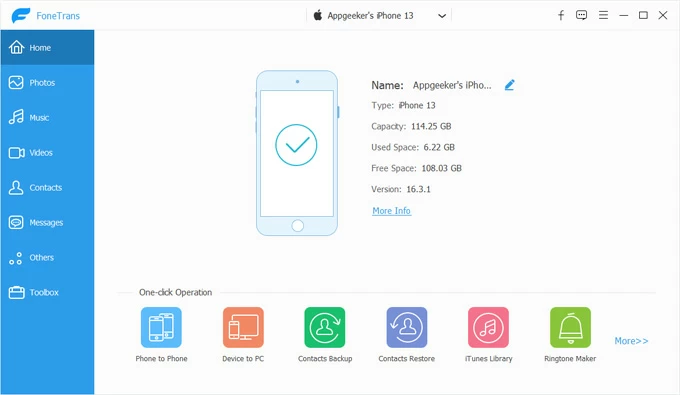
2. Select Music tab from the sidebar on the left side of the screen. It will load your phone's current media library. All tracks are sorted by categories: Music, iTunes U, Ringtones, Audiobooks, etc.
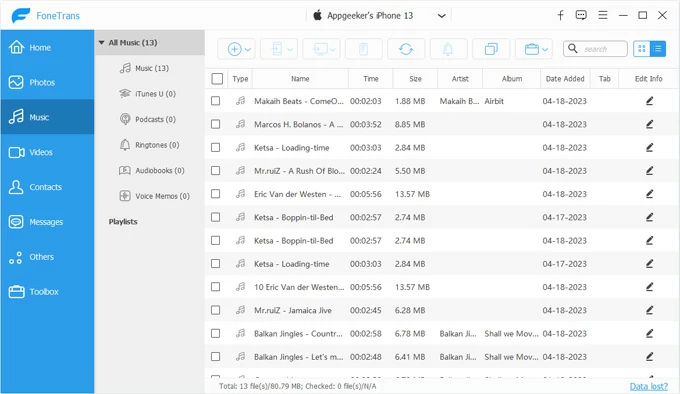
3. To import your music from computer to your iPhone 13, you can do the following:
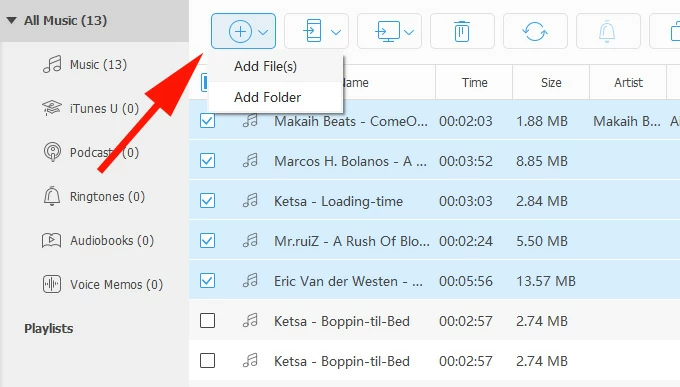
The application will initial the transfer process with a progress bar showing on the window. Once finished, open the native Music app on your iPhone 13—your tracks will be ready to play immediately!
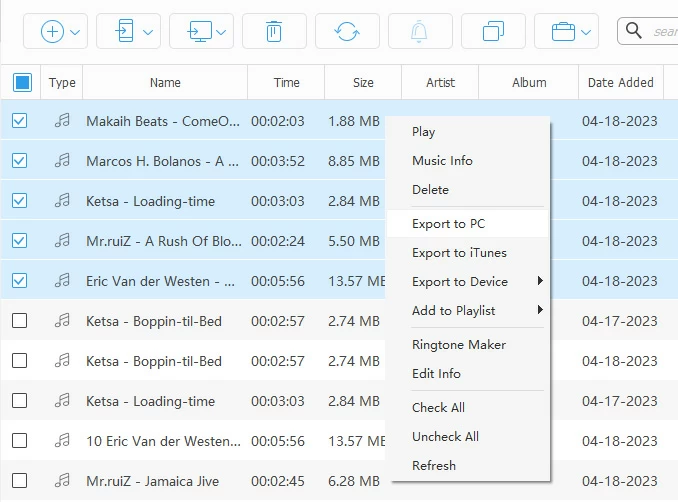
Additionally, there are a few filters on the top menu bar to organize and manage your music library.
For users running Windows or older versions of macOS, iTunes (or the newer Apple Devices app on Windows 11) remains Apple's standard method for syncing local media. However, it comes with a major caveat: iTunes uses a single-library sync model. Syncing your iPhone 13 with a computer's iTunes library will replace any existing music on your iPhone that wasn't sourced from that specific computer library.
Caution: If your iPhone 13 already contains songs downloaded from another PC or a third-party app, syncing with iTunes may delete them from your phone. Always make a backup of your local media before performing an iTunes sync.
How to transfer music from Windows 10 & 11 computer to iPhone 13:
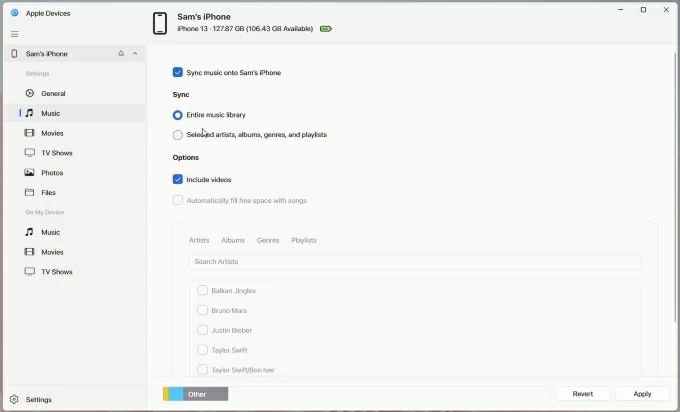
Option A: Using the Apple Devices app (Recommended for Windows 11)
1. Download and install the Apple Devices app from the Microsoft Store.
2. Connect your iPhone 13 via USB and unlock the device.
3. Open Apple Devices and select your iPhone in the sidebar.
4. Click Music under the Settings menu.
5. Check Sync music onto [Your iPhone Name] and select your desired artists or playlists.
6. Click Apply.
Option B: Using iTunes for Windows
1. Install the latest version of iTunes for Windows.
2. Add your music files to iTunes by going to File > Add Folder to Library and selecting your computer's music folder.
3. Connect your iPhone 13 via USB. Click the small device Icon near the top-left corner of the iTunes interface.
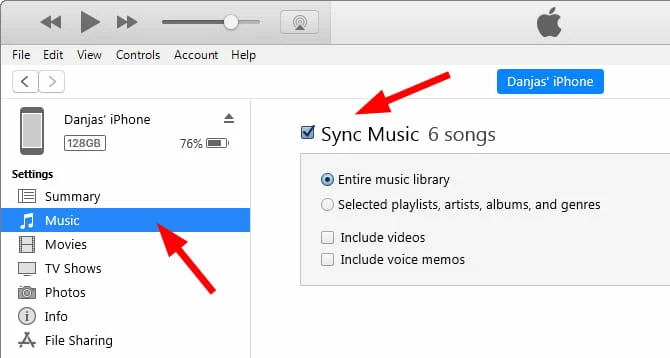
4. Select Music under the Settings sub-menu on the left.
5. Check Sync Music, choose whether you want to sync your Entire music library or Selected playlists, artists, albums, and genres.
6. Click Sync in the bottom-right corner. iTunes will begin backing up your device and copying the selected music files over to your iPhone 13 from computer.
Once you have connected your iPhone 13 to iTunes via USB at least once, you can enable wireless transfers:
1. Click on the Summary tab in iTunes.
2. Scroll down to the Options section and check the box next to Sync with this iPhone over Wi-Fi.
3. Click Apply. As long as your iPhone 13 and computer are connected to the exact same Wi-Fi network, you can sync music without reaching for a cable.
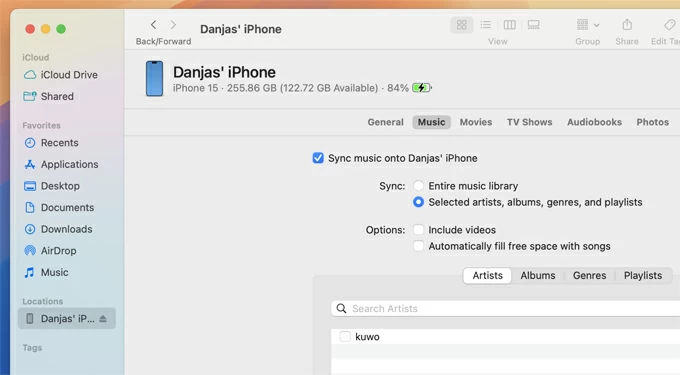
Starting with macOS Catalina, Apple retired iTunes and integrated iOS device management directly into Finder. To import music from Mac computer to your iPhone 13, launch Finder, and follow these steps to complete the task:
1. Plug your iPhone 13 into your Mac using a Lightning-to-USB-A cable.
2. Select your iPhone 13 under the Locations sidebar in Finder.
3. Click on the Music tab in the main Finder window.
4. Check the box next to Sync music onto [Your Name]'s iPhone. Choose whether to sync your Entire music library or Selected artists, albums, genres, and playlists.
5. Click Apply in the bottom-right corner to initiate the transfer.
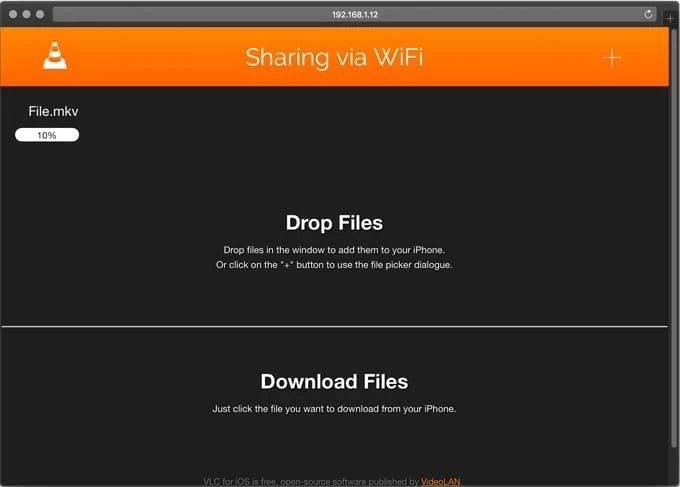
If you don't want to install desktop drivers or sync applications, you can transfer songs on computer to iPhone 13 wirelessly using a free app like VLC Media Player. It includes an integrated web server feature that lets you drop audio files from any web browser directly onto your iPhone 13 over your local network.
Here's how to do it:
1. Download the free VLC media player from the App Store.
2. Ensure both your computer and iPhone 13 are connected to the same Wi-Fi network (turn off any active VPNs on both devices).
3. Open VLC on your iPhone 13.
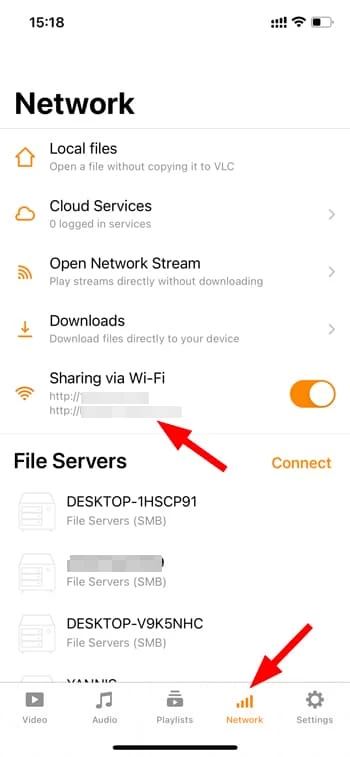
4. Tap the Network tab at the bottom.
5. Toggle on Sharing via Wi-Fi. An IP address (e.g., [http://192.168.1.45](http://192.168.1.45)) will appear below the toggle.
Now, it's time to upload songs from PC.
6. Open Chrome, Safari, or Edge on your desktop PC.
7. Type the exact IP address displayed by VLC into the browser's address bar and press Enter.
8. Drag and drop your audio files into the browser window. The files will instantly stream and save directly into the VLC app on your iPhone 13.
Cloud storage services Dropbox, Google Drive, OneDrive like providers offer a simple multi-platform bridge between Windows PCs and iOS devices.
1. On your PC or Mac, upload your music folder to Google Drive, Dropbox, or OneDrive.
2. Open the matching app on your iPhone 13. If haven't, download it from App Store, and sign in with the same account.
3. You can stream tracks directly inside the cloud app.
4. Or, Tap on the song file, and choose Save to Files / Make Available Offline to download it directly onto the native iOS Files app for offline listening.