
What to do if iPad passcode not working

Frustrated with storage warnings on your iPhone SE? If you need to back up your camera roll, or just want to clear space by moving your photos to a PC, these methods can help.

To copy pictures from an iPhone SE to a Windows PC, the most reliable and highest-quality method is to connect your phone directly to the PC with a physical USB cable and then use Windows Photos app or File Explorer to import items. You can also use third-party file transfer tools like Appgeeker iPhone Data Transfer. It provides granular control, preserves media integrity, and bypasses common ecosystem limitations.
There are several ways of moving photos from iPhone SE to PC with a wired cable, or wirelessly.
Whether you use an older first-generation iPhone SE or the modern, powerful third-generation model, the device packs an exceptionally capable camera into a compact form factor. Over months of capturing family memories, document scans, and spontaneous snapshots, those image files can easily take up a significant amount of your phone's memory. To free up capacity or back up your pictures securely, moving those media assets over to a Windows desktop or laptop is the ideal choice.
Depending on whether you prefer a direct physical connection, specialized file transfer software, or over-the-air cloud deployment, several highly efficient workflows can help you transfer iPhone SE photos to Windows PC smoothly.
Let's walk through the best ways to safely migrate your iPhone SE photo library over to a PC.
Before performing the iPhone SE photo transfer, you must understand two foundational iOS settings that frequently disrupt the process: iCloud Photo Optimization and the High Efficiency Image Container (HEIC) format.
If your iPhone SE uses iCloud Photos, it likely saves space by keeping full-sized photos in the cloud and leaving low-quality previews on your device. When you plug your phone into a Windows PC, the computer can't access those cloud files, causing transfers to crash or look blurry.
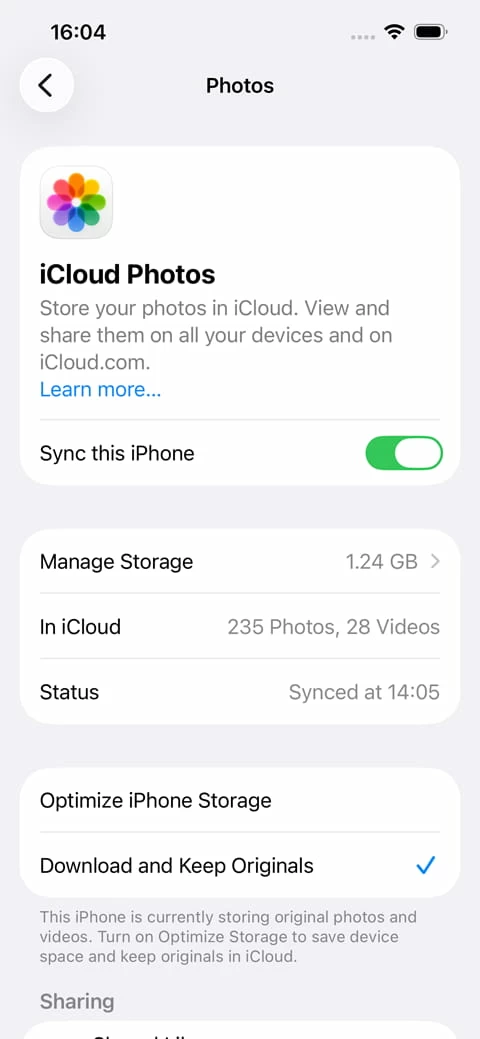
To fix it, go to Settings > Photos and choose "Download and Keep Originals." Wait for the full-resolution photos to finish downloading over Wi-Fi before plugging your phone back into your PC.
Another thing you should note is that modern iPhones save photos in a space-saving format called HEIC, which Windows can't always open. To fix it, go to Settings > Photos, scroll to the bottom, and select "Automatic" under Transfer to Mac or PC. That way, Your phone will handle the conversion automatically during USB transfers.
Related: How to recover deleted contacts from iPhone
The native Windows Photos application provides a straightforward, first-party import wizard. It requires zero third-party software installations, making it an excellent baseline option if you want a clean, guided photo transfer from iPhone SE to PC using a standard Lightning-to-USB cable.
1. Connect your iPhone SE to your Windows PC.
2. Unlock your device screen. You will see an explicit security prompt reading, "Trust This Computer?" Tap Trust and enter your passcode to unlock it.
3. Launch Photos app.
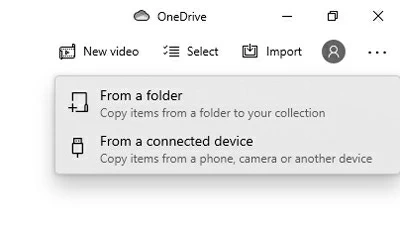
4. Click the "Import" button located in the top-right toolbar of the application interface, then select "From a connected device."
5. The application will scan your iPhone SE media library for pictures and videos. Once the indexing phase wraps up, a comprehensive grid showing all on-device photos will appear.
6. Select the specific photos you want to migrate, or click "Select All."
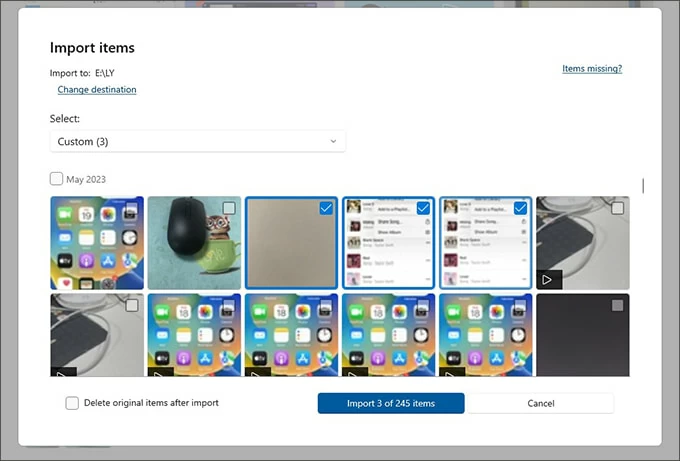
7. Click "Import [X] of [X] items" to start downloading photos from your iPhone SE to your PC.
While the Windows Photos app is highly accessible, its indexing engine can become unstable when processing massive, multi-gigabyte media libraries or handling broken video containers. If your transfer hangs mid-stream or fails to recognize new image additions, you may need a more resilient approach.
Related: How to reset iPad without password
Windows File Explorer treats your iPhone SE as a standard digital storage drive. This manual approach is highly reliable and lets you use classic copy-and-paste commands.
Follow these steps to copy pictures to Windows PC from an iPhone SE:
1. Open File Explorer on your PC and plug your phone with a working cable.
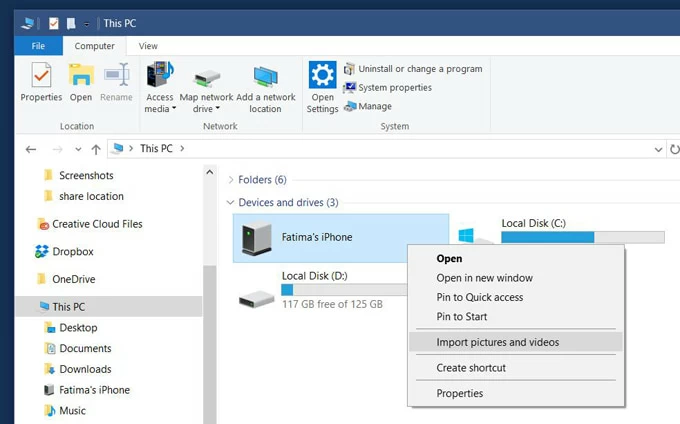
2. Look at the left-hand navigation pane, locate the "This PC" directory, and click it. Under the Devices and drives section, double-click on "Apple iPhone."
3. Open "Internal Storage," followed by the primary "DCIM" (Digital Camera Images) folder.

4. Inside the DCIM folder, you should see several subfolders labeled as 100APPLE, 101APPLE, 102APPLE, etc.. They house your actual image and video files.
5. Copy any of pictures in the folder and paste onto your computer's hard drive to complete the transfer.
You can also right-click on your phone name under Devices and drives, then select "Import pictures and videos" to download your iPhone SE locally.
Keep in mind, File Explorer organizes photos across arbitrary, system-generated numerical folders rather than using your custom iOS albums. If you want to maintain your meticulously curated albums, sorting through raw DCIM folders can be a time-consuming chore.
If you need to preserve your custom albums, maintain original metadata structures, or perform bi-directional transfers, specialized third-party desktop tools offer an efficient alternative to native Windows tools. Robust utilities like Appgeeker iPhone Data Transfer streamline the process with cleaner interfaces and advanced granular control options.
Here's how to import photos from iPhone SE to PC Windows using Appgeeker iPhone Data Transfer. First of all, download and install it on your PC.
Step 1: Launch the software
Launch the utility and connect your iPhone SE to the computer via USB, authenticating the connection on your device screen when prompted.

Step 2: Load pictures on the phone's media library
Click on the "Photos" icon at the left sidebar to open the dedicated library manager.
The application reads your internal database structure, displaying your images categorized exactly as they appear on the device—including specific sub-albums like Live Photos, Places, Imports, Favorites, and Screenshots.

Step 3: Download pictures to PC
Check the boxes next to the individual images you want to transfer, click the "Export to PC" action button located along the primary control toolbar at the top.

A settings overlay will appear, allowing you to choose your destination path and specify your preferred file-naming convention. Click "OK" to execute the transfer.
Alternatively, right click on a custom album, from the context menu, select "Export to PC."

There are other options available for how you want to deal with your selected items through the context menu.

Appgeeker iPhone Data Transfer provides an incredibly robust and organized experience for bulk migrations of media files, including photos, music, and videos.
Related: How to transfer files from Windows to iPhone
If you want to skip USB cables entirely, running the Apple's iCloud for Windows client establishes an automatic, background-synchronized data pipeline. This tool leverages your wireless connection to automatically sync images directly from your iPhone SE into your PC's file system.
To set up and run sync your photos between iPhone SE and PC, do the following:
1. Download, install, and configure the iCloud for Windows application from the Microsoft Store.
2. Launch the application and log in using the exact same Apple ID credentials used to your iPhone SE.
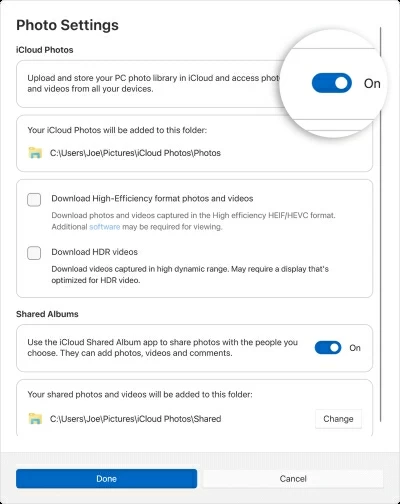
3. After signing in, you will see a dashboard featuring the different types of data you can sync. Find iCloud Photos on the list and click the arrow next to it.
4. Toggle the main iCloud Photos switch to On.
5. On your iPhone SE, enabled iCloud syncing under Settings > [Your Name] > iCloud > Photos > Sync this iPhone.
6. Whenever your iPhone SE is connected to Wi-Fi, it will upload new images to your cloud storage. The iCloud for Windows client then automatically downloads those files directly into the designated folder on your PC.
Please note, Apple provides only 5GB of free space on standard iCloud accounts. If your iPhone SE library exceeds this baseline threshold, your synchronization will pause completely until you purchase a higher-tier iCloud+ subscription or free up cloud space.
This method is ideal if you only need to transfer a few specific photos or a few batches to your PC machine. Apple limits web downloads to 1,000 photos at a time.
1. Open your web browser (Chrome, Edge, etc.) and go to iCloud.com. Sign in with your Apple Account tied to your iPhone SE.
2. Click on the Photos icon from the launchpad.
3. Click on a photo to select it, or hold down the Ctrl key on your keyboard and click each photo you want.
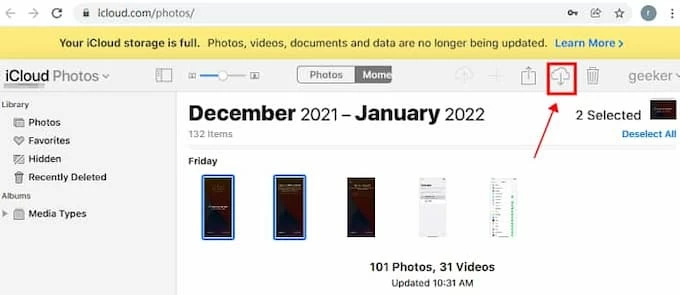
4. Click the Download icon (cloud with a downward arrow) in the top right corner.


