
How to transfer photos from PC to iPhone 17 - 7 ways

Transfer files from iPhone to Windows or macOS laptops using wired or wireless methods. Learn the best ways to move your photos, videos, and other documents easily.

Whether you're transferring large files or just a few items, Appgeeker iPhone Data Transfer provides fast and easy file transfers between iPhone and laptop on both Windows and macOS systems, working for photos, videos, music files, contacts, and other standard files.
This guide helps iPhone users to transfer various types of files to their Windows/macOS laptop efficiently.
Transferring files from an iPhone to a laptop is a daily task, whether you're backing up important data or editing content on a larger screen. Depending on the operating system of your laptop, there are several ways to do it.
This guide covers both wired and wireless methods for file transfer from an iPhone to a Windows or macOS laptop. Cable-based transfers are typically faster and more reliable for large files, while wireless options offer greater convenience and flexibility when you don't have a cable available.
Regardless of which method you prefer, the approaches outlined below can help transfer files from iPhone to laptop efficiently, ensuring they are available for local access whenever you need.
Table of Contents
A cable connection makes it easy to transfer files from an iPhone to a laptop. Once you connect the source iPhone to your laptop, official tools such as Apple Devices and File Explorer, as well as reliable third-party transfer tools, can help complete the transfer efficiently.
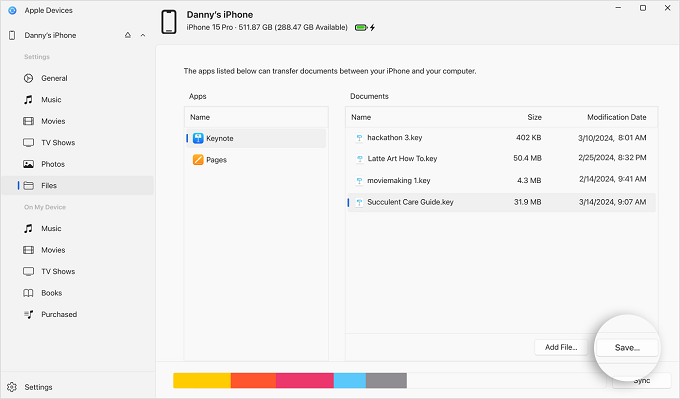
As the official tool for connecting iOS and Windows 11/10, Apple Devices app enables smooth file transfer from an iPhone to a laptop with a wired connection.
The Apple Devices app is available from the Microsoft Store and supports Windows 10 version 19045.0 or later. It works for transferring various types of files from iPhone to laptop, including photos, music, movies, TV shows, and other files stored in apps that support File Sharing, such as Keynote, Pages, iMovie, Chrome, Kindle, and more. Here's how:
1. Open Apple Devices app on your laptop.
Note: If your laptop is running an earlier version of Windows, you can use iTunes for file transfer. On macOS, the same function is handled through the built-in Finder app.
2. Connect your iPhone using a USB cable or Lightning cable that came with your device. If prompted with Trust This Computer, tap Trust and enter your passcode to allow connection.
3. Select Files from the left-side menu. For transferring photos, movies, or music files, select the option accordingly.
4. In the right section, the supported apps will show you the available files in Documents list.
5. Select the files you want to transfer from your iPhone to your laptop.
6. Click Save button at the lower-right corner.
7. In the pop-up window, choose a local folder to save the selected files on your laptop.
After the transfer, you can open that laptop folder to access those iPhone files at any time.
The built-in File Explorer on Windows laptop allows you to transfer files from iPhone's DCIM storage directly. Via a cable connection, you can access and transfer photos and videos captured with the iPhone camera, as well as screenshots and screen recordings.
However, this transfer option is limited to media files stored iPhone's DCIM. If you're looking to transfer other types of files, consider using one of the alternative methods outlined below.
1. Connect the source iPhone to your laptop using a proper USB cable or Lightning cable.
2. Tap Trust on your iPhone when the Trust This Computer prompt appears.
3. Double-click This PC icon on your laptop.
4.Select Apple iPhone under Devices and drives. If this option doesn't appear, unplug the iOS device and re-connect it.
5. Open DCIM folder and browse the sub-folders to select your desired picture files.
6. Drop and drop the iPhone photos to a laptop folder where you want to save them. Or, you can also copy and paste the files to a local destination you desire. It also works for transferring photos from iPhone to PC.

Whether you're transferring standard documents or media files such as photos, videos, and music, Appgeeker iPhone Data Transfer offers a comprehensive solution for moving files from an iPhone to a laptop on both Windows and macOS.
This transfer tool supports nearly all iPhone and iPad models and is compatible with the latest system versions. With its intuitive interface, you can easily transfer files across iPhone and laptop in either direction. In addition to common documents and media files, it also works for transferring contacts, messages, and other supported files types.
The process is simple and efficient, often completed with a single click, which makes it a convenient solution especially when moving large files.
Here's how to transfer files from your iPhone to a laptop with a cable and save them on Windows/macOS for later access:
Step 1: Open Appgeeker iPhone Data Transfer on your laptop. It works for both Windows and macOS machines.
Step 2: Link the source iPhone with a USB cable or Lightning cable. If asked, allow your iPhone to trust this computer and enter the passcode to proceed.

Step 3: Select the iPhone files you prefer to transfer to your laptop.
From the left sidebar, you can choose supported files like Photos, Music, Videos, Contacts, Messages, and other files available on your iPhone.
For example, select Photos tab and choose the picture files you want to save to your laptop.

Step 4: Transfer iPhone files to laptop.
Then, click the computer icon in the tap toolbar and select Export to PC option. In the opening window, pick a local folder to save the transferred files on your laptop.

Once done, simply go to that folder on your laptop to access all files that just transferred from your iPhone. If necessary, you may also transfer files from your laptop to your iPhone.
In addition to using a cable, there are also wireless options for transferring files from an iPhone to a laptop. While these methods don't require a physical connection, they do come with certain requirements and limitations.
The first wireless option for transferring files from iPhone to laptop is iCloud Drive. As Apple's official cloud service, iCloud offers 5 GB of free storage, allowing you to sync files between your iPhone and laptop in real time without using a cable.
This method is quick and convenient for moving a small number of files. Make sure both devices are connected to the internet and that you have sufficient iCloud storage. Follow these simple steps to transfer files from iPhone to laptop without a cable:
1. Enable iCloud Drive on your iPhone.
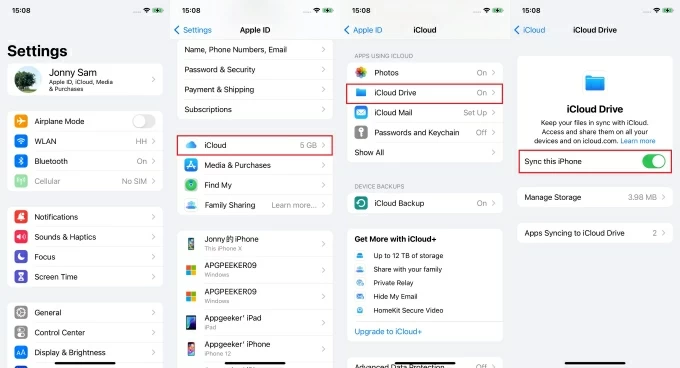
TIP: If you just want to transfer photos from iPhone to laptop, select Photos and then enable Sync this iPhone toggle.
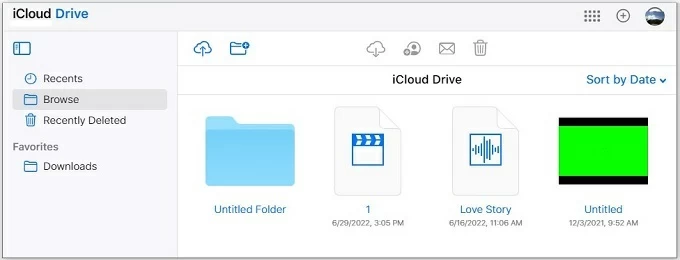
2. Move your desired iPhone files to iCloud Drive.
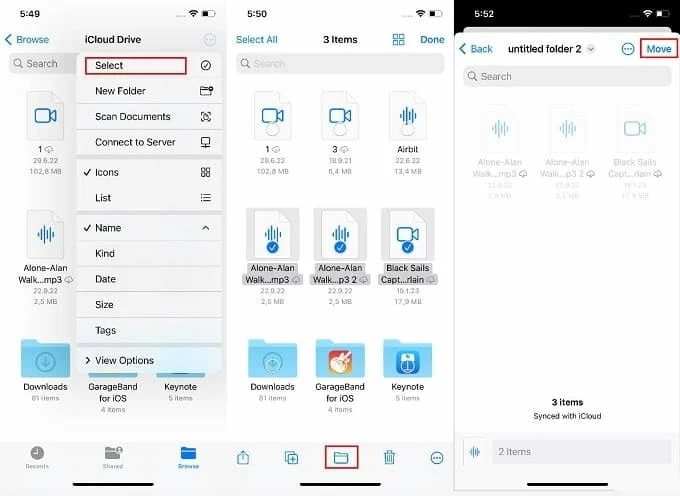
3. Download iPhone files to laptop from iCloud Drive.
To complete iPhone-to-laptop file transfer, you can choose between automatic syncing or manual upload and download.
Automatic file syncing — set up iCloud for Windows on your laptop.
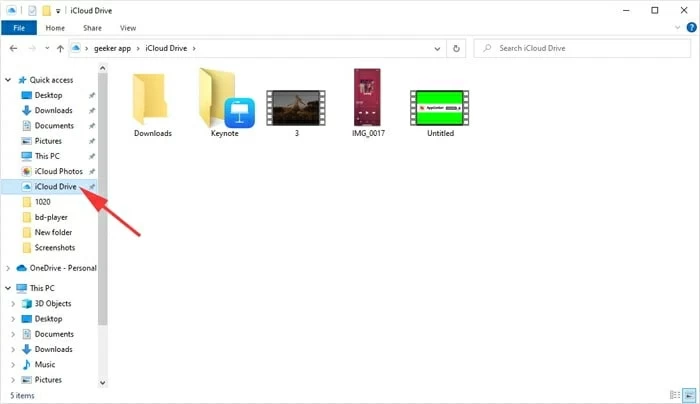
The iPhone files saved in your iCloud Drive will sync with your laptop automatically. You can then download everything you want from iCloud Drive to a local laptop folder. By default, they will be stored in C:\Users\[username]\iCloud Drive.
TIP: For macOS laptop, open System Settings > [your name] > iCloud. Then enable iCloud Drive option and turn on Sync this Mac.
Manually download on laptop:
It may take a short while, depending on the network speed.
Besides iCloud Drive, other cloud services such as Google Drive, OneDrive, and Dropbox, may offer more free cloud storage for syncing the iPhone files with laptop without a cable.
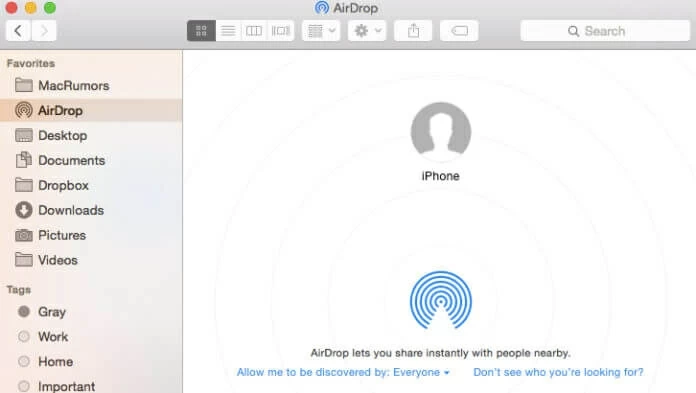
If you're using macOS, you can transfer files from your iPhone to your laptop wirelessly using AirDrop. As a built-in feature of Apple's ecosystem, AirDrop allows you to share files directly between your iPhone and Mac without a cable.
It works especially well for small files, completing transfers quickly and with minimal setup. However, for larger files, a cable-based transfer method may be more efficient and stable. To AirDrop files from iPhone to macOS laptop, put them near each other within the Bluetooth and Wi-Fi range.
1. Enable AirDrop on MacBook.
2. Share files from iPhone.
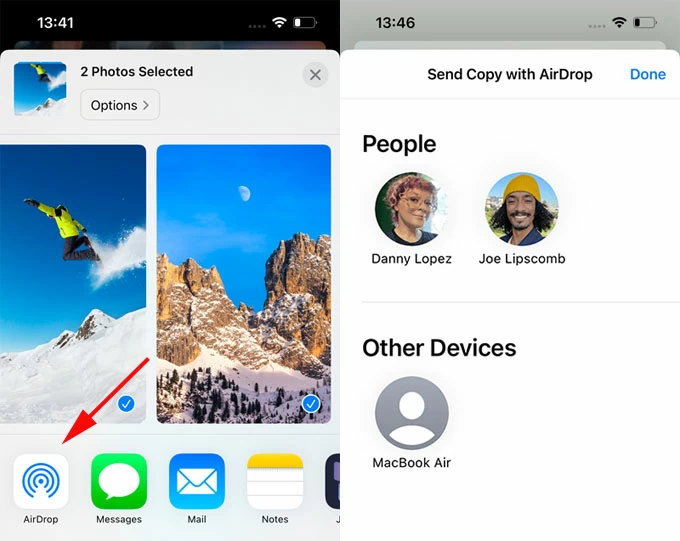
3. Save transferred iPhone files on laptop.
When transferring small-sized files from an iPhone to a laptop, such as PDFs, Word documents, or similar files, email is a quick and free option.
1. Simply open the Mail app and create a new email.
2. Add your own email address as the receipt.
3. Attach the iPhone files you choose to transfer to laptop.
4. Send the email to yourself.
5. On your laptop, sign in to your email with the same account.
6. Locate that email in your inbox and download the files locally.
The best transfer method depends largely on the file types you're transferring from your iPhone to your laptop and how you prefer to work.
If you're looking for an all-in-one solution that supports various file types and works on both Windows and macOS, Appgeeker iPhone Data Transfer stands out for its ease of use and high-speed performance.
Q1 - How can I transfer files from my iPhone to a Windows laptop or PC?
There are several ways for cross-platform file transfers from an iPhone to a Windows laptop or PC:
Q2 - Can you transfer iPhone files to a laptop without a cable?
Yes. Wireless options, such as iCloud Drive, AirDrop (for macOS), and email, allow iPhone users to transfer files to their laptop without a USB cable. These convenient methods are best suited for small or lightweight files.
Q3 - How can you transfer files from an iPhone to a laptop without iTunes?
iPhone users can transfer their files to a laptop without iTunes by using cloud-based services such as iCloud Drive, Google Drive, or OneDrive for wireless transfers.
If you only need to transfer media files like photos and videos, the built-in File Explorer and Windows Photos (Microsoft Photos) app allow you to complete the transfer with no iTunes required.
Additionally, third-party tools such as Appgeeker iPhone Data Transfer provide a fast and efficient alternative for transferring various file types from an iPhone to a Windows or macOS laptop, no need for iTunes.


