
How to transfer photos from PC to iPhone 16

If your iPhone 12 full of precious photos of kids? Don't want to pay for an iCloud plan to store them? With these tips, you can copy photos from iPhone 12 to Mac or PC quickly.


You can directly transfer iPhone 12 photos to computer with USB cable, or use cloud services.
There's no denying the iPhone 12 boasts a fantastic camera that takes high-resolution images with improved dynamic range, and enhanced color quality. However, the better the camera, the bigger the file size.
Let's say you have snapped thousands of photos and videos of your kids with your iPhone 12 over the years, now the device is almost running out of the space, and you're preparing to move the treasure memories of photos from your iPhone 12 to PC or Mac. It's simple, if you know how. Here's a quick guide to help you transfer photos from iPhone 12 to computer hard drive via a few different methods, both wired or wireless. The same goes for your videos transfer.
If you're looking for a reliable way to move your media files, including photos, videos, music, podcasts easily, check Appgeeker iPhone Data Transfer. It simplifies the whole transfer process and supports bidirectional transfers that goes beyond the usual one-way transfer that most of tools do. It also gives you ability to get great control over the media library on your iPhone, which makes it an ideal app for beginner and experienced users.
Table of Contents
Downloading photos and videos from iPhone 12 to a PC Windows 11 or Windows 10 can be handy for editing, viewing on a large screen, and create an offline backup. The fastest method for transferring a lot of photos to a PC is to attach your iPhone 12 to your computer via the USB cable and then use File Explorer's copy-n-paste feature. Wired connections always result in a more consistent and reliable transfer.
Here's how to copy photos from iPhone 12 to Windows PC using File Explorer.
1. Connect your iPhone 12 to your PC.
2. Unlock your phone with the passcode, and then tap Trust on your device when prompted to trust the computer if it's the first time to connect to the machine.
3. On your Windows computer, open File Explorer.
4. From the left sidebar in File Explorer, Locate your iPhone 12 under This PC section.

5. Double-click Apple iPhone, then navigate to the Internal Storage. There are a lot of folders with names like 202501_, 202502_, 202503_, etc., on the screen, and you'll have access to all your photos and videos there.
In earlier Windows 7, you'll want to open DCIM folder, navigate to the subfolders that are named things like 100APPLE, 101APPLE, 102APPLE.
Tip: If you can't see those folders or it's empty after the folder opens, plug the phone in again.
6. Select the photos you want to transfer from any of the folders.
7. Copy and paste them to a folder on your computer. Or you can use the drag-n-drop feature to move them to your destination.
8. After you've transferred all the photos to your PC successfully, right-click Apple iPhone in File Explorer and select Eject.
9. Unplug the phone from the computer. Done!
See also: iPhone security lockout screen
Another option to try is Windows Photos app, with which you can instantly view your gallery, allowing you to import photos from iPhone 12 to your Windows PC with just a couple of clicks. Best of all, the Photos app is already pre-installed out of the box.
To know how to import photos from iPhone 12 to PC, follow this guide to learn all about it.
1. Make sure your phone is connected with the PC.
2. Open the Photos app on your computer by launching the Start menu and clicking the app icon. If you don't see the app in the menu, you can type Photos in the search bar until it appears in the Applications list.
3. Click the Import button in the top right of the Photos screen.

4. select Apple iPhone in the drop-down menu. Now you can view your photos on your PC.
5. To get photos off iPhone 12 onto your computer, select the photos you want by checking the boxes next to the items, or choose Select all to highlight all images and videos in the library.
6. Click the Import button. Your selected photos will imported onto the folder you specified on your computer.
See also: How to sign out Apple account without password
If you're running an iMac, MacBook, or Mac Mini and want to import photos from your iPhone 12, there is also a Photos app available for use.
The process to move photos from an iPhone 12 to a Mac is similar to that of Windows platform. Once you've connected your device, you can view your photos and videos within the app and download to your Mac smoothly.
1. Hook up your iPhone 12 to your Mac with a USB cable.
2. Unlock the phone with the passcode.
3. When a notification pops up on the phone asking you to trust the computer, tap Trust to go on.
4. Launch the Photos app on Mac.
5. Click your phone name in the left sidebar under Devices. All of the photos and videos stored on your iPhone 12 will display on the screen, just like the screenshot shown below.

6. At the top of the screen, click Add To to specify a folder where to save the pictures on Mac. You can choose an existing album from the list or create a new one.
7. To transfer photos to Mac from iPhone 12, select the photos you want and then click Import Selected; to transfer all your photos, simply click Import All New Photos in the upper right corner instead.
8. Done!
See also: Text messages disappear on iPhone
For those who just want to copy a few images from an iPhone 12 to a Mac, AirDrop is the best bet. It's as simple as sending the photos directly and having the recipient's device accept it.
1. Open an image you want to transfer in the library.
2. Tap the Share icon at the lower left corner.
3. Select AirDrop from the opening menu. If there are nearby recipients, you will see a list of devices.
4. Click the name of your Mac.
5. On the Mac, you'll get a notification asking you to allow or deny the transfer. Select Allow.
6. The photo will then be sent on its way to your Mac and appear in the Downloads folder.
Sure, you can copy and paste your photos or use Import feature in Photos app to transfer your photos to your computer, but Apple's file system is a mess: Thousands of photos are stored across different of subfolders. You need to open every folder to find the pictures you need before a transfer, making everything cumbersome and time-consuming.
Is there a tool that do a better job than File Explorer or Photos app when it comes to transferring photos from iPhone 12 to Mac or PC, Appgeeker iPhone Data Transfer is the way to go.
The program significantly simplifies the process of photos transfer by offering an intuitive interface that allows you to directly copy the photos from iPhone 12 to your PC or Mac without confusion. All photos are arranged in an orderly manner by date and, and all you have to do is select what you want, and you're good to go.
In addition to transferring photos, the program has the added benefit of being able to transfer your songs, videos, podcasts to and from your iPhone and iPad — it supports bidirectional transfer. It even comes with tool to help you create custom ringtones to set on your iPhone.
Follow the steps below to download pictures from iPhone 12 to PC or laptop. The process is practically identical for Mac.
1. Download and install Appgeeker iPhone Data Transfer on your PC.
2. Connect your iPhone 12 to your PC via USB cable. If it's your first time doing so, you may be prompted to tap Trust appearing on the phone.

3. Run iPhone Data Transfer. Once the phone is recognized by the app, click the Photos in the left sidebar.
All your photos and videos will show up in the right pane, which are sorted by different categories: Live Photos, Videos, Screenshots, Download, and others. Clicking any category will display photos inside in chronological order by date, which helps locate and download photos you want.

4. Select the pictures you want to transfer by either checking the boxes next to the individuals, or checking the box next to the date to select all photos under this time, or even ticking the Check All option in the top..
5.. Now, click the Computer icon (when you hover it, it says Export to PC) , then select the folder where you want the photos to go, then click Save. Your select photos will be transferred to the computer immediately.

Alternatively, right-click on any of the selected photo(s), then select Export to PC. You can also choose to transfer over to your iPad or iPhone, or move to another album you want.

Also, you can go to the root folder that says Camera Roll and right-click to transfer all photos and videos from your phone's library with Export to PC option.

The software also features a music transfer tool to help you add songs to an iPhone without erasing the current music on the device.
If you prefer do things wirelessly, Apple's iCloud makes your photos and videos available across all your Apple devices, iCloud for Windows, and the web. To move pictures from iPhone 12 to computer Windows 11 or Windows 10, however, first you need to check if you have iCloud Photos enabled in your phone Settings.
Be aware, though, that you will need enough iCloud storage for all of your photos to sync. By default, Apple provides 5GB of free iCloud storage for an Apple account.
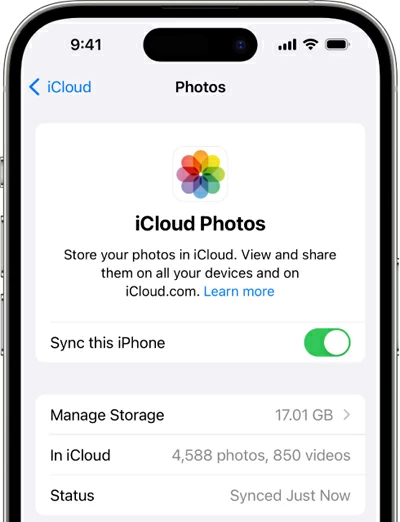
1. Go to Settings > [your name] > iCloud.
2. Tap Photos, then Sync This iPhone. Wait for a while until iCloud completes wirelessly syncing your photos and videos to Apple cloud server.
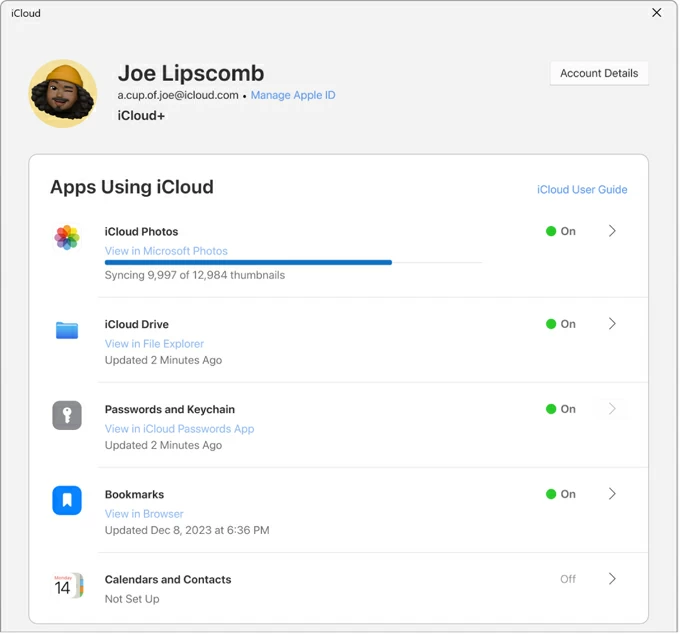
3. Install iCloud for Windows on your PC if you haven't yet, open it.
4. Sign in with the same Apple account, then click the arrow to the right of iCloud Photos, and then toggle the iCloud Photos switch to ON position.
5. Once iCloud Photos is enabled, photos and videos will be automatically downloaded to your photo library on your computer, which is usually at C:\User\[your user name]\Pictures\iCloud Photos\Photos.
iCloud is intuitive and easy to understand. If you don't have a working USB cable available, try turning on iCloud Photos feature for transferring content from your iPhone 12 to your PC.
See also: What does support.apple.com/passcode mean
Alternatively, go to iCloud.com using any browser on your desktop or laptop and download your photos that way. Here's how.
1. On your Windows 11 or any other operating system, sign in to the icloud.com website with the same Apple Account.
2. Once signed in, click Photos in the menu to open your photos library in iCloud. You should see all the photos and videos synced from your iPhone 12..
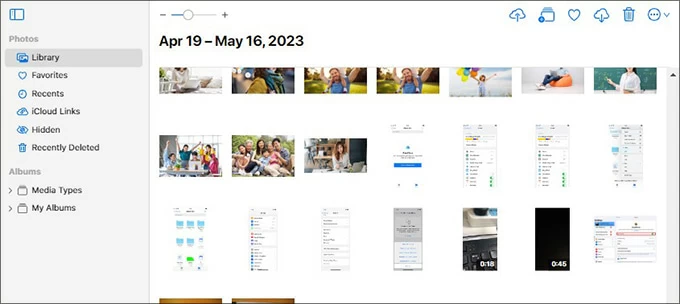
3. Select photos you want to copy to your PC, Click the Download button (often a cloud with a downward arrow) in the upper right of the page.
4. Specify a folder on your computer and your photos will be saved as a ZIP file soon.
See also: How to bypass Google account verification after reset
Several of the third-party online backup services offer backup of photos on your iPhone 12 and allow downloading locally. One of the most popular such kind of apps for your photos is Google Photos. You can install the app on your phone, turn on the Backup option to automatically upload photos and videos on the iPhone 12 to your Google Photos account, which you can then download to your PC as needed.
1. Install Google Photos app on your iPhone 12 if you don't already have it.
2. Open Google Photos app, tap your profile picture at the top right of the screen after signed in.
3. Select Google Photos settings from the menu.
4. Tap Backup & sync, and then toggle the Backup & sync switch on.
5. Allow the app to upload all of your photos and videos on the iPhone 12 to your Google Photos account.
6. Once uploaded, visit photos.google.com website on your computer browser.
7. Sign in with the same Google account. You should see all of your photos and videos in your Google Photos library in web.
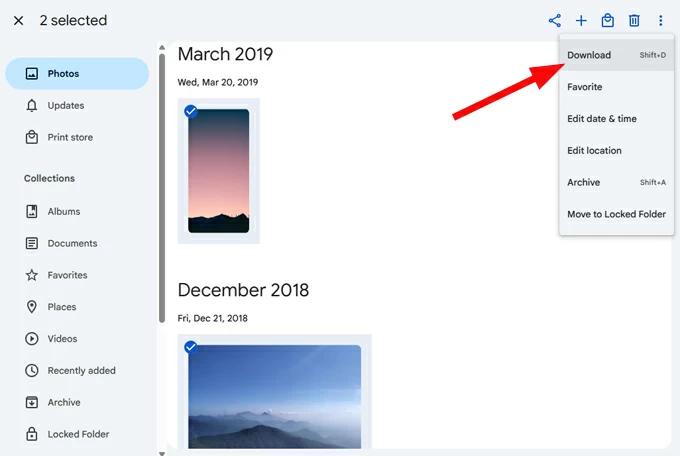
8. Select the photos and videos you want to download.
9. Click the three dot in the upper right corner and then select Download button. When you're prompted to choose where to save the photos on your computer, specify a folder and click Save.
10. All your selected photos will be saved to your computer.
The only caveat of using Google Photos to transfer pictures from iPhone 12 to PC is that it comes with free 15GB storage limit. So if you have more than 15GB of images to transfer, please use other methods mentioned in this post.


