
How to Transfer Photos from iPhone to USB

Want to craft a unique iPhone ringtone or enjoy the fun of customization? This article will tell you how to make custom iPhone ringtones, no matter the audio source you use.

Appgeeker iPhone Data Transfer is a powerful iPhone ringtone maker with a built-in feature to convert audio files into the M4R iPhone ringtone format, allowing you to easily make a custom ringtone for an iPhone.
Making and setting custom ringtones on iPhone can enhance your user experience and reflect your personal style.
Do you love a song and want to set it as your iPhone ringtone, or wish to create a personalized ringtone to replace the default ringtone of iPhone? Making a custom ringtone on your iPhone not only helps you quickly identify incoming calls, but also lets you recognize callers by assigning unique ringtones to specific contacts.
Therefore, knowing how to make a custom ringtone on iPhone has become a demand of many users. Fortunately, in this guide we will show you several effective ways to create custom iPhone ringtones, whether you want to use the intro of your podcast, a self-recorded ambient sound, or a curated Apple Music track.
From using the GarageBand app alone to leveraging computer-based workarounds, you can customize your own exclusive ringtone on the iPhone, embarking on a journey of personalized artistic ringtones.
Table of Contents
iPhone ringtones have some requirements to ensure custom ringtones can be played and used on your iPhone. Here are the key requirements:
GarageBand, Apple's free music creation app, allows you to make your custom ringtone directly on your iPhone for free without a computer. While this Apple-designed app may seem like a tool for music producers, it can transform any sound clip into a polished ringtone, including GarageBand's built-in virtual instruments, Live Loops, audio recordings, music files stored on your iPhone or iCloud Drive, and DRM-free songs downloaded from Apple Music.
However, for beginners, using GarageBand to make your own ringtone may be a bit complicated. Here are the specific steps on how to customize a ringtone on iPhone using GarageBand app.
1. Download GarageBand app from the App Store if it's not pre-installed on your iPhone.
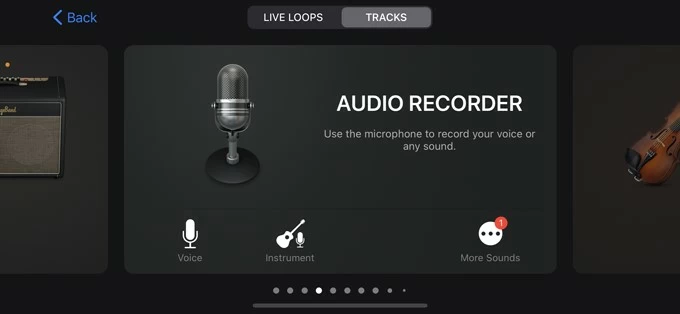
2. Open GarageBand app, under the TRACKS tab, select Audio Recorder to create your new ringtone.
3. Tap the Tracks button (it looks like a stack of horizontal lines) in the upper left corner.

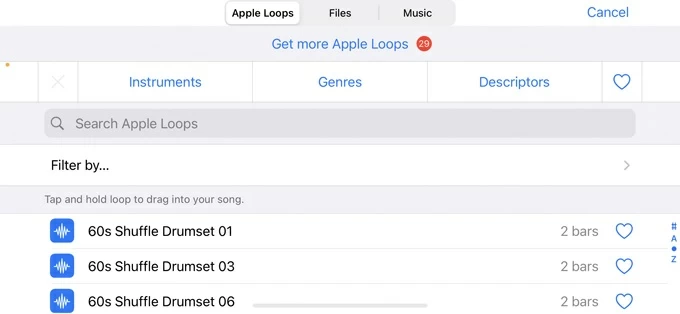
4. Tap the Loop icon (loop symbol) in the top right corner to add the audio you want to use for the ringtone.

5. Go to the Files option at the top, tap Browse items from the Files app to import songs stored locally on your iPhone or downloaded from iCloud Drive. Or select the Music tab to make a ringtone from the Apple Music Library on iPhone.
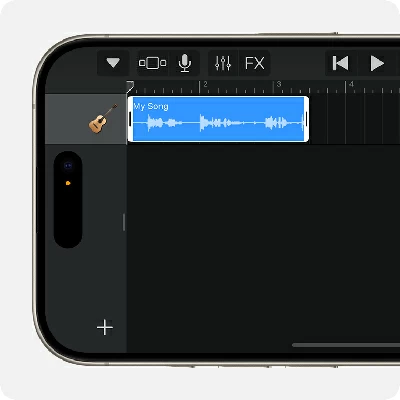
6. Drag the file into the workspace timeline.
7. Use the timeline to trim or split the audio to 30 seconds or less by dragging the edges of the audio region.
8. After editing, tap the down arrow in the upper left corner and select My Songs to save your project.

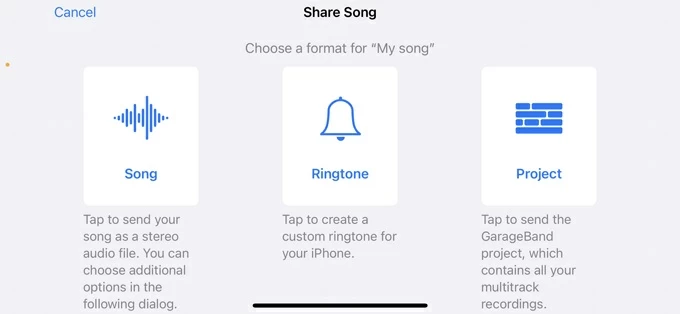
9. Long-press your new project, tap Share > Ringtone, give it a name, and tap Export.
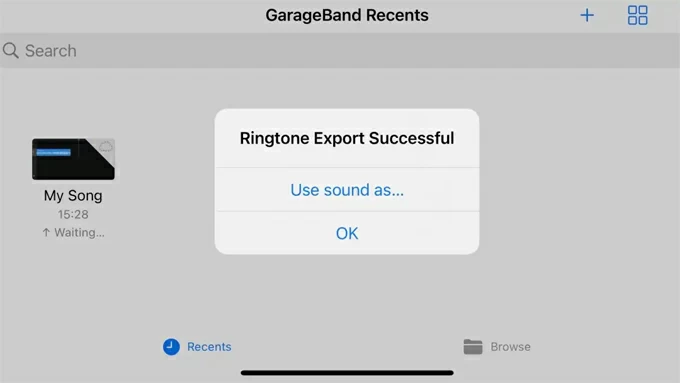
10. Once exported, select Use sound as in the pop-up window. You can choose Standard Ringtone to set it as your new phone ringtone immediately. You can also assign it to a contact or add it to your ringtone library.
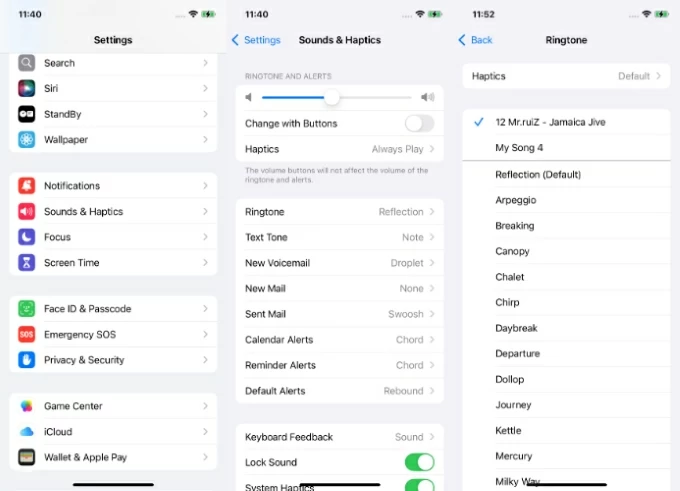
11. Verify the ringtone in Settings > Sounds & Haptics > Ringtone.
Note:
If GarageBand feels too complex or you want more freedom in making custom iPhone ringtones, Appgeeker iPhone Data Transfer is your best helper, integrating ringtone maker and iPhone import without complicated workflows.
Not only does it allow you to create high-quality, lossless ringtones, but it also automatically converts music files in formats like MP3, OGG, M4A, WAV, FLAC, AMR, and AIFF into the .m4r format required for iPhone ringtones, seamlessly adding them to your iPhone's ringtone library, saving you a lot of time.
Beyond quickly and efficiently customizing an iPhone ringtone using various audio sources, iPhone Data Transfer also supports batch transfers of music, photos, videos, contacts, and other multimedia data between iPhones or between an iPhone and a computer.
Here's how to make custom ringtone for iPhone without iTunes:
1. Connect your iPhone to the computer using an adapter USB cable, then launch Appgeeker iPhone Data Transfer, navigate to the One-click Operation section at the bottom and select the Ringtone Maker function.

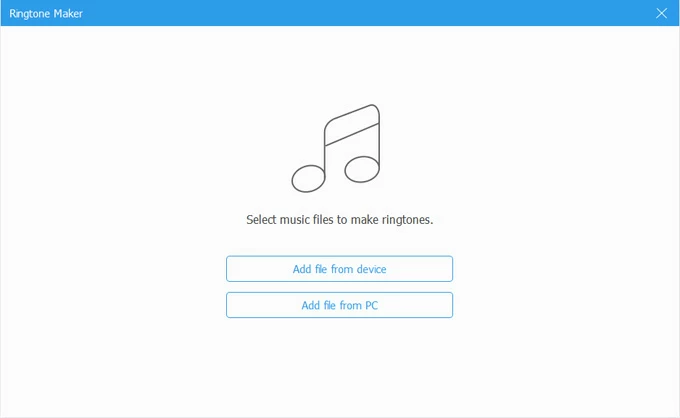
2. Choose Add file from device, or Add file from PC / Mac to import the song or audio you want to edit into a ringtone.
3. Make your ringtone. Once the song is successfully imported, you need to control the length of the ringtone to less than 30 seconds. You can do this by dragging the flags on both sides of the audio or manually entering the start and end time points.
Additional tools are available to help edit your iPhone ringtone:
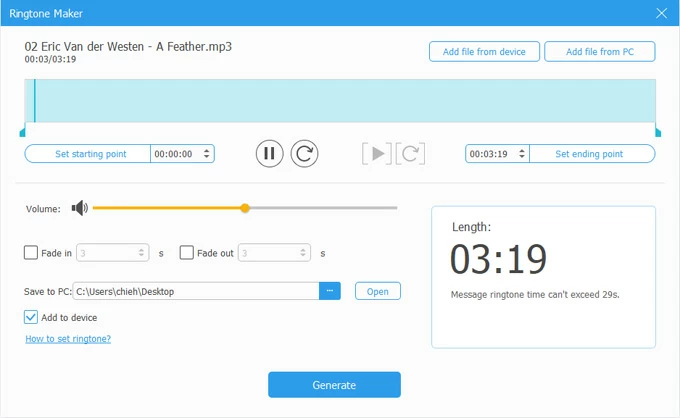
4. After editing, check Add to device, then click Generate to add your custom ringtone to your iPhone.
5. Set the custom ringtone on your iPhone. Open the Settings app on your iPhone and go to Sounds & Haptics > Ringtone, and select your newly created ringtone from the list.
You can use Screen Recorder to record the audio from YouTube videos or capture streaming music, and then use iPhone Data Transfer to create a personalized ringtone for your iPhone.
For music enthusiasts with a purchased Apple Music library or users who have imported favorite songs into their music list, combining Apple Music with Finder offers a way to create custom ringtones for use on an iPhone.
This method is ideal for macOS Catalina or later users, leveraging Finder's direct iPhone syncing and Apple Music's editing and conversion features.
1. Run Music app on your Mac computer.
2. Find the song you want to make a ringtone from in your music library. Or import your favorite song into the library via File > Add To Library.
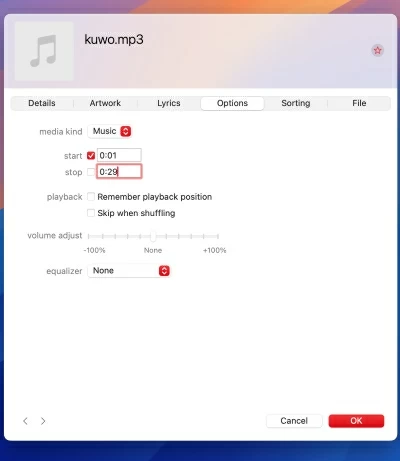
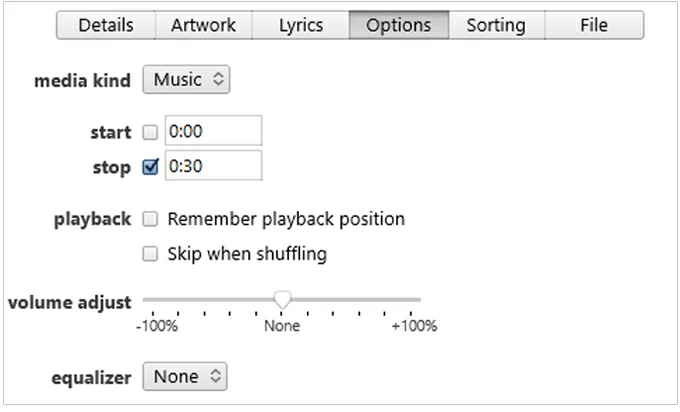
3. Right-click the song > Get Info > under the Options tab, set a 30-second Start and Stop time, then click OK.
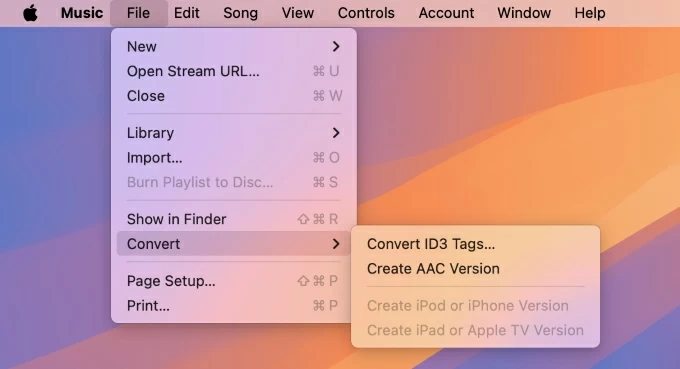
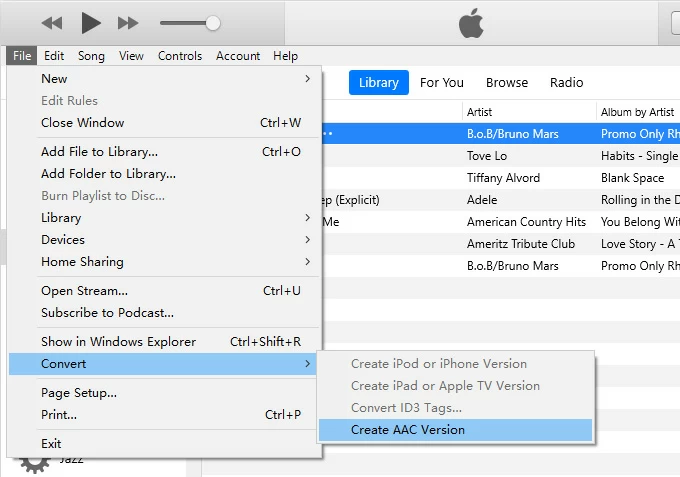
4. With the clip selected, go to File > Convert > Create AAC Version. A copy of the song in AAC format will appear in your music list, typically above or below the original track.
Note:
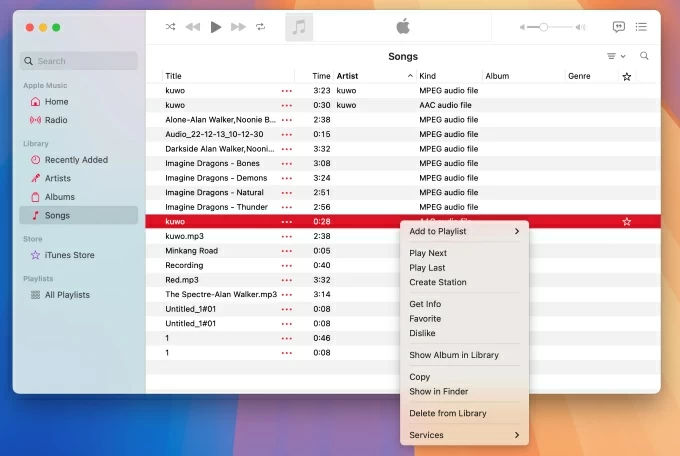
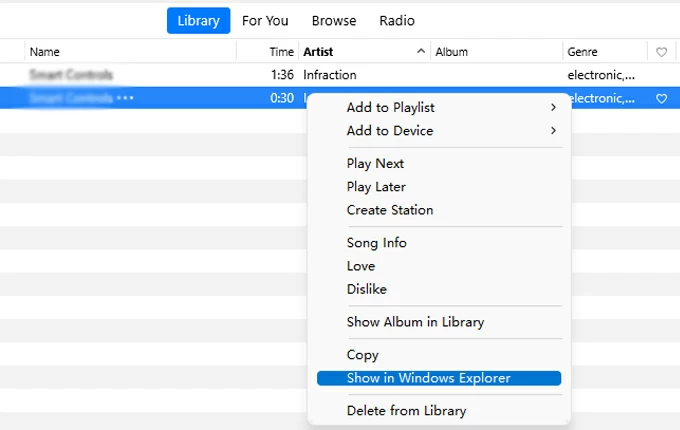
5. Right-click the new file in Music > Show in Finder.
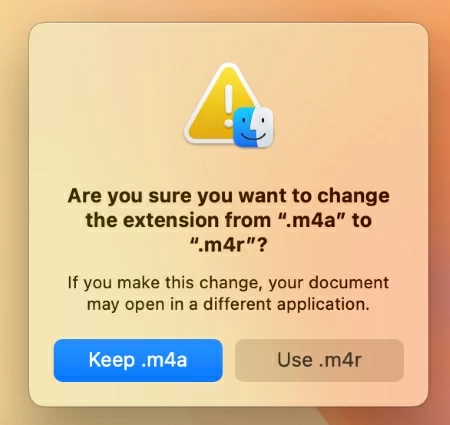
6. Right-click the song file, select Rename, and change the file extension from .m4a to .m4r. In the pop-up, select Use .m4r to confirm.
1. Open the Finder app and plug your iPhone into your Mac with a compatible USB.
2. Select your device from the Finder sidebar and locate the General tab.

3. Drag the .m4r ringtone file into the Finder window.
4. You'll see the file you dragged into Finder with a green plus icon, indicating it has been added to Finder and synced to your iPhone simultaneously.
5. Head to your iPhone's Settings > Sounds & Haptics > Ringtone and apply the new ringtone on your iPhone.
Also read: How to convert MP3 to iPhone ringtone with or without iTunes
To make a ringtone that's unique to your iPhone for free, iTunes is a reliable tool for users on Windows or older Mac systems (macOS Mojave or earlier). It offers precise control over audio clips, allowing you to craft custom iPhone ringtones from your favorite tracks. Ensure you have the latest version of iTunes installed on your computer.
1. Run iTunes on your desktop and navigate to the Music library.
2. Select the audio you need to use as a ringtone from the library, ensuring it's not a DRM-protected file. Alternatively, go to File > Add File to Library to add the desired music file.
3. Right-click the track, select Song Info, and go to the Options tab in the pop-up window.

4. Check the Start and Stop boxes, adjust the segment to within 30 seconds, and click OK.
5. Right-click the track again, click File at the top, then select Convert > Create AAC Version.
6. A new 30-second AAC clip will appear in your media library. Right-click it and select Show in Windows Explorer.
7. Change the audio clip's file extension to .m4r so iTunes recognizes it as a ringtone format.
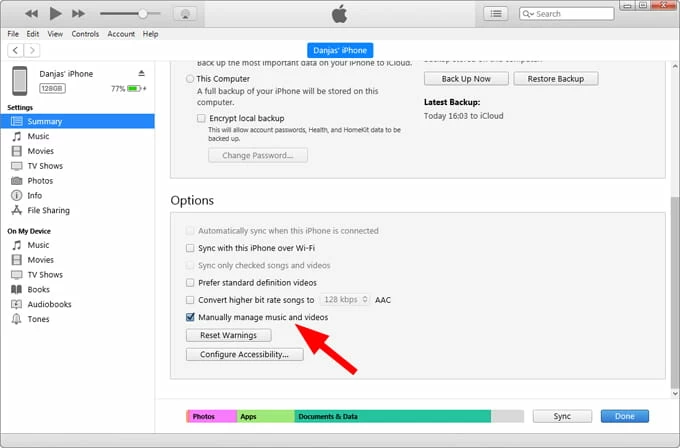
8. Connect your iPhone to the computer, click the device icon in the top left corner of the iTunes window to enter the Summary settings, check Manually manage music and videos in the Options section, and click Apply / Sync.
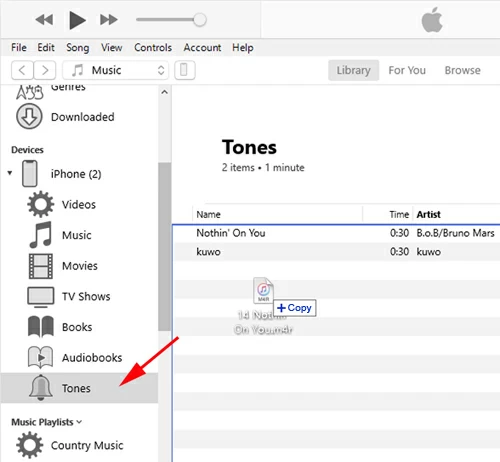
9. Return to the iTunes Music library page, expand your device in the Devices section on the sidebar, and locate the Tones option.
10. Drag your created M4R ringtone file into the Tones window.
11. Click the device icon again and select Apply / Sync to put the custom ringtone on your iPhone.
12. Open Settings on your iPhone, tap Sounds & Haptics, select Ringtone, and then set the custom ringtone as your new iPhone ringtone.
Conclusion
Creating a custom ringtone on iPhone is a rewarding way to add personality to your device. Through the four effective methods explored in this article, you've gained a comprehensive understanding of the process of crafting and applying unique ringtones for your iPhone or specific contacts, making a surprisingly big difference in your daily life.
1. How to assign custom ringtones to contacts on iPhone?
Go to Contacts app, select a person, tap Edit, and choose a unique ringtone for them. This way, you'll know who's calling without even looking at the screen.
2. How to buy your favorite ringtones on iPhone?
The iTunes Store app comes with different types of ringtones for you to purchase. If you like one, you can:
3. Why can't my ringtones be synced from iTunes/Finder to iPhone?
This usually happens when the file format is incorrect or the length exceeds 30 seconds. Ensure your ringtone is in .m4r format, under 30 seconds long, and synced through Finder or iTunes with the "Manually manage music and videos" option enabled.


